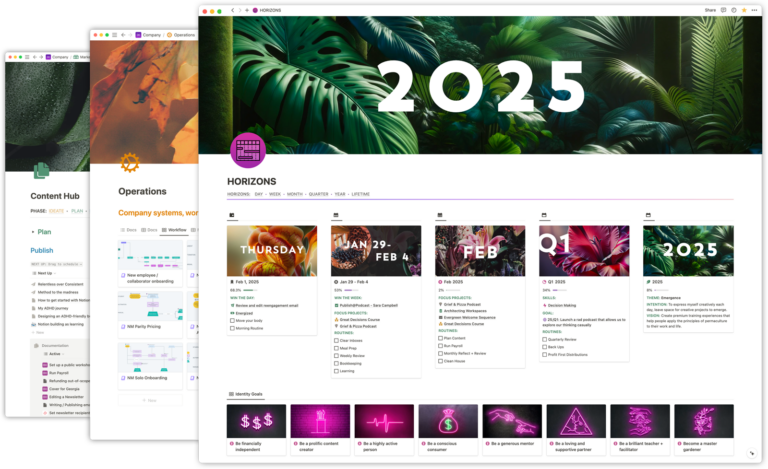
Automate the heavy lifting of your Notion project setups
With a few clicks you can automate the setup of some of your most common project workflows, creating fully automated workback schedules based on an initial project date.
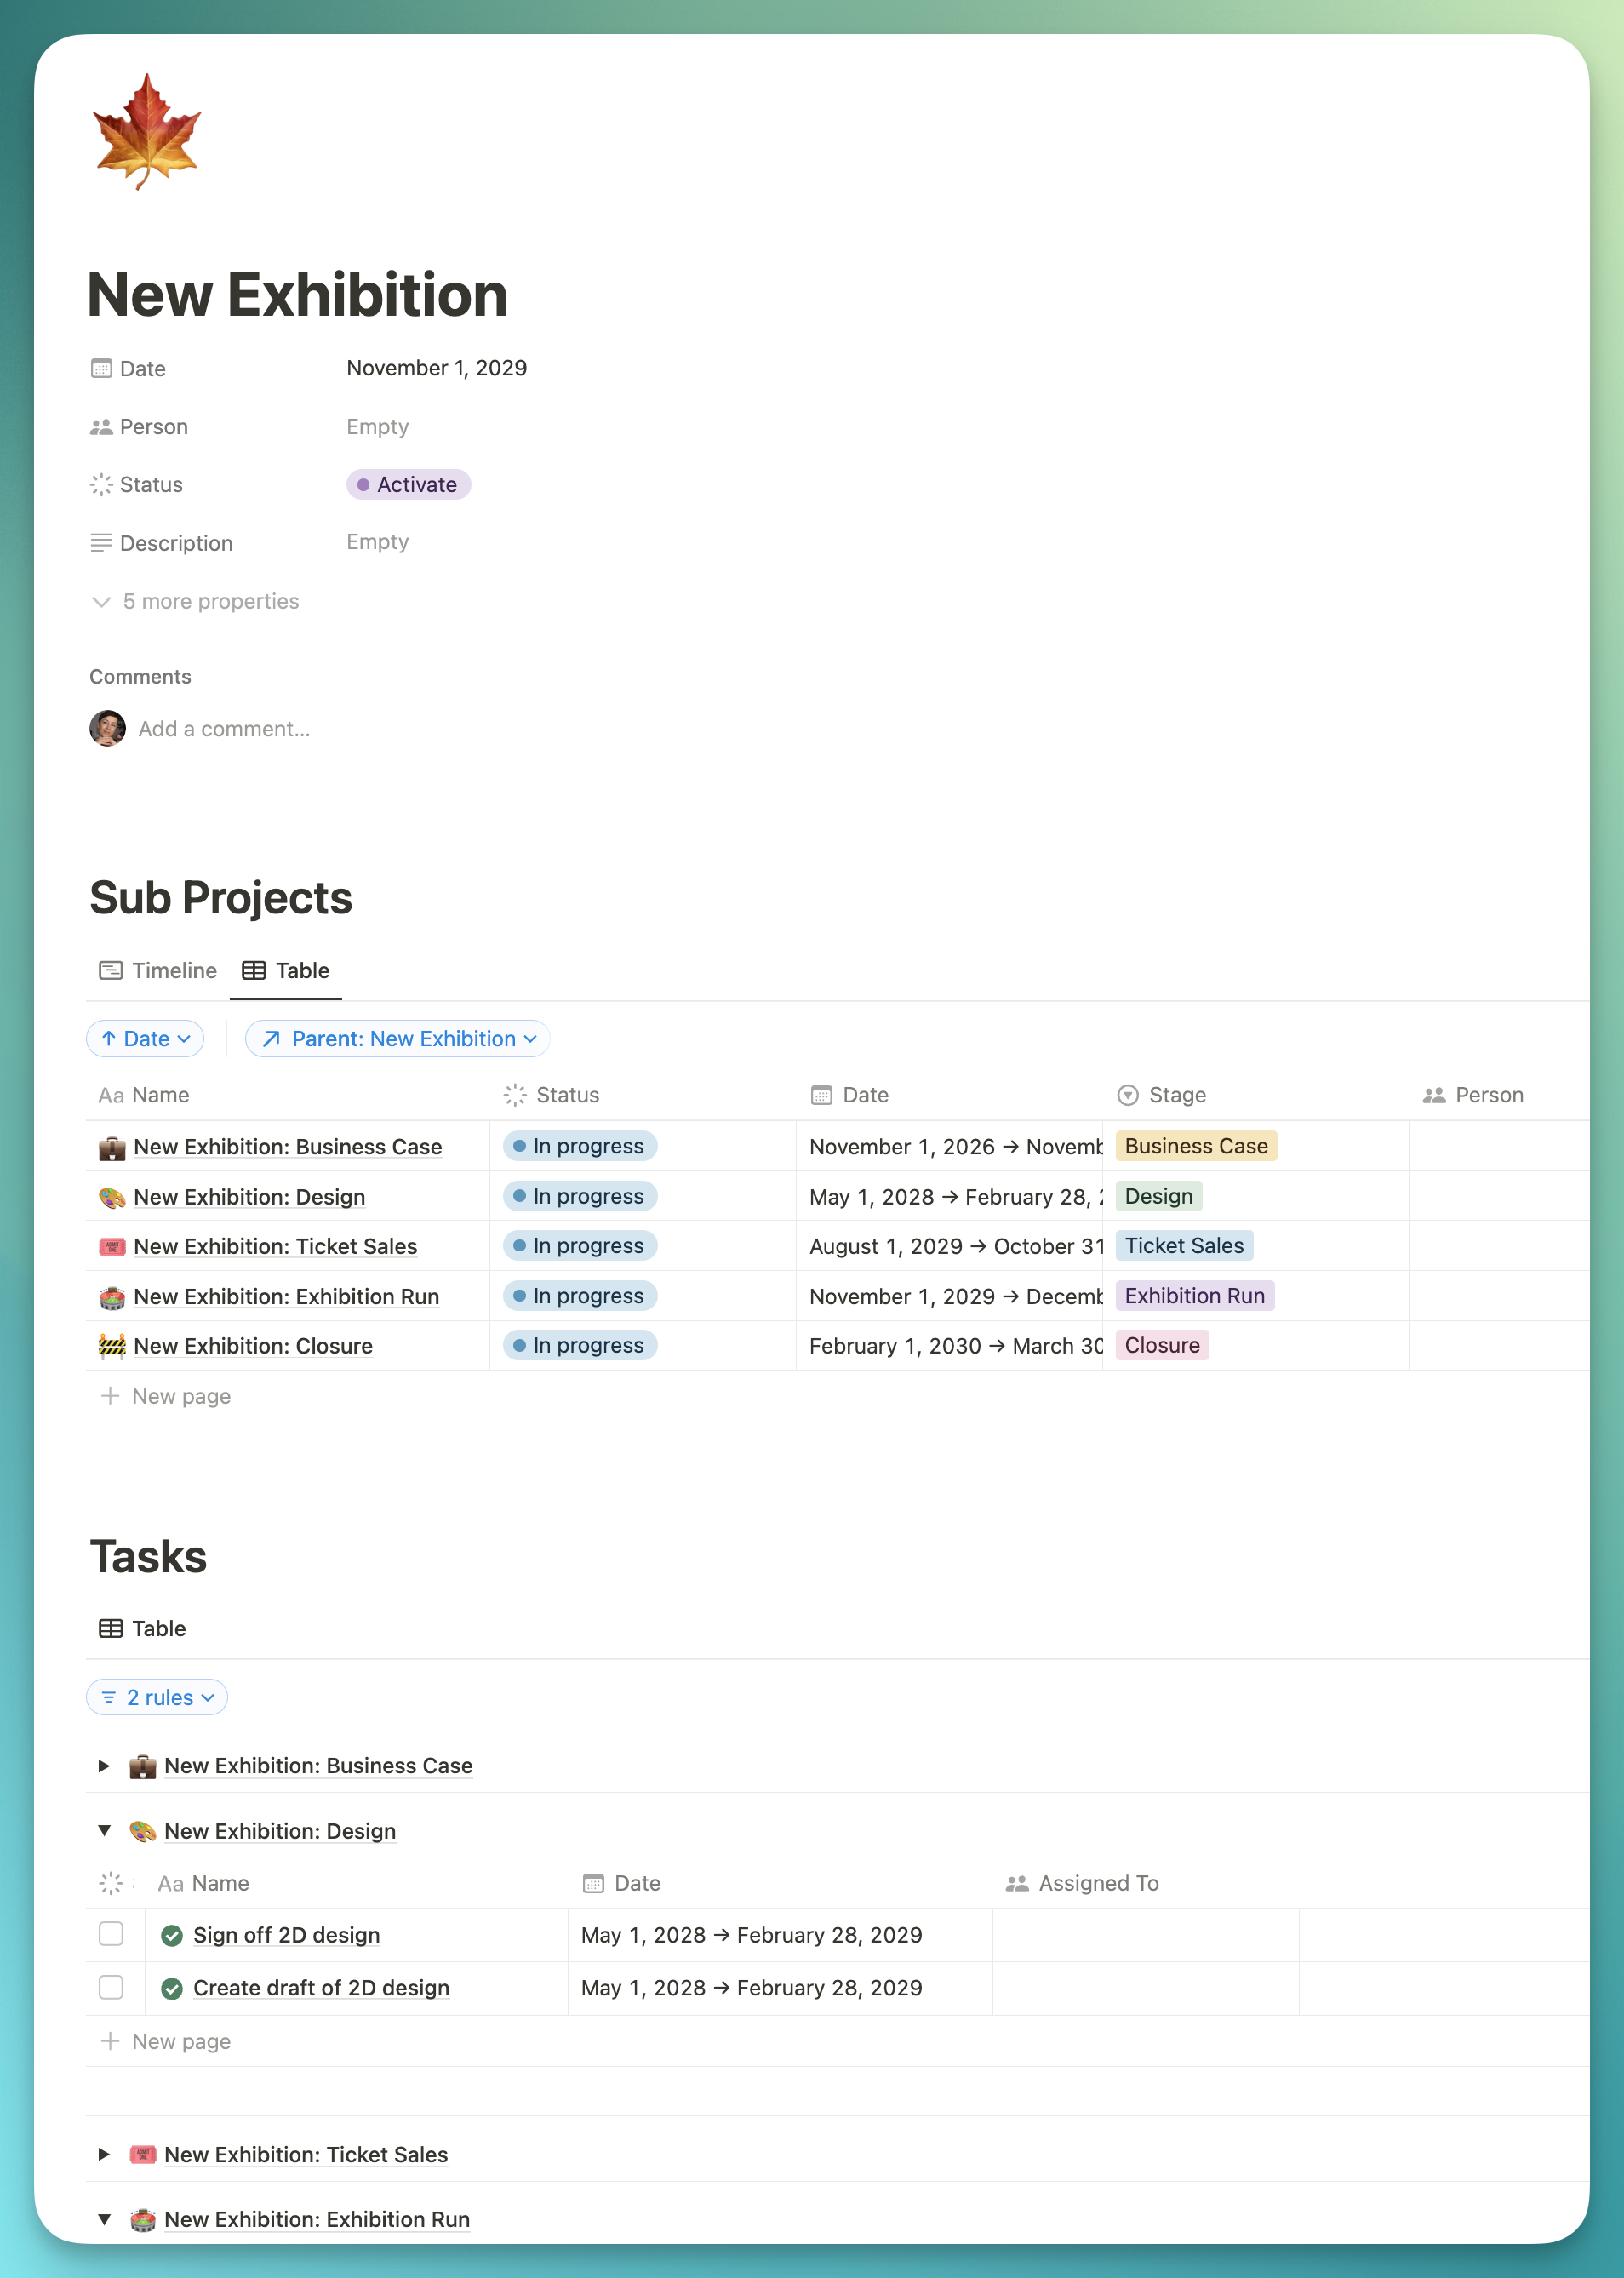
If you have large projects that have standard project phases and standard tasks that occur each time, you can set up a single automation to help you do the heavy lifting (in Notion) of setting up sub-projects, automatically applying templates, setting project and task dates, and automatically connecting relations between your projects and tasks.
In this video I do a walkthrough of how to set up this sort of automated workback schedule, as well as demonstrate some variations that include adjusting date ranges based on a launch date or project start date.
You’ll need:
- A Projects database and a Tasks database, with a two-way relation between the two.
- A two-way self-relation from your Projects database to the same Projects database for creating a parent-child relationship.
- A Status property in your Projects database for activating the automation (or use one of your existing properties).
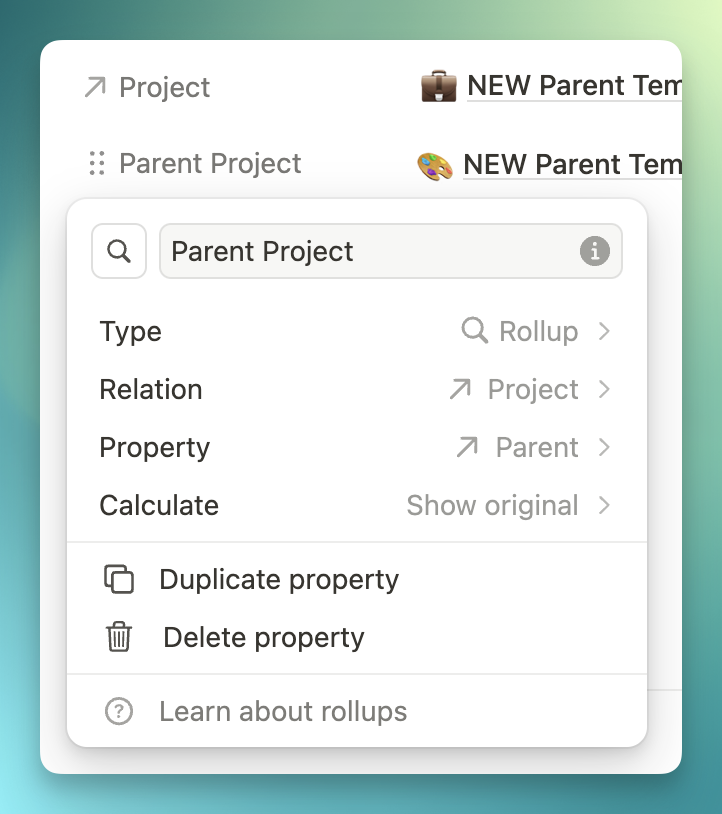
- A Parent Project rollup in the Tasks database that looks up the Project Relation > Parent property (allowing you to always identify the parent project from every sub project).
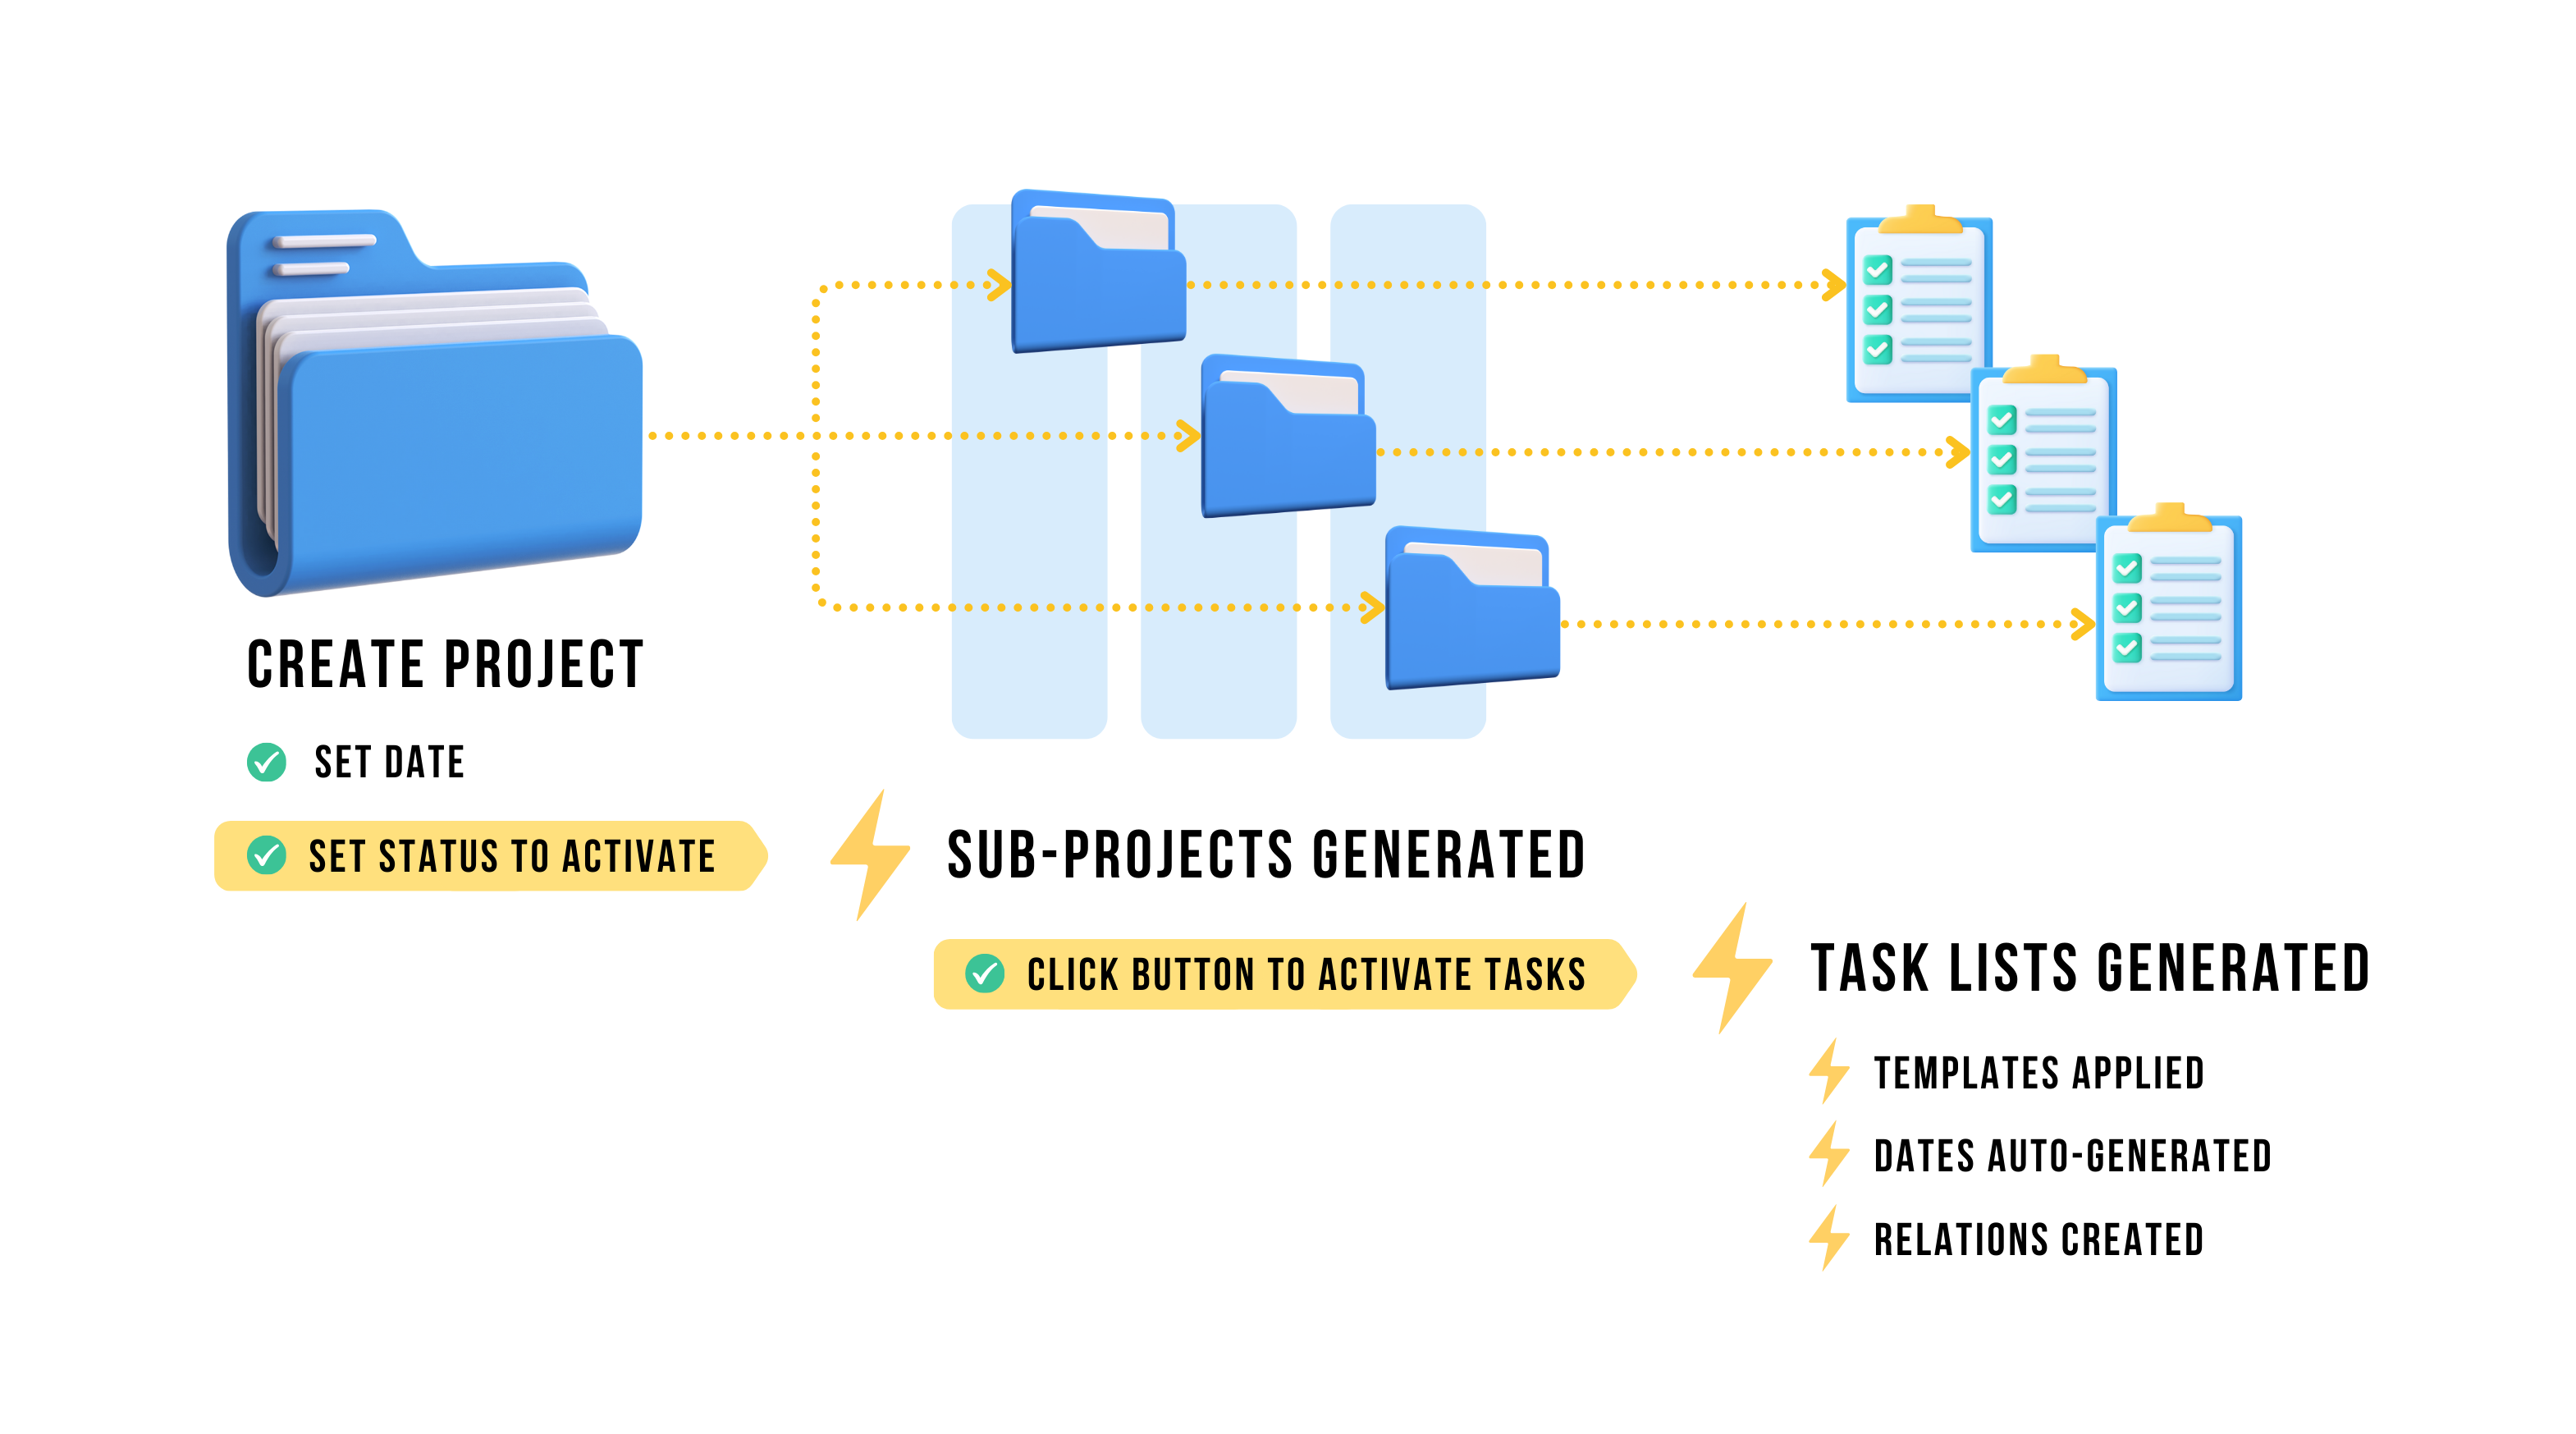
How it works
You:
- Add a new project in the Projects database using a parent project template.
- Add a date to specify when the project should be completed.
- Change the Status property to “Activate”.
Notion Automation:
- Creates X number of sub-projects inside the Projects database with dates auto-populated, and templates automatically applied.
You:
- Open the parent Project page.
- Open the first sub-project (phase) page and click the button to auto-populate all sub-project tasks.
- Repeat with each project phase.
Notion Automation:
- Creates all tasks in the Tasks database, related to the project, with dates auto-calculated based on project dates.
How to set it up
Create a Parent Project Template
- Create a new template in your Projects database.
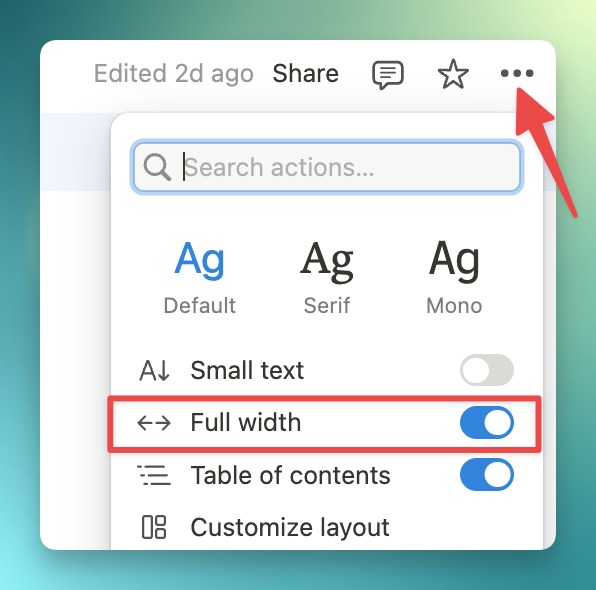
- Make the page full width in the project settings:
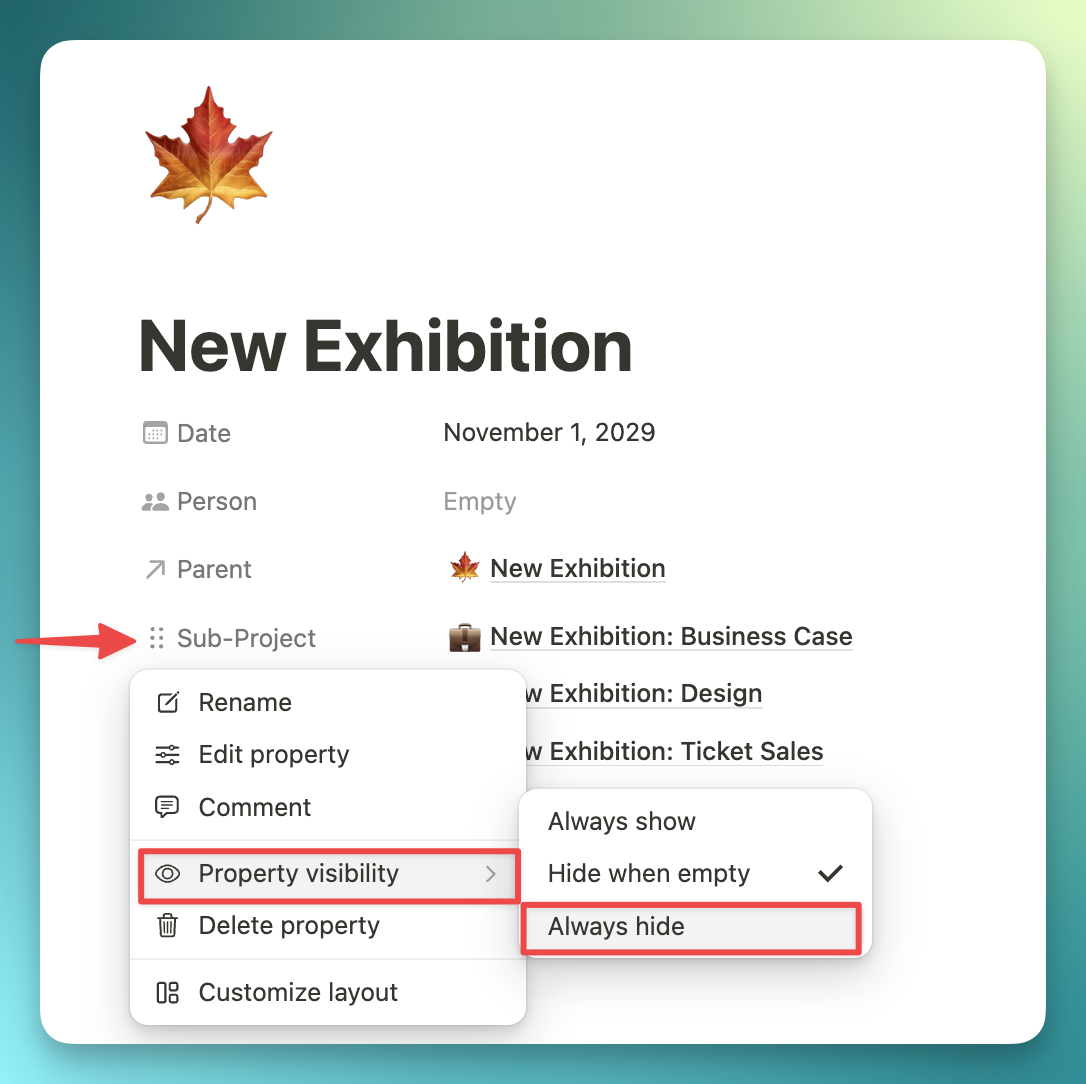
- Set the Sub-Projects property to Always hide. Why? You can’t do anything in the property area except add/remove projects, and this takes up valuable real estate. We want to manage the projects in the body of the page through linked databases, which allows us to filter, sort, and manage the data.
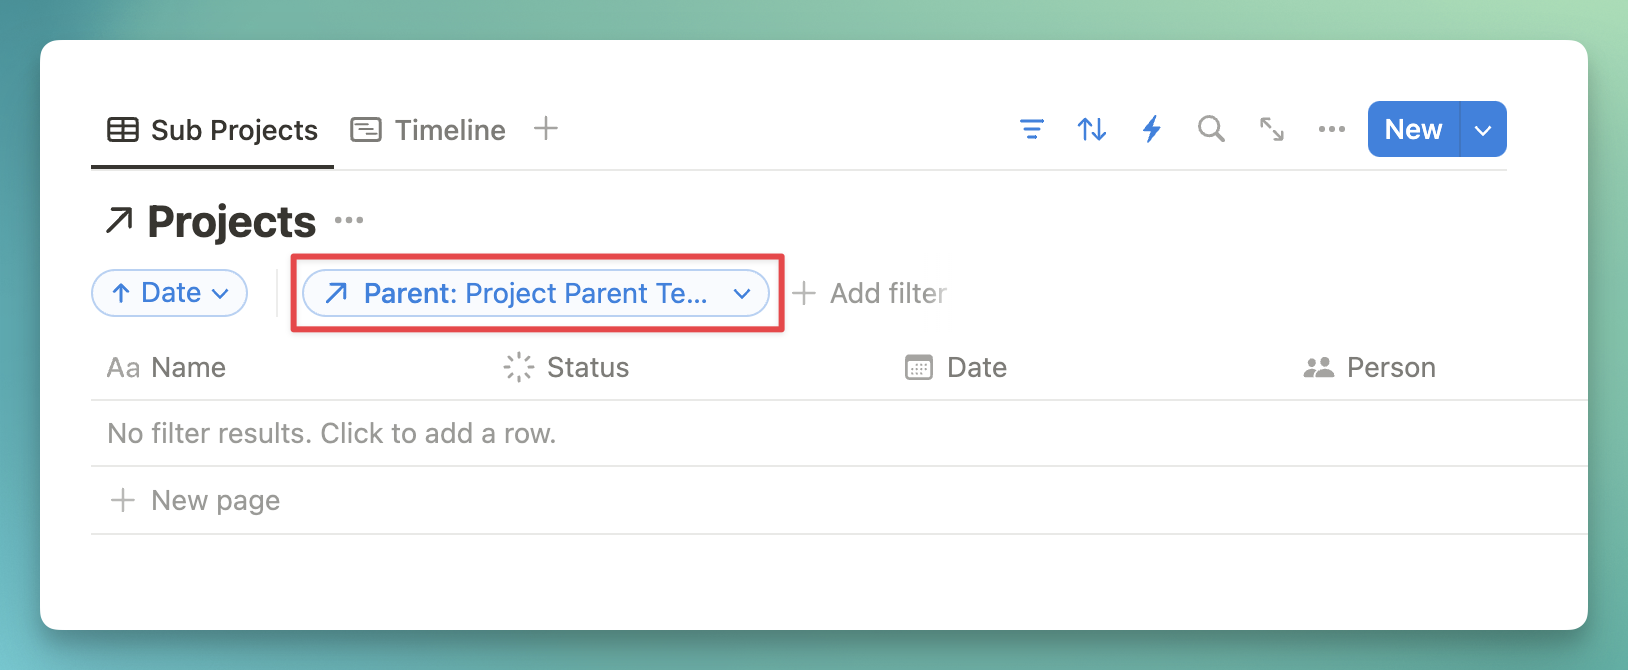
- In the body of the project, put a linked view of the project database (Type
/linkedand search for your Projects database). - Add a filter where Parent (Project self relation) = [The Project Template name].
Repeat the same process with the Tasks Database:
- Below the Projects database, create a linked view of the Tasks database.
- Add a filter where Project contains the Project Parent Template, OR where the Parent Project contains Parent Project.
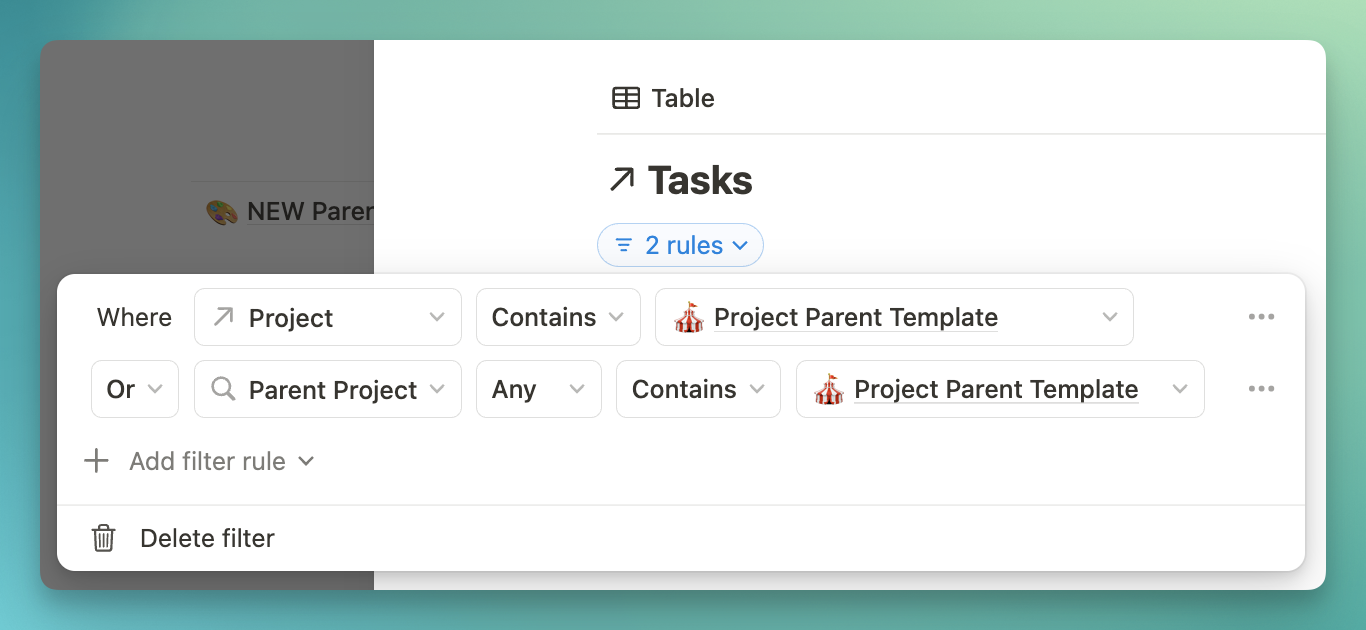
This will allow you to see all Tasks from all Projects that are connected to the Parent Project.
Turn on Group by Project, which will allow you to collapse the different project phases and only see the ones you need to see at any given time (to reduce overwhelm).
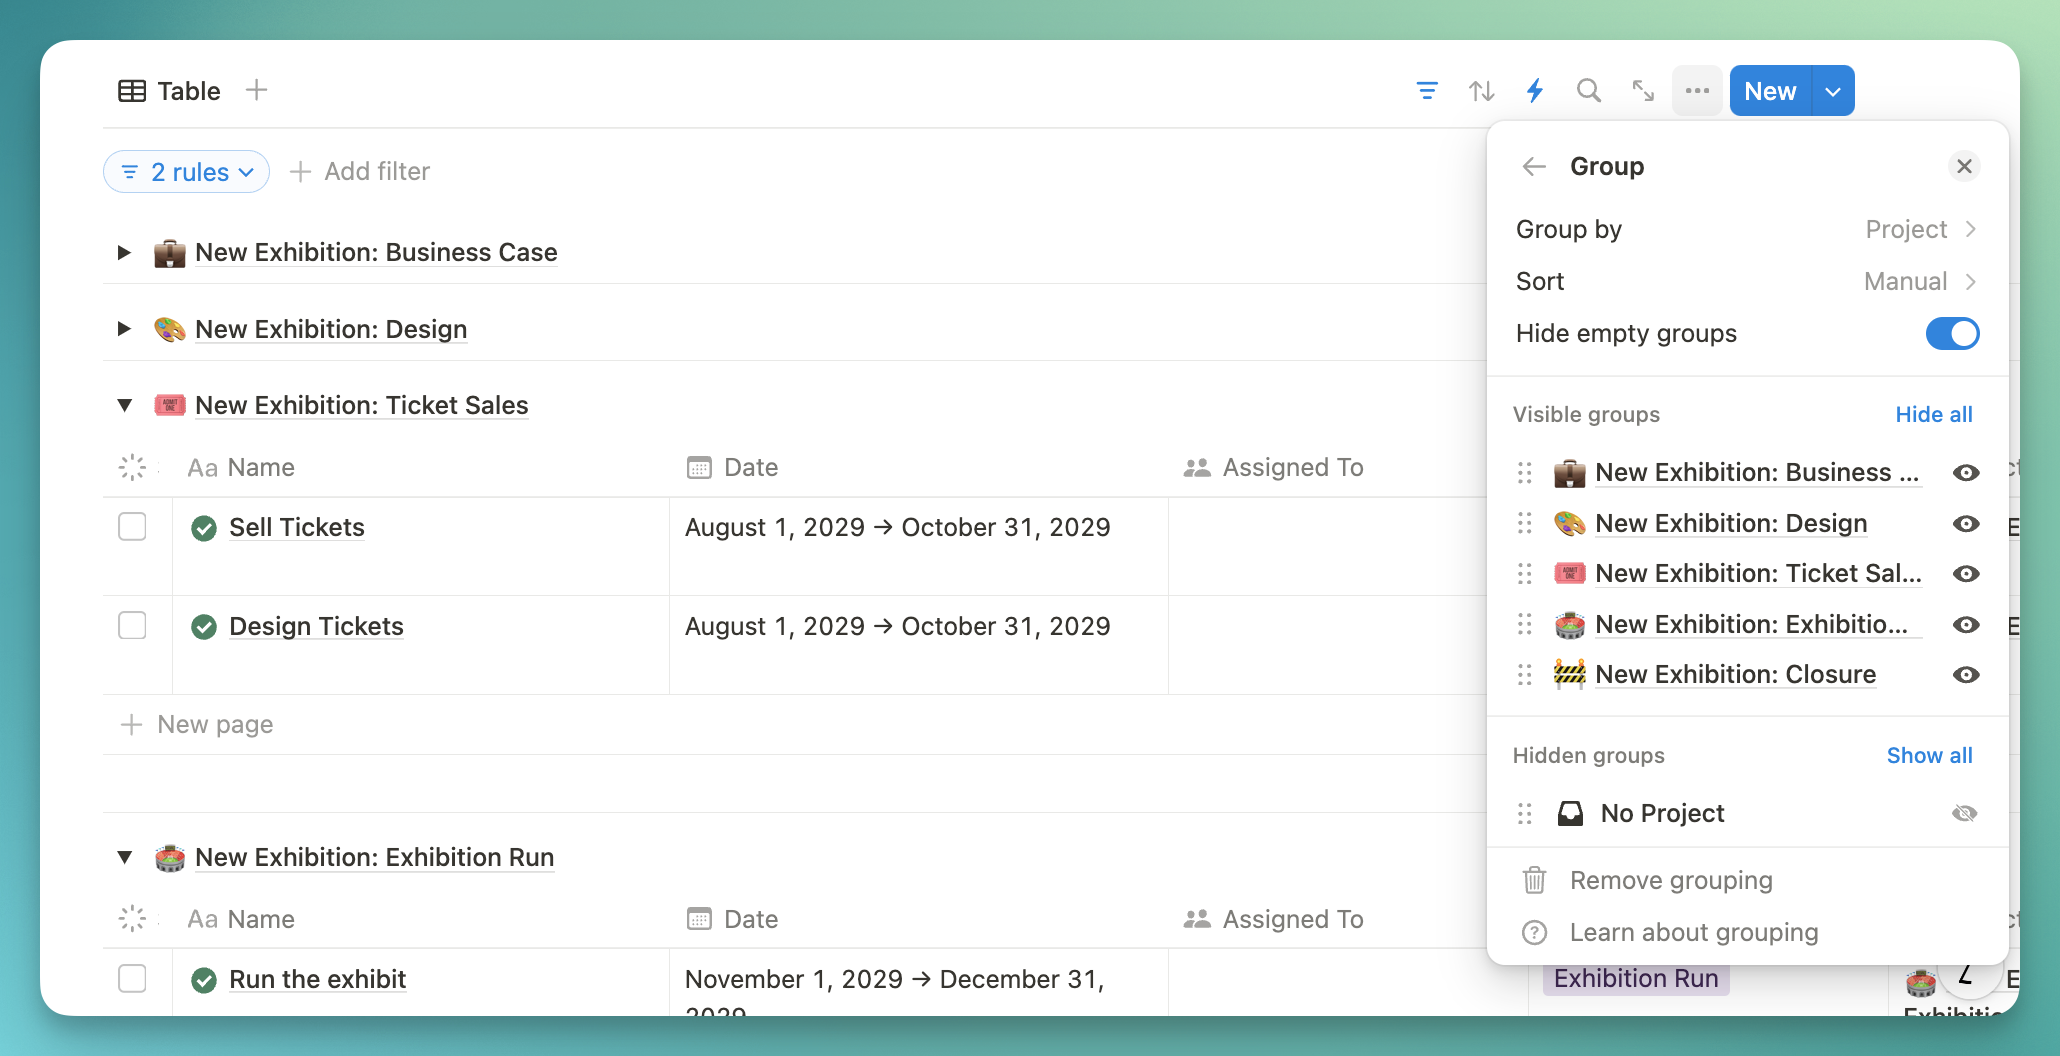
You can manage all sub-projects and tasks from this project dashboard, or go to each individual sub-project page to manage tasks within each phase.
Create a Sub-Project template for each phase
Alternatively, if you don’t want to create different project templates, you can create a single sub-project template that contains all task buttons for each phase, but I think it’s easier to create each sub-project phase!
- Create a new project template
- Use the same process as above, adding a linked view of the Tasks database, filtered to Project contains [template name].
- Create a button to auto-populate your tasks through an automation.
Once all of your project templates contain all necessary buttons with all your required tasks, you can set up the automation on the Projects database.
Create the Projects database automation
- Add a new Automation to the Projects database.
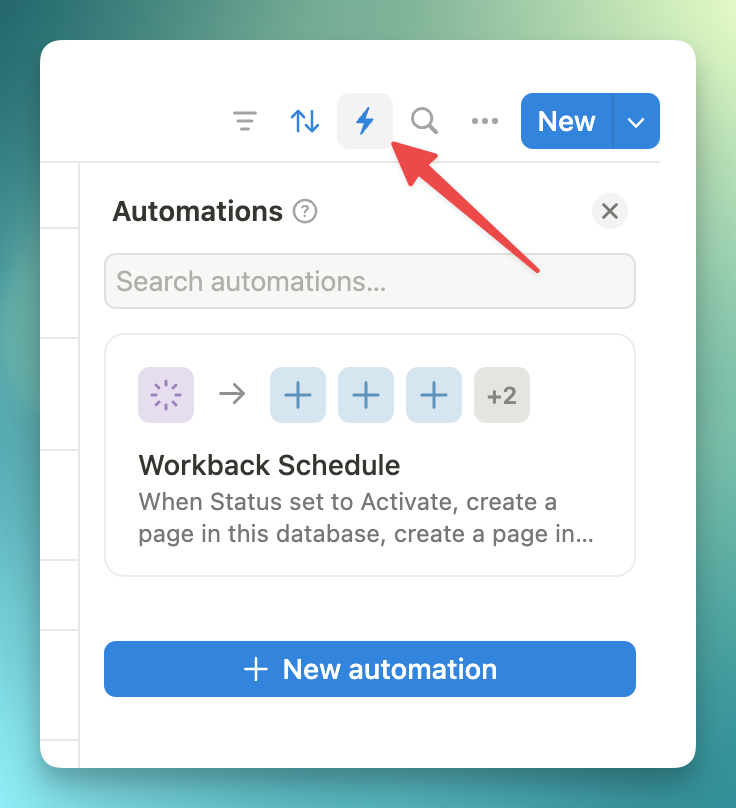
- Set the trigger that will kick off the automation. In this example, I have created a Status of “Activate”, but you can use any other desired trigger.
![Notion interface: setting up a workback automation. When status is set to Activate [trigger], do: Add page to projects database and update the date, title, parent project, and status property.](https://notionmastery.com/wp-content/uploads/2025/02/CleanShot-2025-02-20-at-16.01.11@2x-1.png)
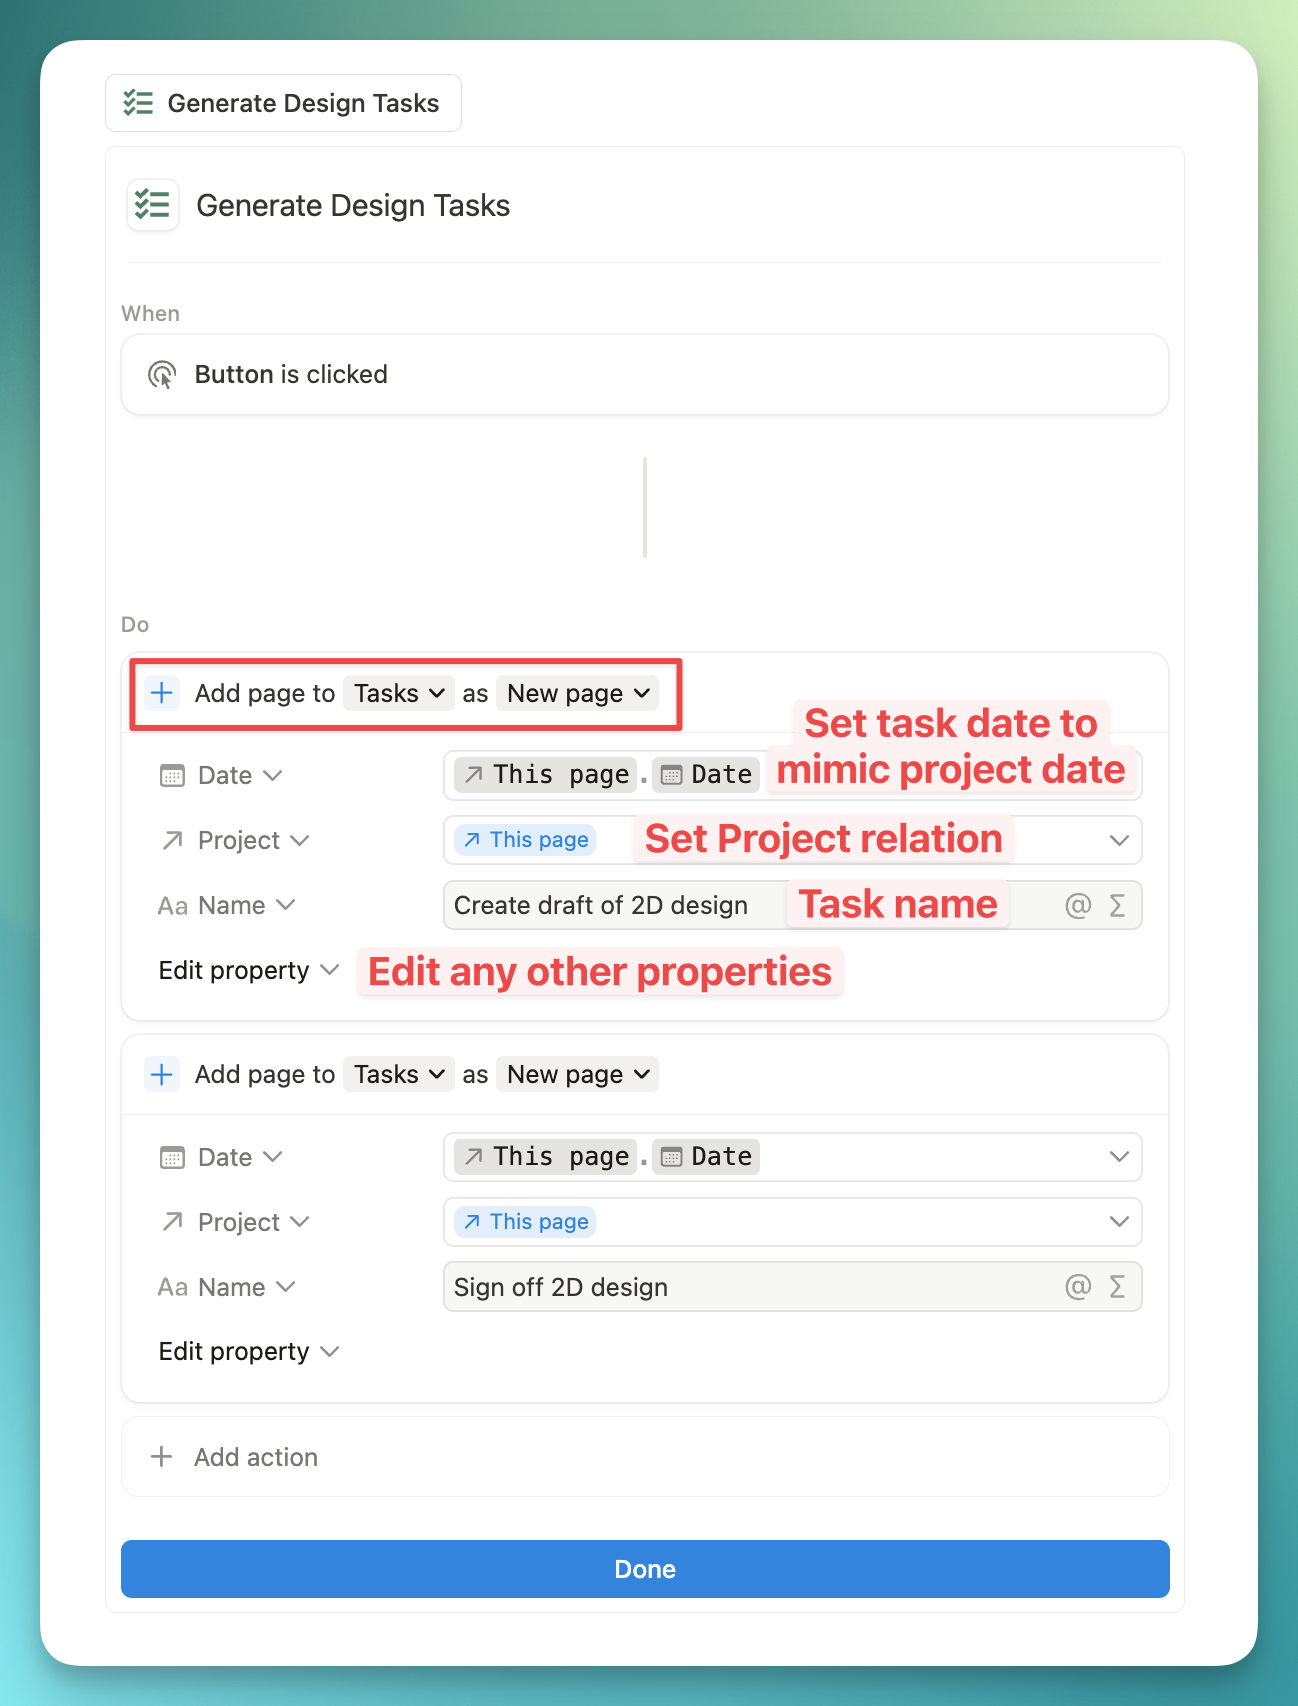
- Set the “Do” actions to “+ Add page to [Projects] using [Desired Template]”.
- Set the Date property using a formula. This is where the heavy lifting happens!
- Using dateSubtract, we can subtract time from the date in the trigger page (the sub project’s date), allowing us to create the workback schedule.
You can subtract days, weeks, months, or years, etc (or use dateAdd to add time to a date)
- Using dateSubtract, we can subtract time from the date in the trigger page (the sub project’s date), allowing us to create the workback schedule.

- Set the Date property for each sub-project phase as desired.
Making sure it works
- Test the automation with a test project. Do the dates look right?
- Make any adjustments to your formulas or templates as needed.
- What other property updates could you automate along the way?
The set up takes some time, but once it’s in place it can save you hours of set up time!
Enjoy.
 Notion tips in your inbox