I’ve heard frequently that Notion’s Zapier application is abandonware or vaporware (yes), and, while I have offered to improve or maintain it in the past, there is one feature that I hear is missing a lot that can actually be solved for today.
“You cannot add relations to Notion pages via Zapier’s Notion app”.
While this is technically true, today I want to show you a way around that without leaving Zapier.
The Problem
Let’s say you have a Students database in *Notion as well as a Memberships database and the two are related to each other via a Relation property.
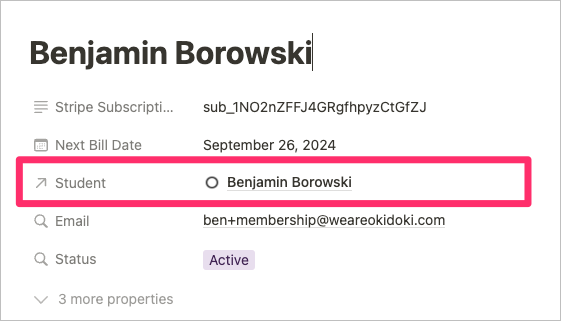
In Zapier, we might want to use a Find Database Item in Notion Action to look up a student by email.
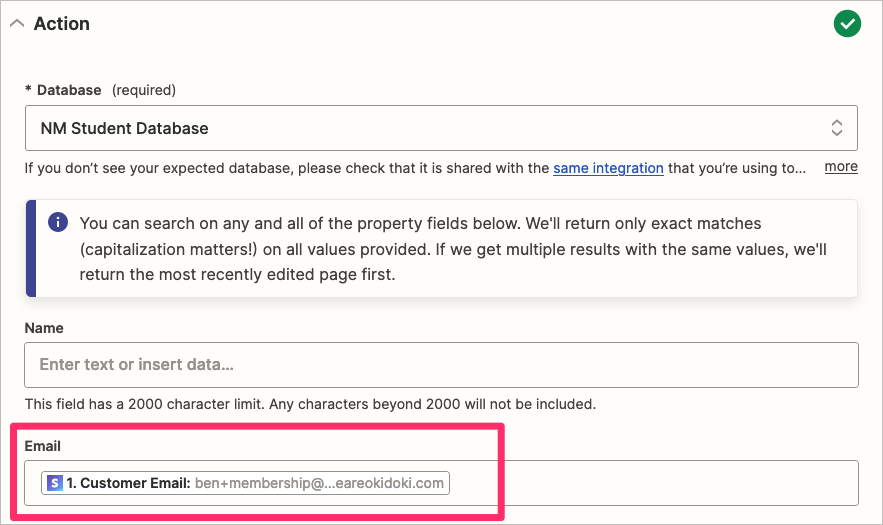
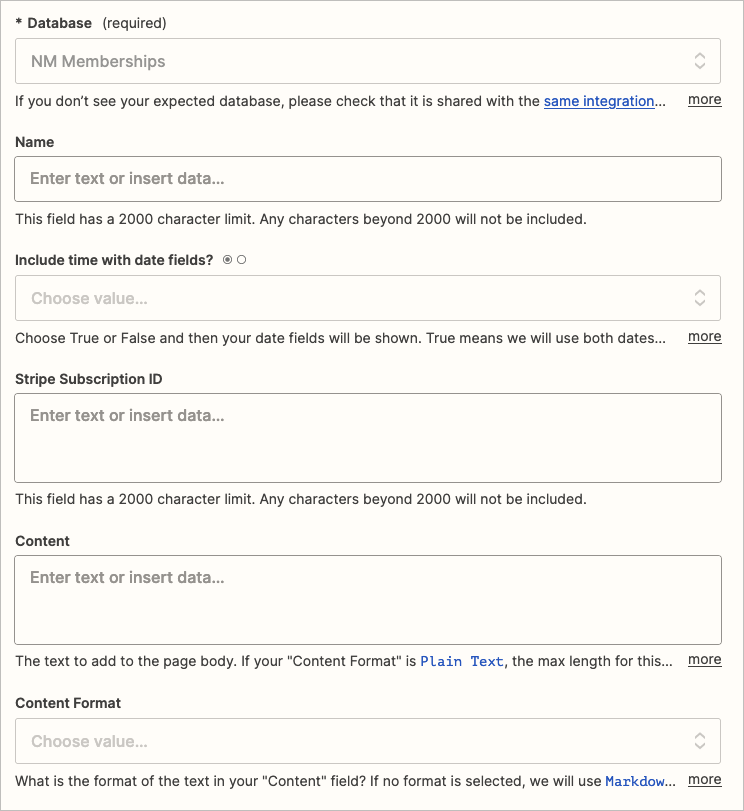
Next we’d want to attach the Student when we create a new Membership. However, you might notice that the “Student” relation does not show up anywhere in the form when configuring the Create Database Item in Notion step in Zapier.
The Solution
In order to attach relations in Notion, we’ll have to use the Notion API directly. But don’t worry, we can actually write some minor code in Zapier itself to do this and we don’t have to host any of our own services.
Enter Webhooks by Zapier!
Building my Zap
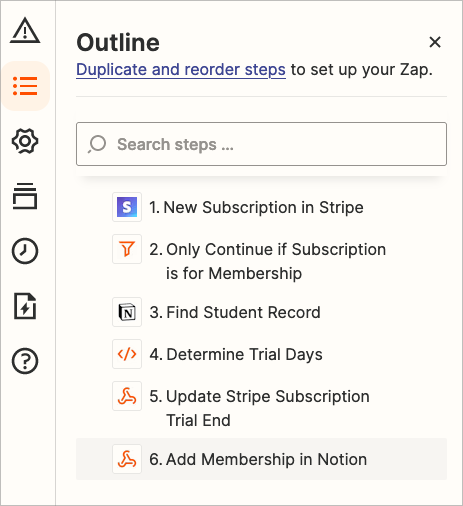
This morning I created a Zap that:
- When a Stripe subscription is started for our membership product, we want to…
- Find the student it’s related to in our Students database in Notion, and then…
- Update the Stripe subscription’s trial end date to account for any time remaining on their initial Notion Mastery purchase, and finally…
- Create a new page in the Memberships database and relate the Student record to it.
Since Zapier does not allow us to send relations via the Create Database Item step, we can instead use a webhook to send a request to Notion’s API which allows us to attach relations.
A webhook is a method used to provide real-time information from one application to another. It’s a way for an app to send automated messages or information to other apps. In other words, it’s a way for applications to “speak” to each other and stay updated about events.
So we can use Zapier’s flavor of webhooks to provide more information about the Membership than the Notion app itself can.
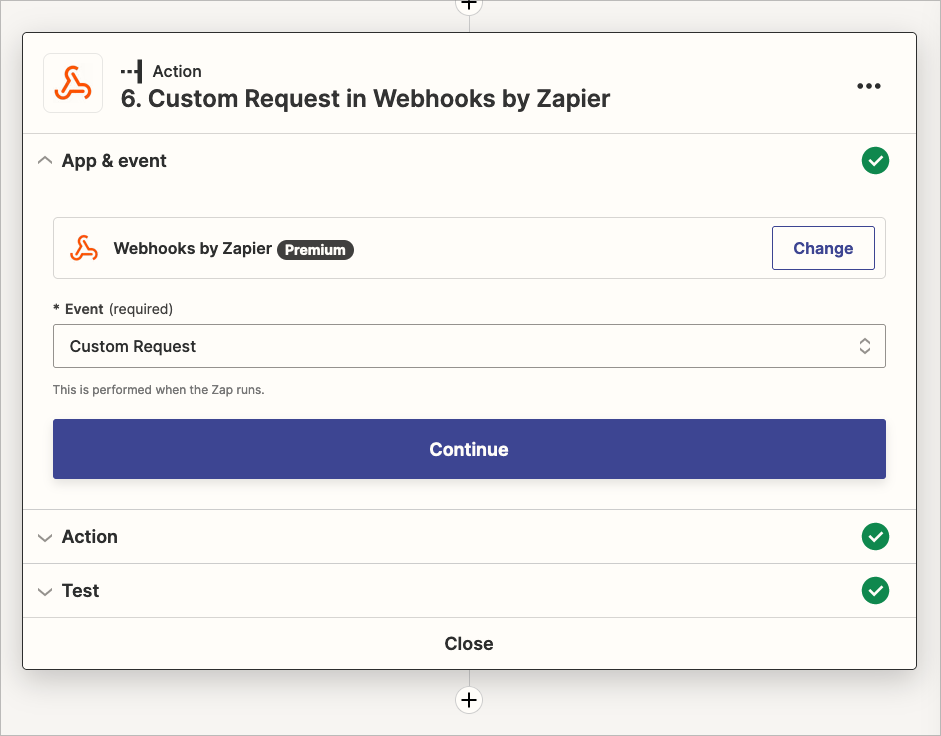
To start, add an action to your Zap and choose Webhooks by Zapier. Ensure that you select “Custom Request” as the Event.
Next we’ll configure the Action…
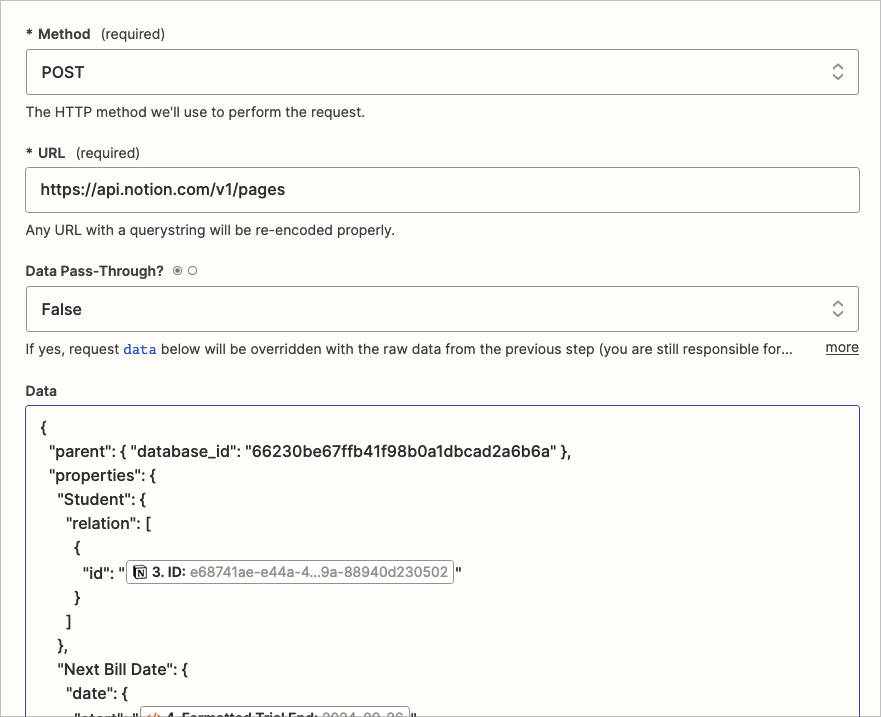
- Select
POSTas the Method. - Enter
https://api.notion.com/v1/pagesas the URL (note: this is the page creation endpoint that is used to create pages in your Notion workspace). - Make sure Data Pass-Through? is set to
False. - In the Data field, you’re going to enter the content below.
- Replace
YOUR_DATABASE_ID_HEREwith your database ID. - Replace
YOUR_RELATION_NAME_HEREwith the name of your relation property. YOUR_RELATION_ID_HEREshould be replaced by a value from one of your previous Zap steps.
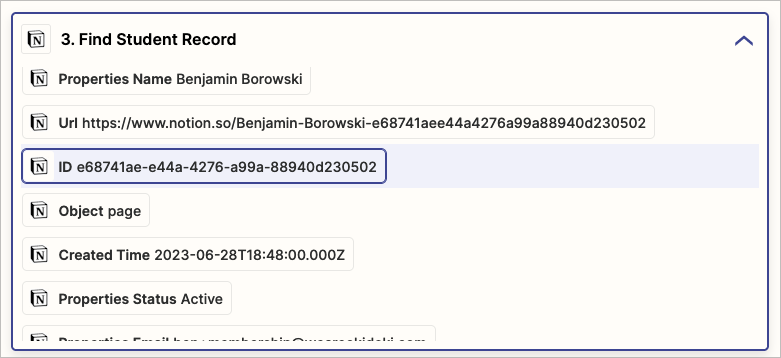
For example, I can click into this field and select the ID token from my “Find Student Record” step. When this action step runs, it will create a Membership record and the Student will be related to it.
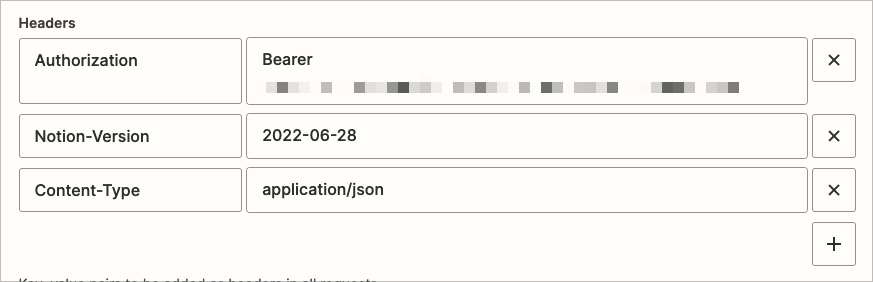
One last thing to configure before we test this step is our authentication setup. Under Headers we need to add 3 items as shown below.
- Authorization: This is your Notion API integration token as
Bearer YOUR_TOKEN_HERE. You can learn how to create an integration token here. You will need to add the token to the databases you want to access under the Connections settings of the page. That is described here. - Notion-Version: You can see the current version of the API here.
- Content-Type: This will always be
application/json.
You should now be able to test this step and see a new page in your database with a related page attached. Amazing!
You may have noticed though that now we don’t have that handy-dandy form-based approach for our other fields in the Notion database. There are two approaches to solving this. You can either extend your data in the custom webhook to add the content via the JSON payload…
In this case, you’ll have to jump into the Notion API documentation for creating pages to figure out how to properly format your JSON payload you put into the Data field.
OR (easier), you could add two Zap actions to fully create the page.
- The first would create the page using the Create Database Item step.
- The second would be a webhook-based request to update the page you just created.
In this case, we’ll still be using a Webhook step with Custom Request, but we’ll change the Method to PATCH :
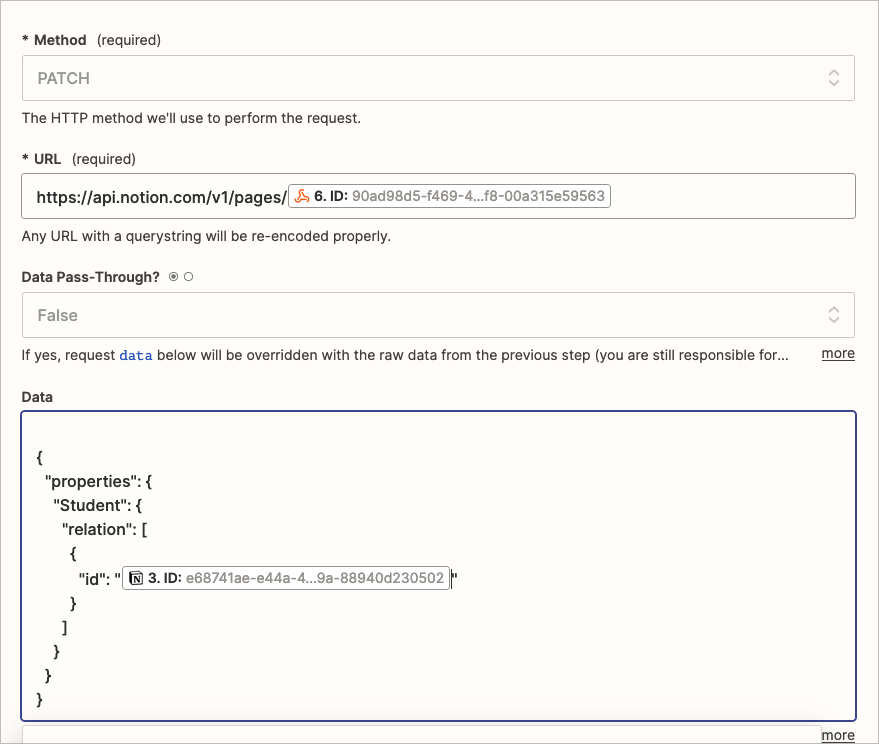
and our Data payload will be slightly different:
You’ll also note above that the URL for this request is the same URL for our page creation but we have to add a “/” and the Page’s ID after it in order to update the page we want to change. We don’t need to supply the database ID in the Data field because it’s already in the database we want it to be in.
One note here: in both cases, relation properties are totally overwritten. There is no “add” or “remove” relation in Notion’s API, so if your page has existing relation, you will have to fetch these first and append to the array of objects. This gets into more complicated coding that I won’t cover in this article.
Using Code Steps
One really powerful thing we can also do in Zapier is adding Javascript or Python steps to manipulate the data in our Zaps as they tick through the steps. In my Zap detailed so far, I had to first capture the Trial End property from Stripe from the newly created subscription and, looking at the data we have in Notion, extend the trial as necessary if there is any remaining time on their initial Notion Mastery access (we give access to all our live events and training workshops for a year and then give folks the option to extend that access through a recurring quarterly payment).
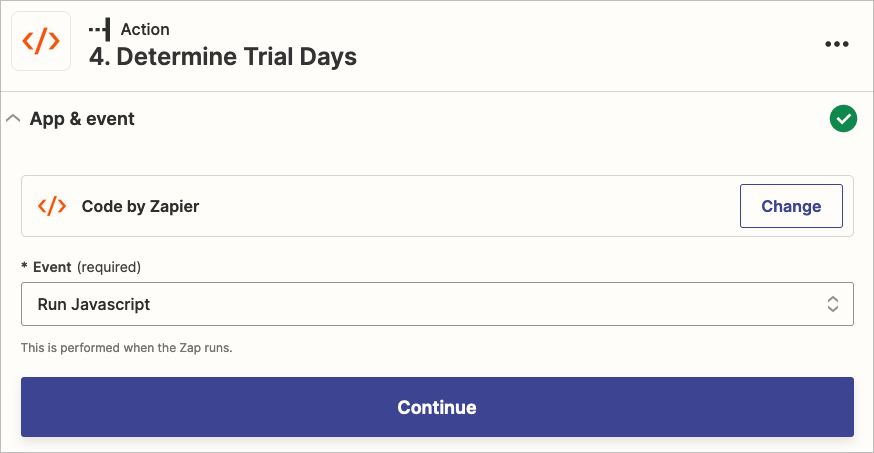
First I created a Code step and set it to run JavaScript.
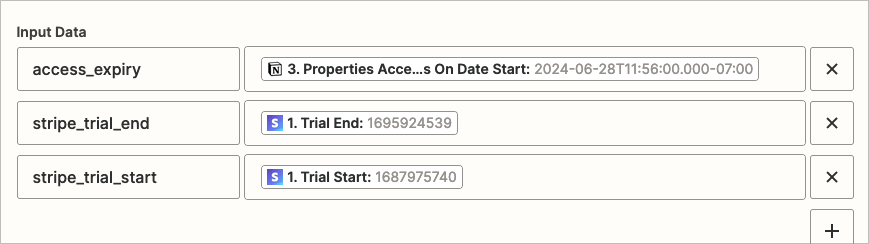
Next I can set some inputData for my Code step by mapping some properties from previous steps to JavaScript variables.
And finally, the code I want to run.
This little snippet figures out when the trial should expire based on their access expiry date in our Notion data. I can use the inputData dictionary to access the variables I set in the Input Data fields. Setting the output variable in the code allows us to carry that data on to successive Zap steps. In this case I use the trial_end data to send a request to Stripe to update the Subscription’s Trial End property and the formatted_trial_end variable to send a request to Notion to update the student’s record there.
Conclusion
So we’ve seen how we can indeed use Zapier to assign relations in Notion via Zapier’s Webhooks step, some examples, and also an example of using Zapier’s Code step. While it’s not as easy as one would hope, hopefully this has opened your mind to the possibility of exploring beneath the surface of no-code automations and to see how a little bit of pro-code can make your automations better.
P.S. Need help building an end-to-end Notion ecosystem or a Zapier application for your app? I can help.
[*For full disclosure, I’m a Notion Partner, so when you sign up with my link, you also help support me and my content!]
 Notion tips in your inbox