We offer many live events within the Notion Mastery community (usually between 25 to 30 per quarter!). These include:
- Office Hours: 60 minute informal calls with no pre-set agenda, where folks can show up, ask any questions they have, and receive support from our team to troubleshoot their Notion challenges.
- Weekly Reviews: 30 minute co-working calls where folks follow a provided template to review the week, update project progress, schedule next actions, and plan out the following week.
- Demo Days: 60 minute calls where we talk through the latest Notion feature releases, tips and tricks, and demo how to use each new feature.
- Workshops: live training sessions, usually 90-120 minutes in length, where our instructors teach a specific concept. We use slides to present the concept and usually provide a Notion template to work from.
When we are working on a new workshop concept, we usually run it within the Notion Mastery community first and later on, may offer it again as a public training. Notion Mastery students often receive free access to our public trainings, as part of their NM membership.
Over the last couple years we have been refining our process for taking workshops from ideation to delivery. There are many, many moving pieces, especially when you are leading workshops that are simultaneously available to folks both within your course community, as well as to the general public.
Here is our step-by-step process for delivering live, online workshops
Table of Contents
- 8 weeks before
- 6 weeks before
- 4 weeks before
- 2 weeks before
- 1 week before
- 1 day before
- Day of workshop
- After the workshop
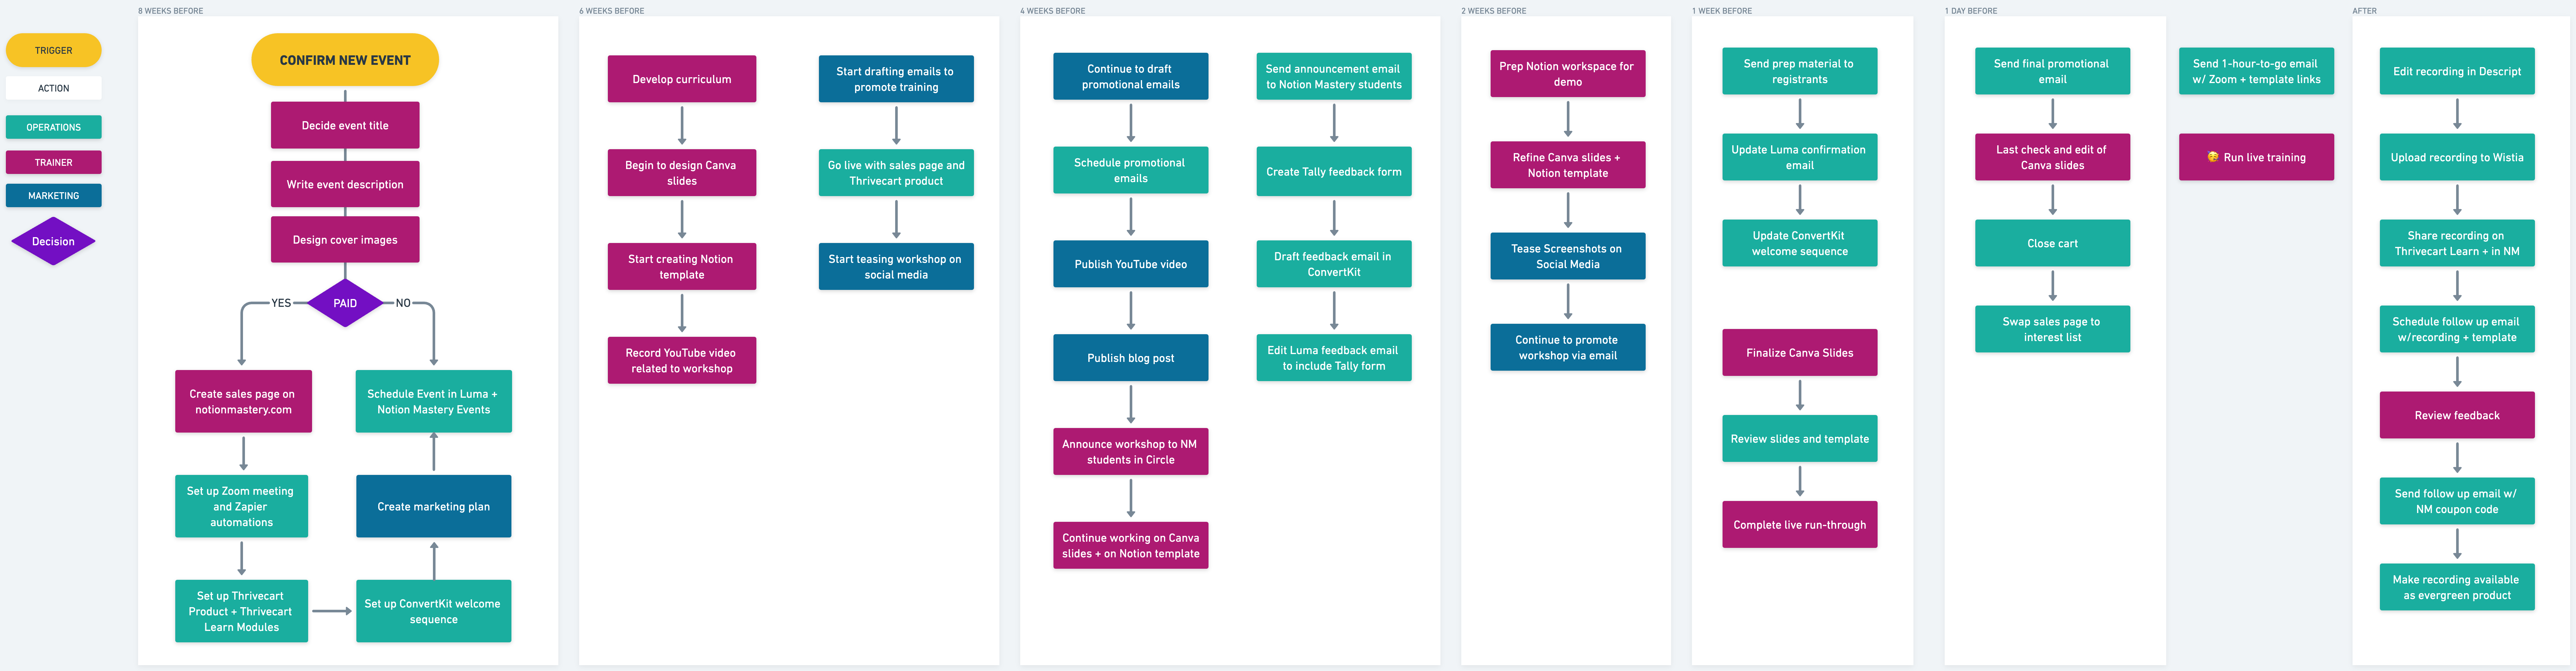
Full disclosure: the timelines shown in the Whimsical board above and in the post below are aspirational. We have certainly pulled off workshops in shorter time frames (but it’s a bit stressful!). And, we don’t always hit our marks (for example, sometimes we don’t get a YouTube video published because there simply isn’t time!). But, this is ideally how things play out, and when we operate within the cadence described, we are both at our best while delivering great work.
Quarterly Planning
This timeframe isn’t in that fancy Whimsical board, but I wanted to mention it briefly. At the beginning of each quarter, our team meets to do our Quarterly theming and goal setting. During this time, we will decide on one workshop that will be our main focus and settle on a rough idea of when we will deliver it. Since these workshops are often new and never-before delivered, they often require the creation of slides, templates, activities, and supporting material, plus set up of all the Ops systems. It’s a big chunk of work! We have delivered multiple workshops per quarter before, but right now narrowing our focus to one workshop and doing it really, really well (and calmly!) has been working wonderfully for our team.
8 Weeks Before
Workshop title, description, cover images, and landing page
Based on the general workshop topic we settled on during our Quarterly Planning, we sketch out a rough idea of what will be covered in the workshop. Using that rough sketch as our guide, we come up with the workshop title, tagline, and a few sentence description.
We then head to Canva and use the workshop title and description for inspiration to create images that will be used later on when we set up the workshop registration in Luma and ThriveCart. We have templates in Canva that are sized correctly and have a general design in place, to make spinning up these images quicker.
We also have a page in our WordPress site that we use as a “template” for our workshop landing pages. It is pre-formatted so all we have to do is duplicate that page and then plug in the information relevant to the workshop.

Our landing page includes sections that describe what we’re offering, how it’s delivered, who it’s for, who is facilitating the workshop, and how to register. We also include testimonials if it’s a workshop we’ve already run in the past, and an FAQ section that covers the most common questions we receive.
Notion
The foundation of our Ops systems is the documentation we have that explains them, and that lives in Notion. We have been offering live workshops for a long time, and each time we iterate on the Ops systems slightly. We started with simple bullet lists and as we’ve refined the systems, we’ve also created more in depth documentation.
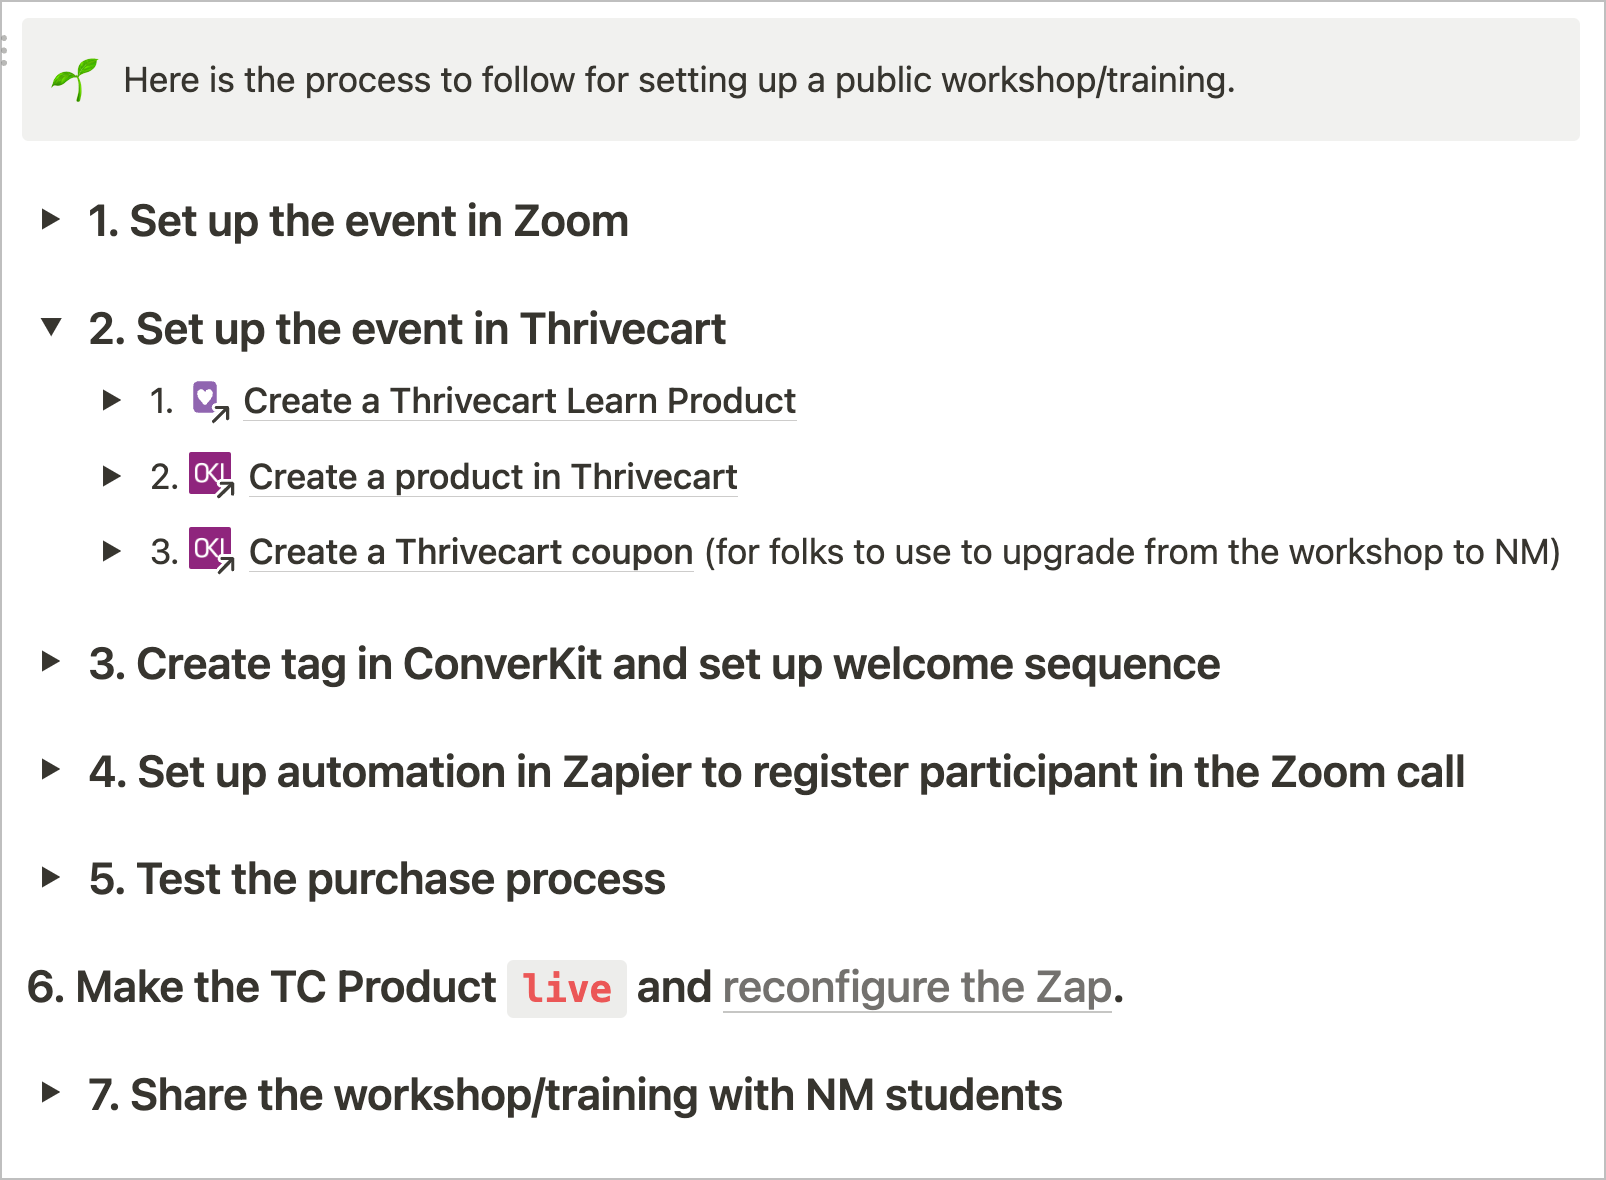
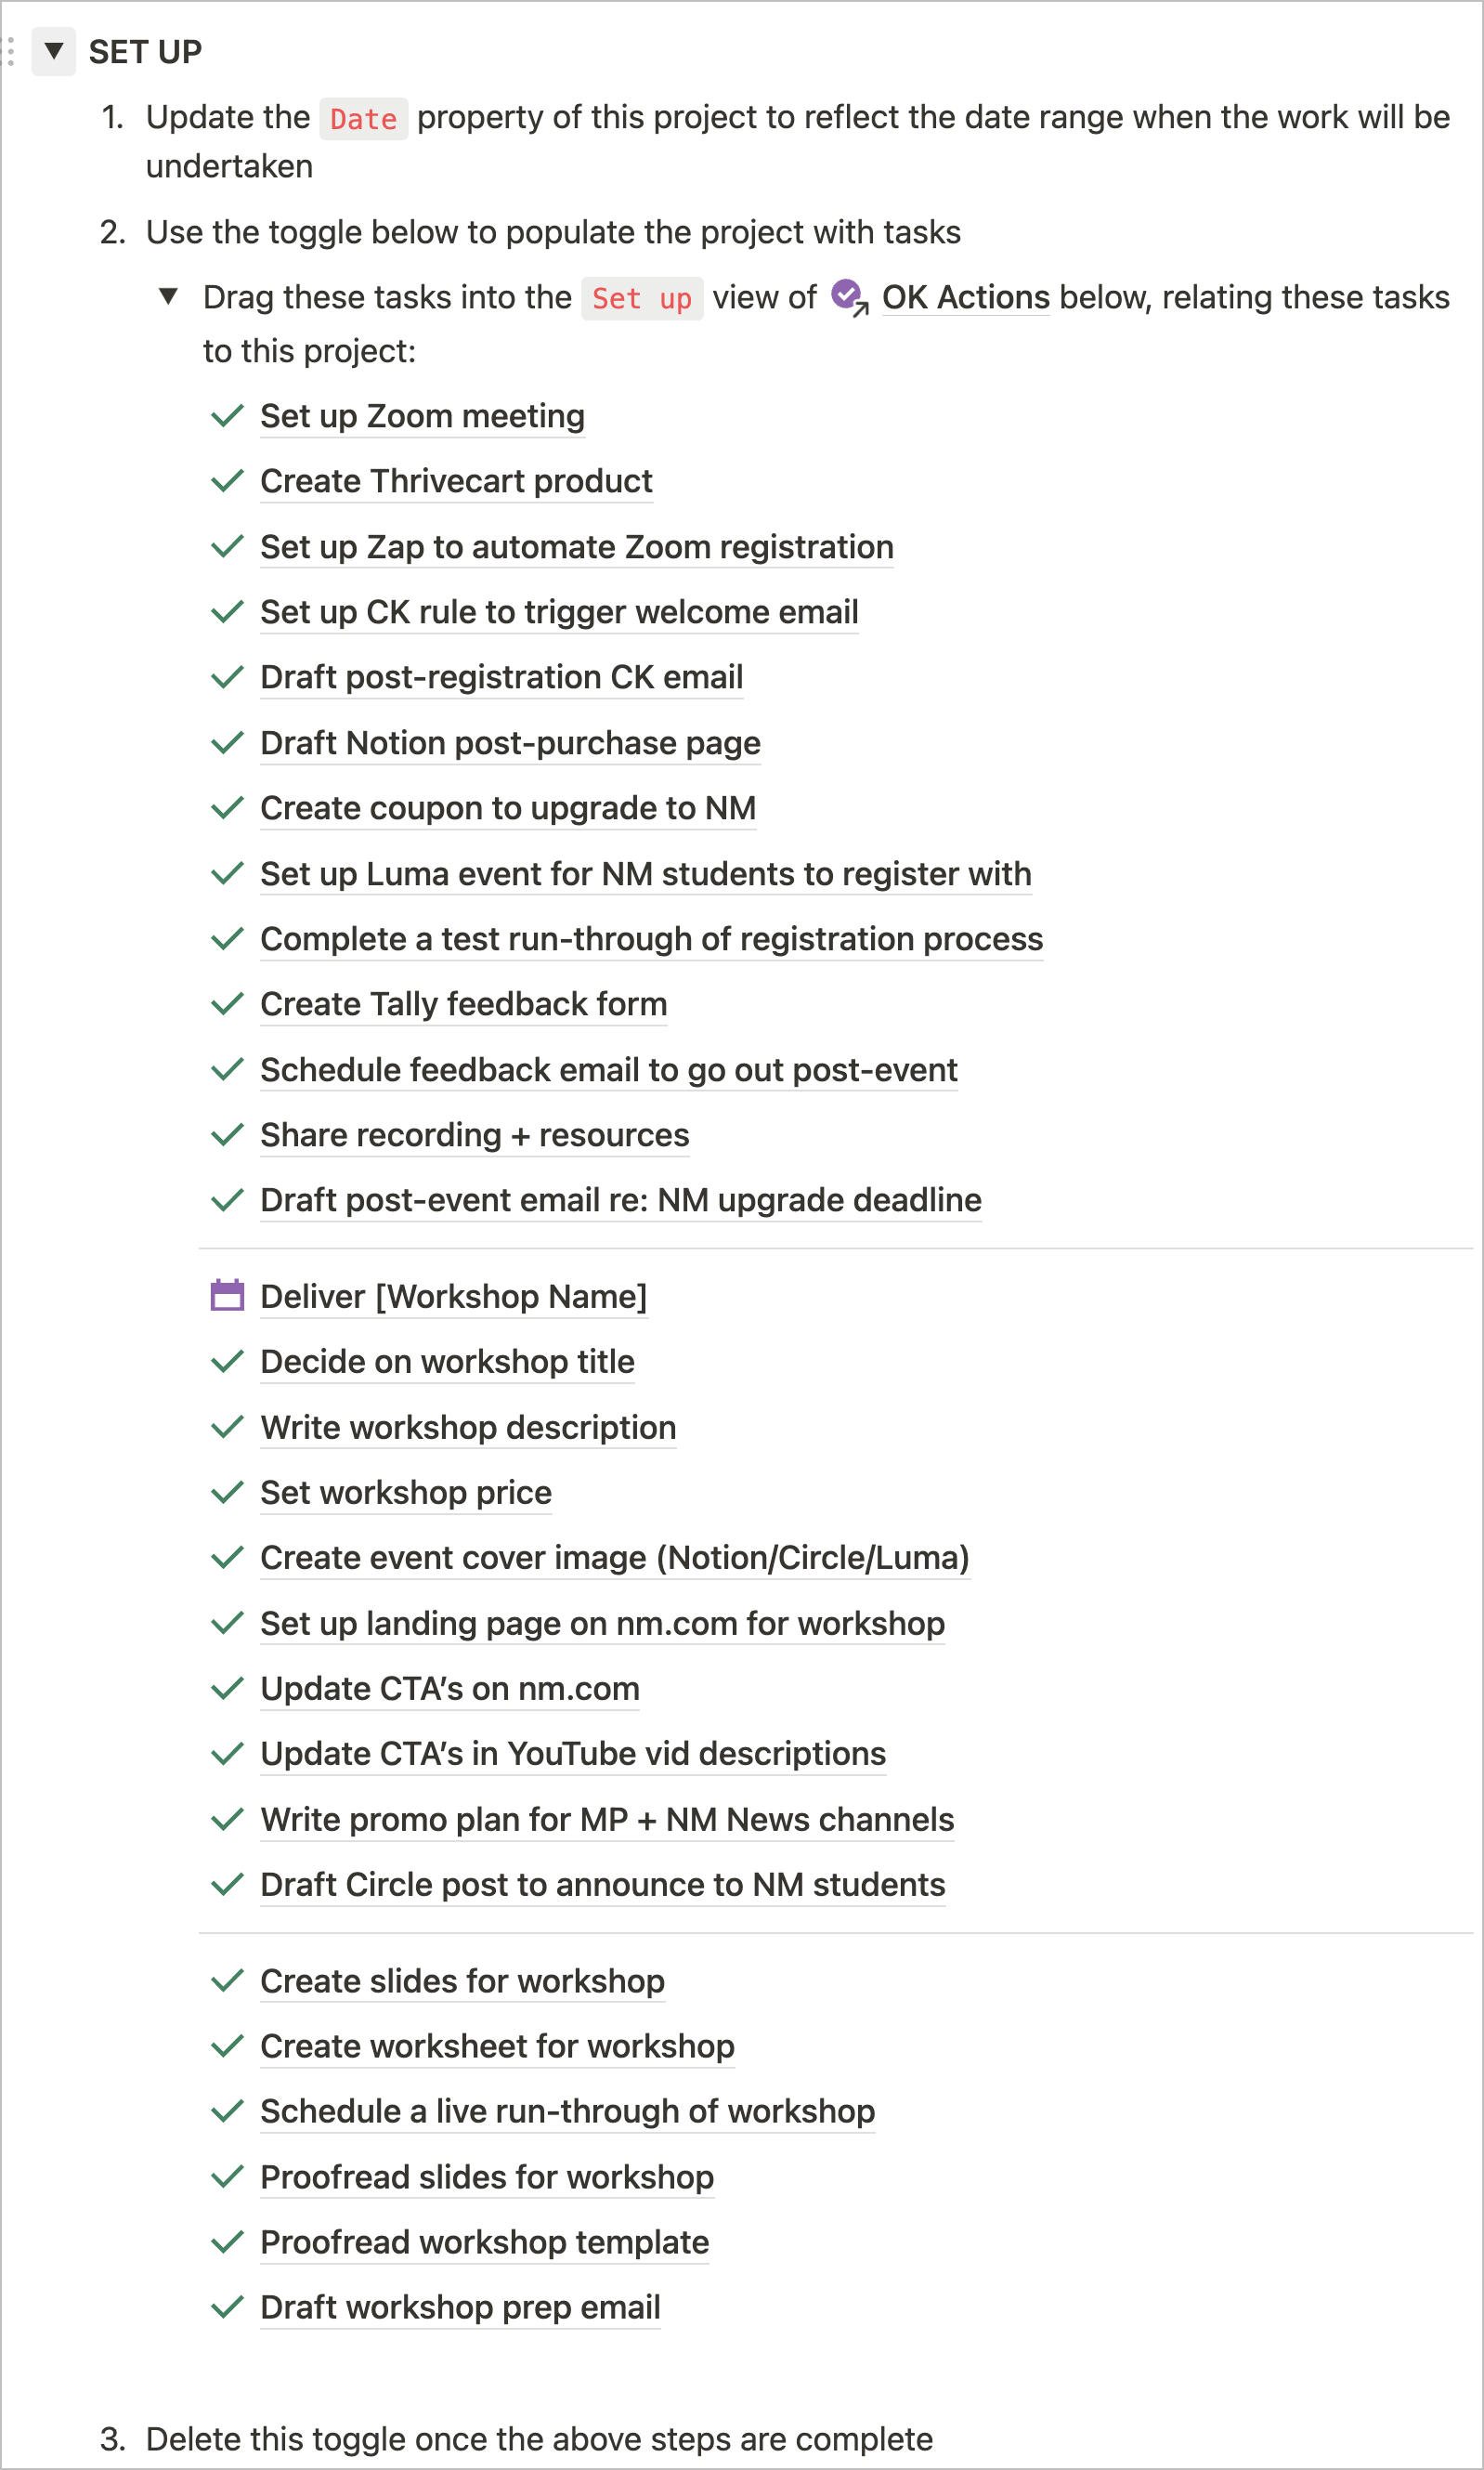
Each toggle in the image below contains step-by-step instructions for how to execute that step. There is no guessing, or trying to remember what we did last time or how to set something up. Having this documentation makes us way more effective! We use Notion to capture this documentation. But, whatever your tools of choice are, just make sure you are documenting.
When we decide to run a new workshop, we create a related project in our Notion Projects database. We have a “Training Project” template which contains a bunch of pre-created tasks that we have to complete each time we run a workshop. When the template is activated, we drag the tasks into a linked view of our Actions database which is on the project page, and those tasks are automatically associated with that workshop. We can then assign dates and adjust dependencies, as needed.
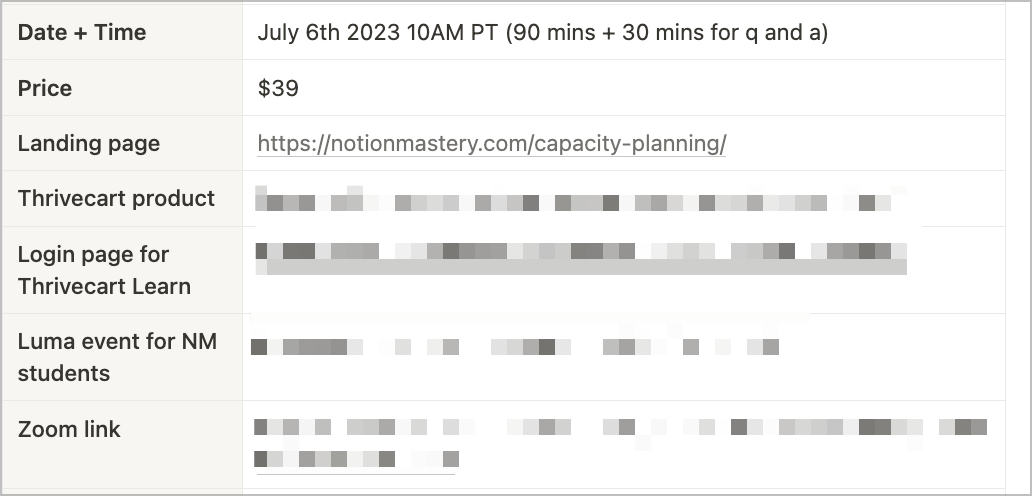
The workshop’s project page also contains:
- A simple table where I collect all the links, tags, and other details that relate to the workshop
- A linked view of our Notes + Ideas database where we can collect resources and notes that relate to the workshop
- A place where we collect questions during the live event (more on that below)
- Various linked views of the workshop’s Feedback database (more on this later)
Zoom
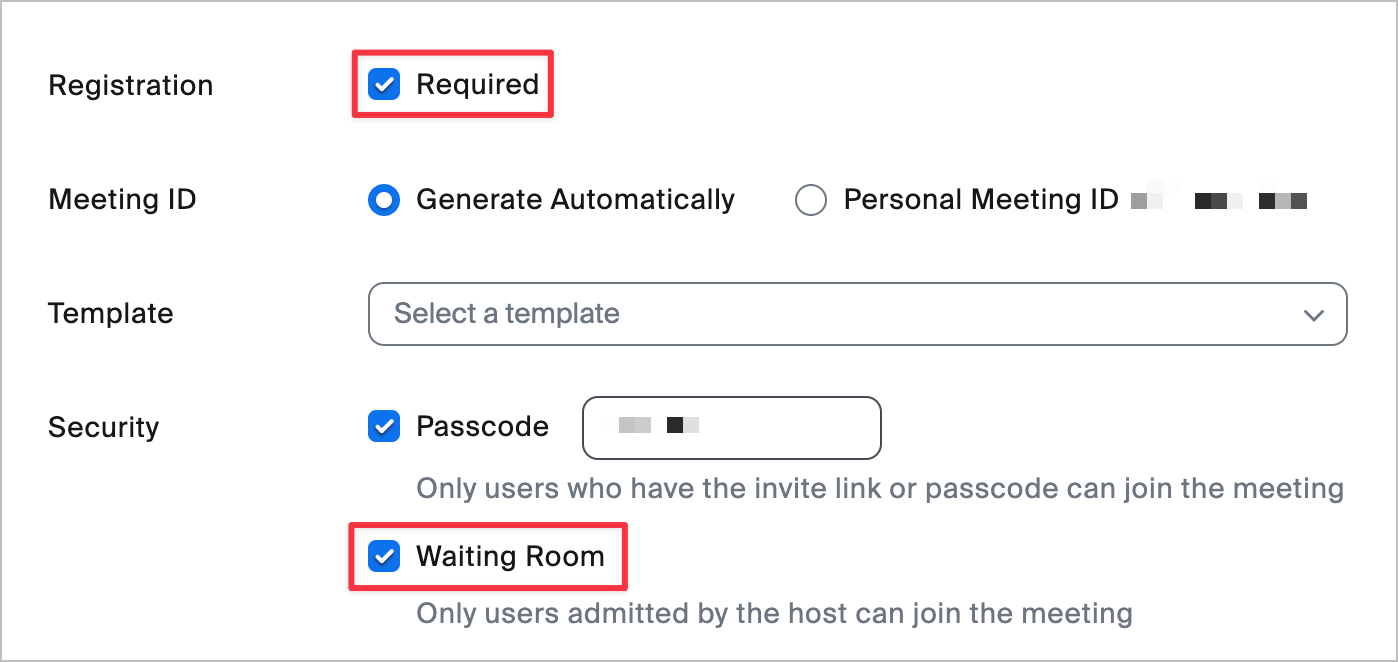
We use Zoom to host our live trainings. We have a Zoom One Pro account with the Large Meeting add-on, so we can host 100’s of folks. For workshops, we require registration (further down I will explain the Zapier automation we set up to automatically register folks). For all our events we always have the Waiting Room on to begin with (this gives our team time to run our last tech check’s before the event starts, without having any attendees pop in early!).
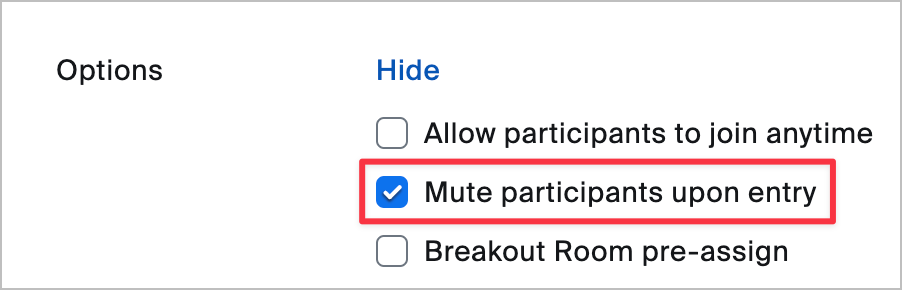
I also recommend turning on Mute participants upon entry. This will prevent a bunch of distracting background noise coming through everyone’s speakers as folks join the call!
ThriveCart
For our paid workshops we use ThriveCart both as our Learning Management System (LMS) and as our cart.
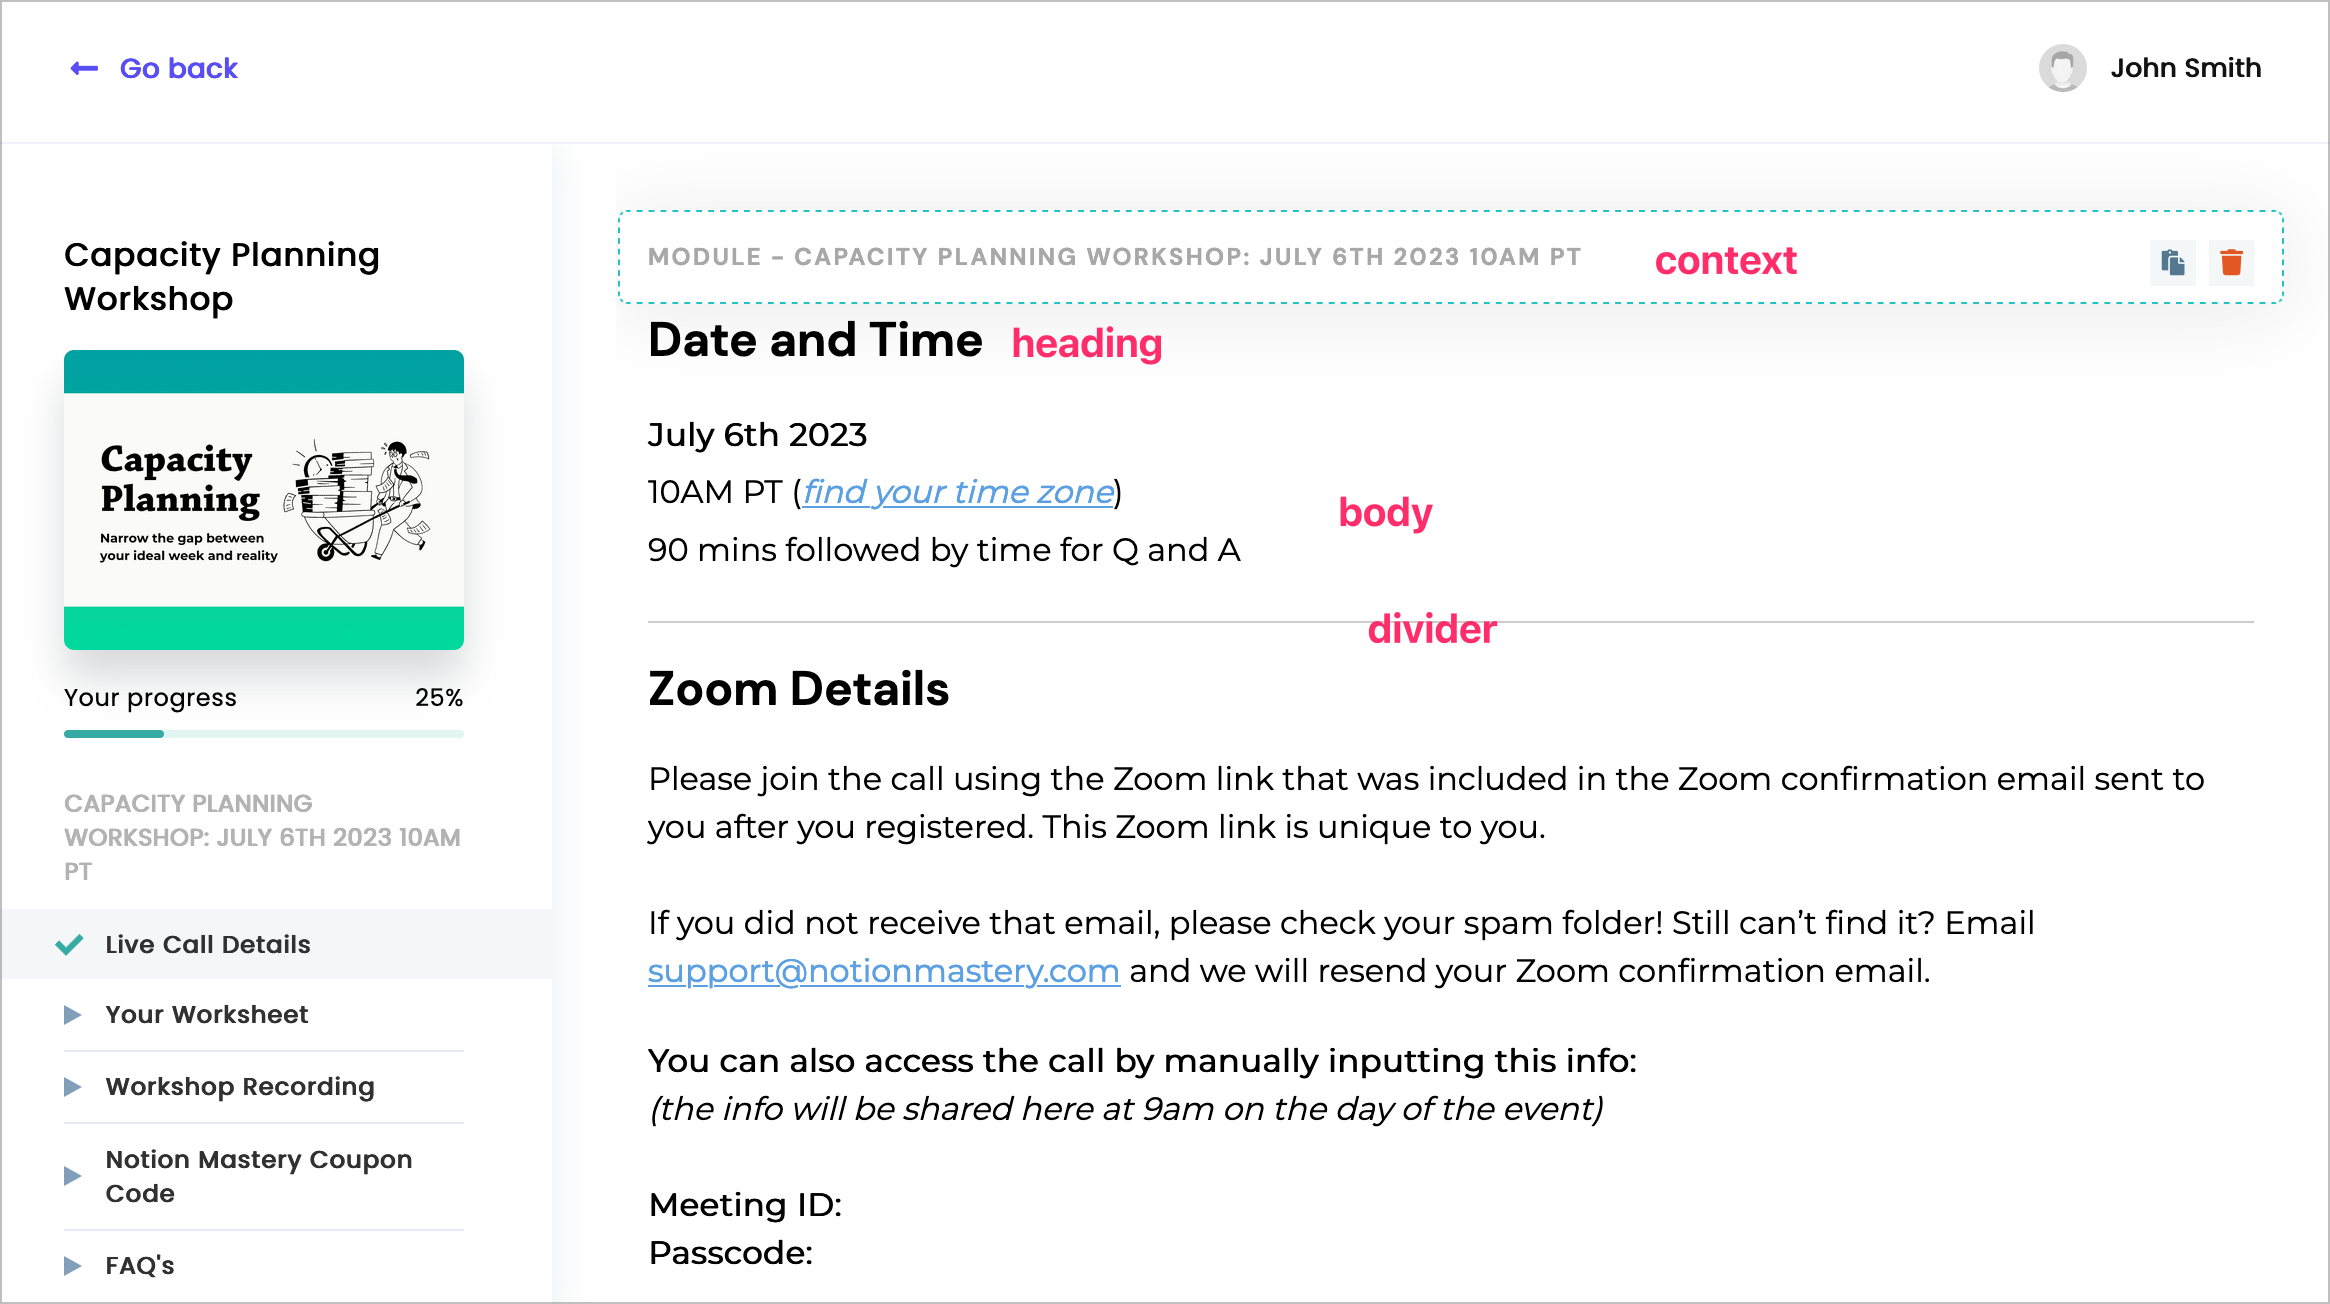
We start by creating a new “course” in ThriveCart Learn, where we can customize the course modules and lessons. We refer to this as folks’ “workshop dashboard”. It’s where they will come to find all the details they need: Zoom call info, Notion templates, workshop recording, and any other resources.
We have a style guide in our SOP’s to make it simple to maintain consistency in the way different workshops are presented in ThriveCart.
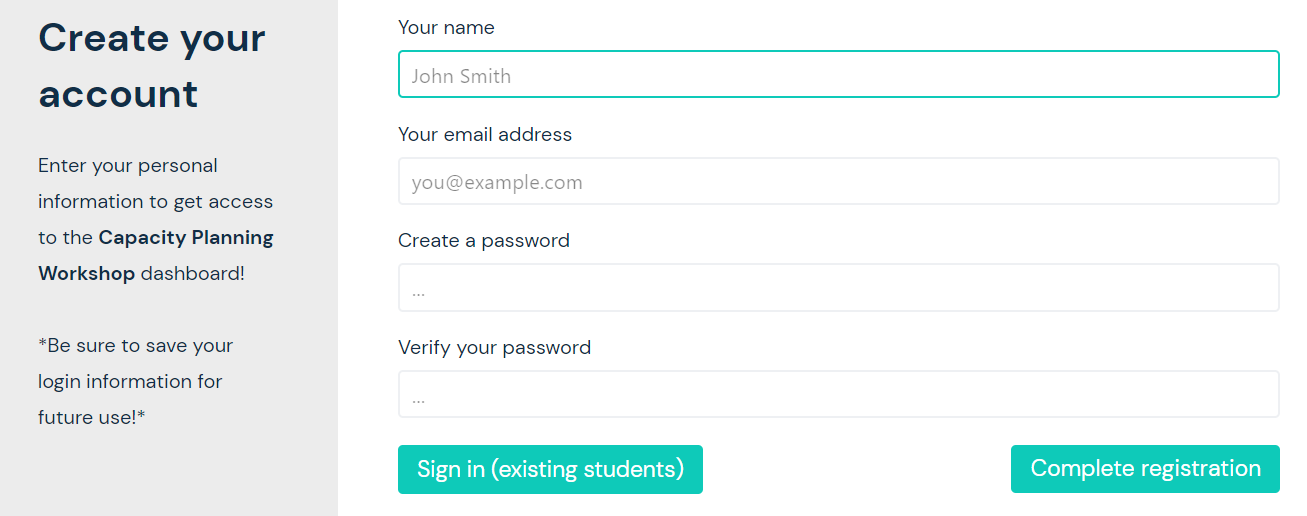
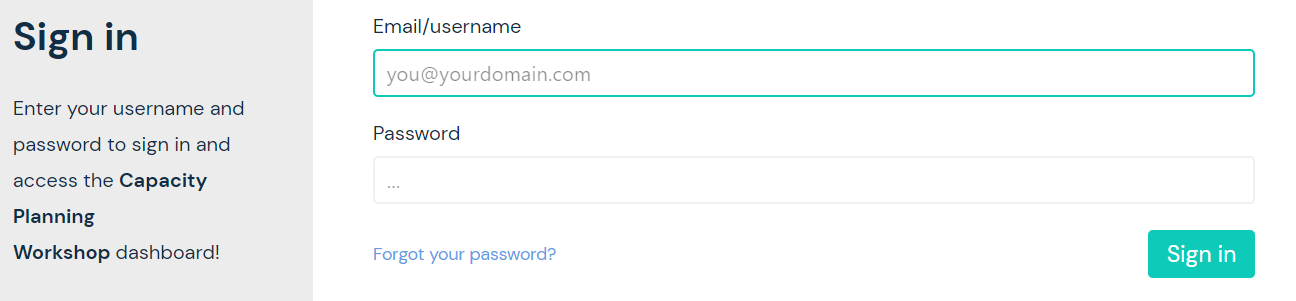
We can also customize the sign up page they will use to access their workshop material.
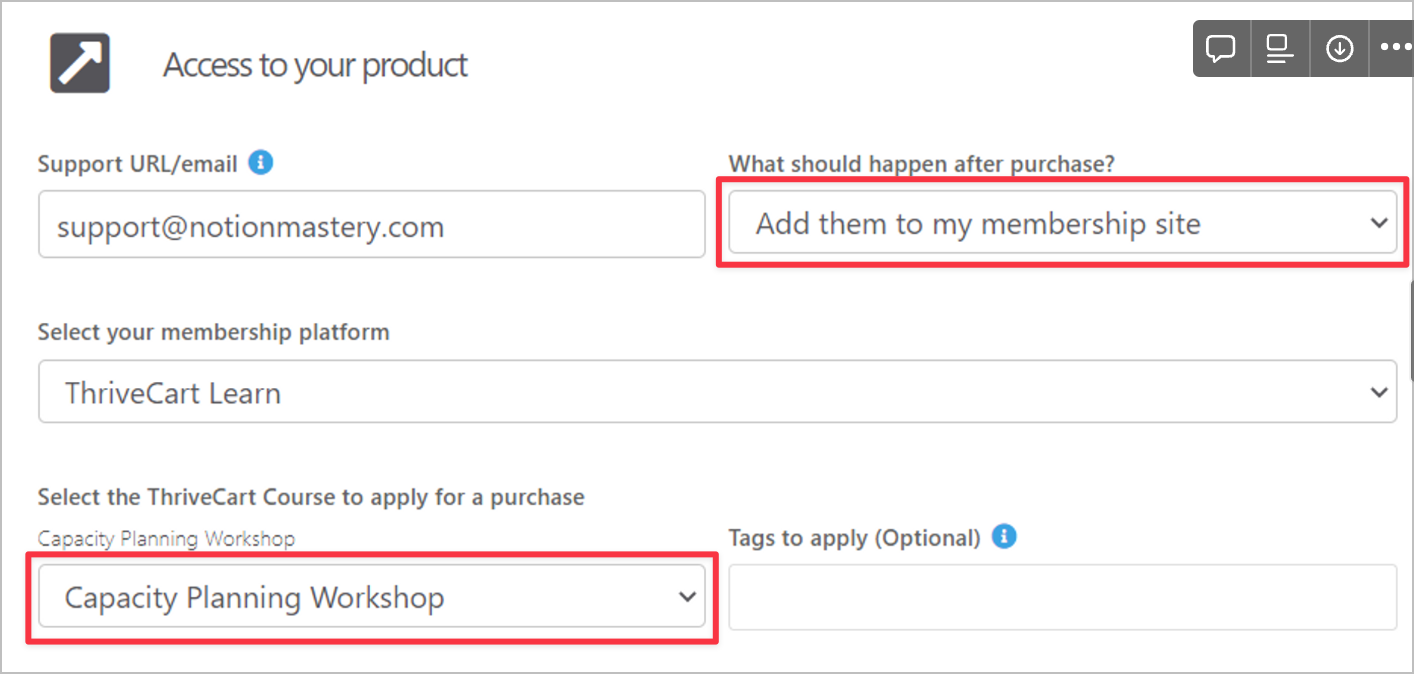
Once the workshop dashboard is set up in ThriveCart Learn we then set up a new ThriveCart product. It’s often easiest to duplicate the product for a past workshop we ran, and tweak and update things from there.
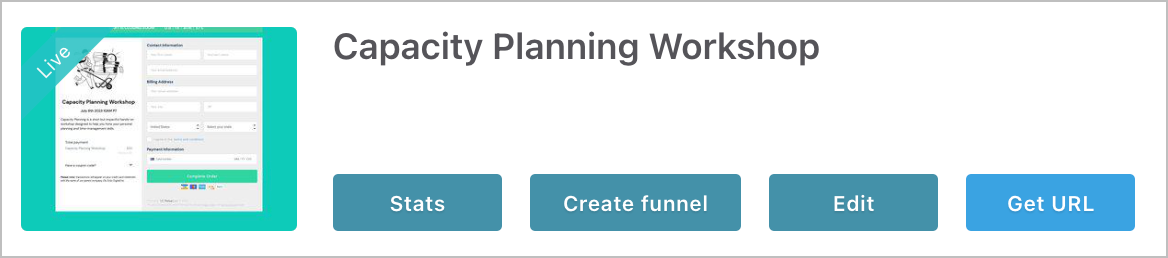
One thing that has made our workshop onboarding and resource delivery super smooth is the way ThriveCart allows you to directly register folks for a ThriveCart Learn course when they make a payment through ThriveCart. Anyone who purchases the workshop product will be automatically registered for the related course.
Once a workshop registrant has set up their password they can continue to login at any time to access their workshop details. It makes it super streamlined and easy to find everything they need because it is all organized in one spot! If someone has purchased a workshop from us in the past and has already set up a ThriveCart Learn login, they won’t need to set up a new one, they will just be prompted to login using their existing info.
The last thing we use ThriveCart for in relation to our workshops is for setting up the coupon code we provide workshop registrants so they can apply the cost of the workshop to Notion Mastery.

ConvertKit
We use ConvertKit to host our workshop-related email sequences (and to send promotional emails and our newsletters!). Each workshop has a related tag (eg. Registered - Capacity Planning Workshop) and a rule that automatically adds a subscriber to the workshop email sequence when the tag is applied.

The initial Welcome email sends as soon as the purchase is complete. ThriveCart has built-in behaviour rules that allow us to automatically apply a tag to a subscriber after a purchase.
The welcome email usually includes:
- The date and time of the live event (Note: I loved how Jessica Abel included an easy way to convert the workshop time to your local time in her post-registration workshop emails and we’ve started including that, too!)
- A reminder to add the event to their calendar and instructions for how to do that
- A reminder to set up their password for the workshop dashboard and instructions for how to do that
- A link to the workshop dashboard
- A reminder that they can reply to the email for more support
Beyond the initial welcome email, we also usually send out:
- An email the week before with information about how to prepare for the workshop.
- An email the day before where we give guidance around participation during the live call.
- A reminder email 1 hour before we go live.
These emails that follow the initial welcome aren’t always ready until after we’ve started selling the workshop. When we have new information to share, we can send it to all the folks tagged with the applicable workshop tag (eg. Registered - Capacity Planning Workshop) and then add it to the email sequence so that anyone else who registers from then on will automatically receive the information.
Zapier
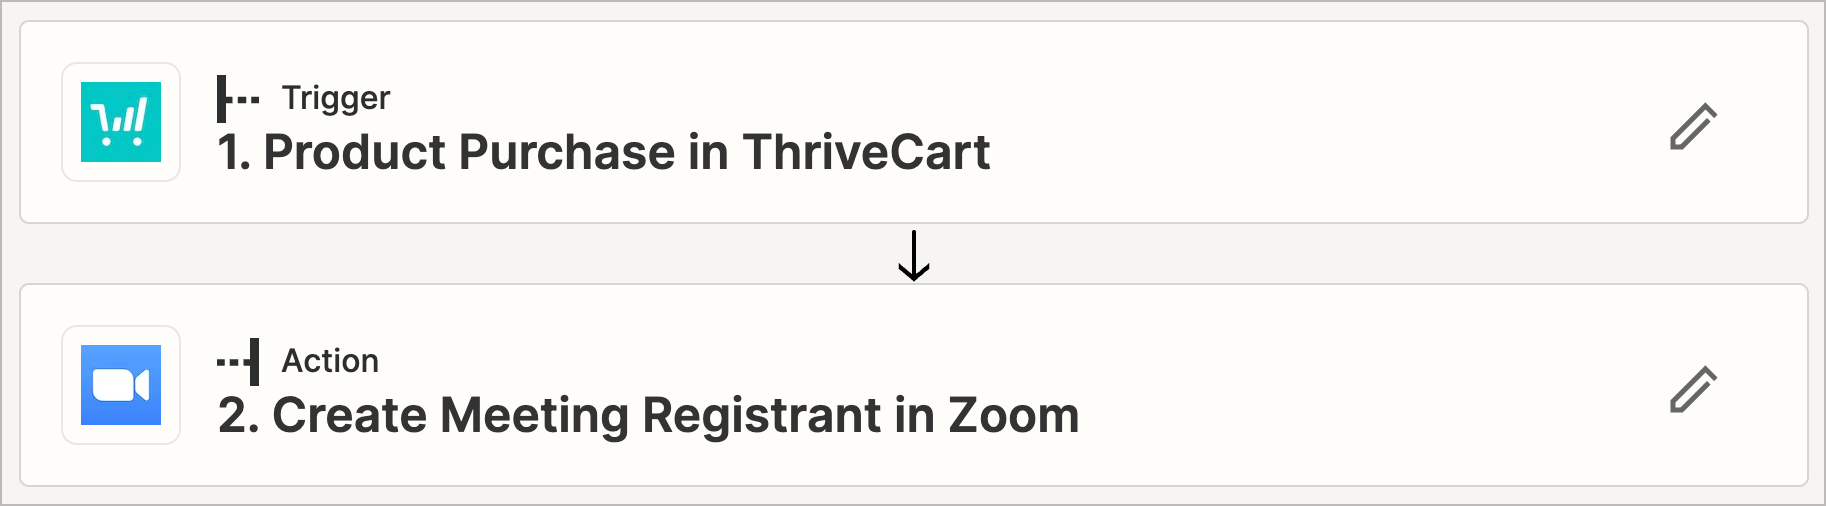
We set up one automation in Zapier related to our live workshops, and that’s to automatically register anyone who purchases the workshop in ThriveCart, for the related Zoom call. When they are registered for the call they are automatically sent a Zoom confirmation email that includes information for joining the Zoom call as well as links to add the call to their calendar.
Note: we often keep our ThriveCart products in Test Mode until we take them live to sell. This makes it easy for our team to run test purchases without having to make actual payments. However, we have noticed that if the above Zap is published when the ThriveCart product is in test mode, and you then make the product live, the Zap will no longer work. You have to reconfigure the Zap, after the product has gone live, and then everything will run smoothly again!
Luma
I mentioned earlier that our workshops are often made available to the public as a paid offering as well as to our Notion Mastery community as a free offering included in their membership. Promoting a workshop to these two distinct audiences and setting up smooth onboarding for both groups has been one of the focuses of our workshop ops refinement.
What we’ve landed on that has worked the smoothest is to have a separate registration process for folks in the NM community. We use Luma for this (instead of ThriveCart) for a few reasons reasons:
- Luma is the tool we use to manage all our NM community events, so our community members are familiar with the event registration process through Luma.
- Using Luma rather than providing a 100% off coupon for NM community members to use in ThriveCart prevents anyone who should be receiving free access to the event from accidentally purchasing it through ThriveCart (and prevents us from needing to process refunds for those accidental purchases!).
- We can easily see how many paid registrants we have (in ThriveCart) vs how many Notion Mastery students are registered (in Luma).
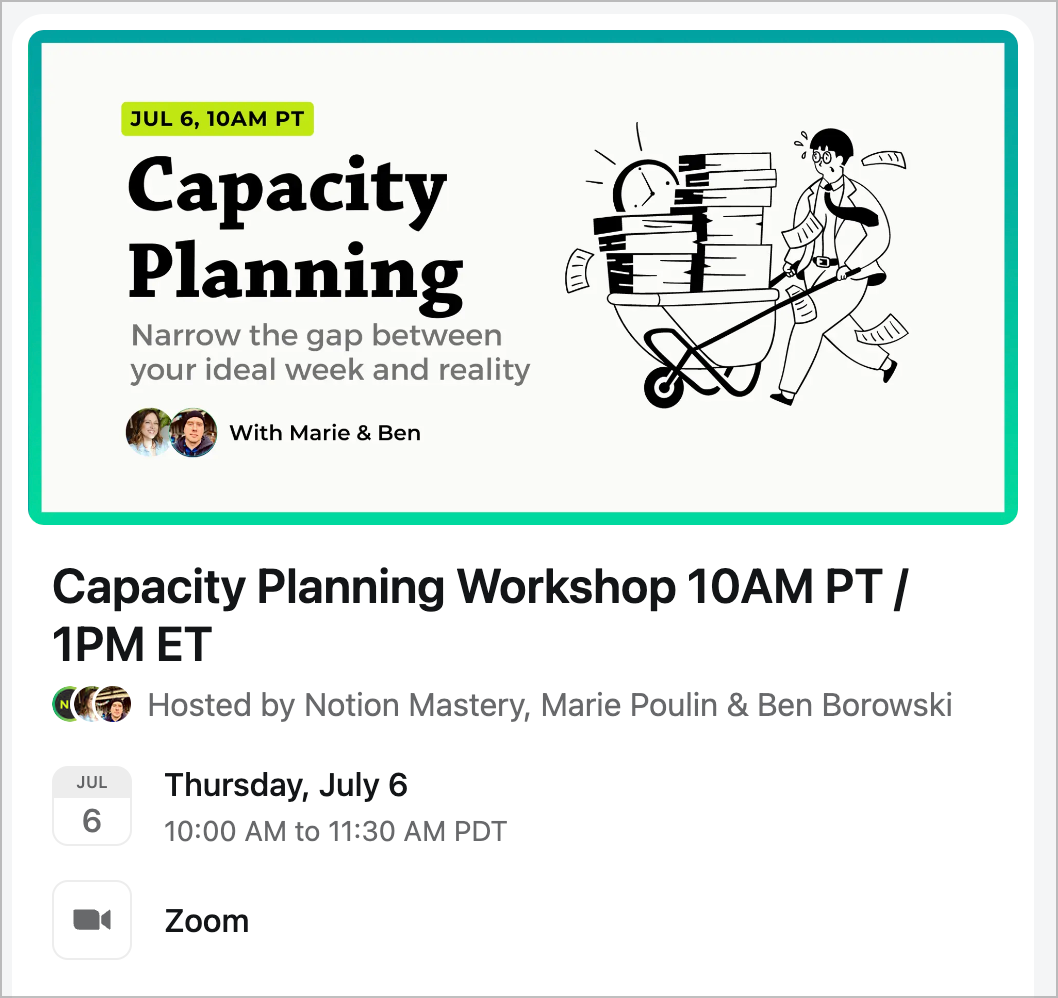
When we set up the event in Luma we use the link to the same Zoom meeting that we generated earlier so everyone showing up for the workshop is showing up to the same call, whether they bought the workshop or are joining us via the Notion Mastery community.
We then share the Luma registration link through the usual channels we use for promoting an event within our NM community:
- In our Notion event calendar
- In our NM Google calendar
- Through our monthly event round up email
- In event-related posts in our online community hosted on Circle
We edit the Luma confirmation email to send similar information that we include in the email that goes out to paid registrants, excluding links to the ThriveCart workshop dashboard. Instead, all the resources NM members need are shared with them via the event listing in our Notion event calendar.
Test, test, test
Once these registration pieces are in place, I test the whole process, both for paid registrants and NM members. After that, I task one of my team members to run a test as well, to make sure all systems are running as expected.
Once we are certain that everything operating the way we want, we update the sales page to include a link to the ThriveCart cart page.
Marketing Plan
During the planning phase, we map out a rough idea of what blog posts, YouTube videos, emails, and social media posts we want to publish in the lead up to the live workshop. We enter the ideas into our Notion content database, and include notes on what the call to action (CTA) for that content piece will be, as well as a very rough description of what the focus of the content will be.
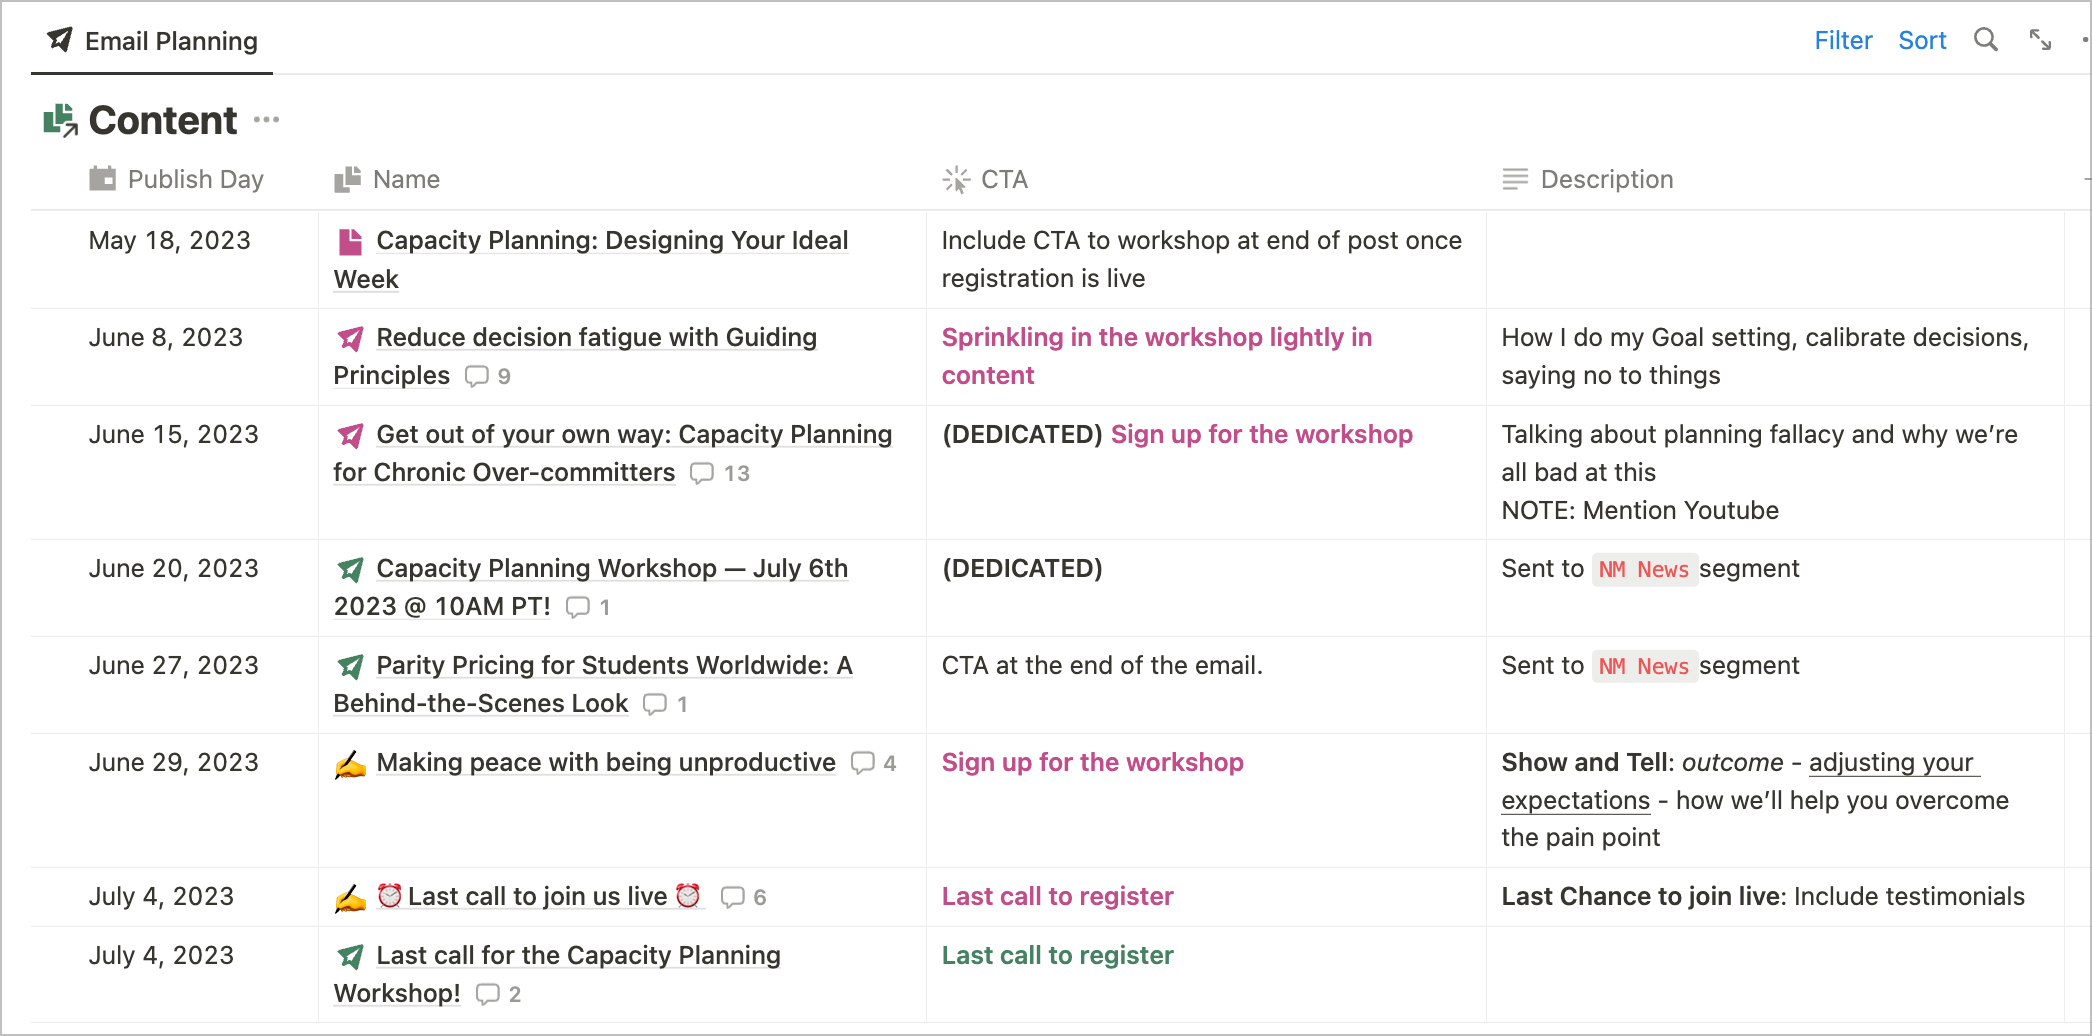
In addition to the writing and video recording that we do to promote the workshop, we also update the descriptions of our most popular YouTube videos, and the footers of any blog posts that relate to the workshop topic, to include a CTA that sends folks to the workshop sales page.
6 weeks before
Develop curriculum, slides, and template
These items are usually being worked on from the point that we decide on the workshop topic, right up until the week of the workshop. We are constantly tweaking and refining! We have a template in our Notion training database that helps map out the workshop curriculum, which is then translated to Canva slides. We present the slides directly from Canva when we deliver the workshop live. If you haven’t checked out Canva’s latest presentation features, do! We are really enjoying them.
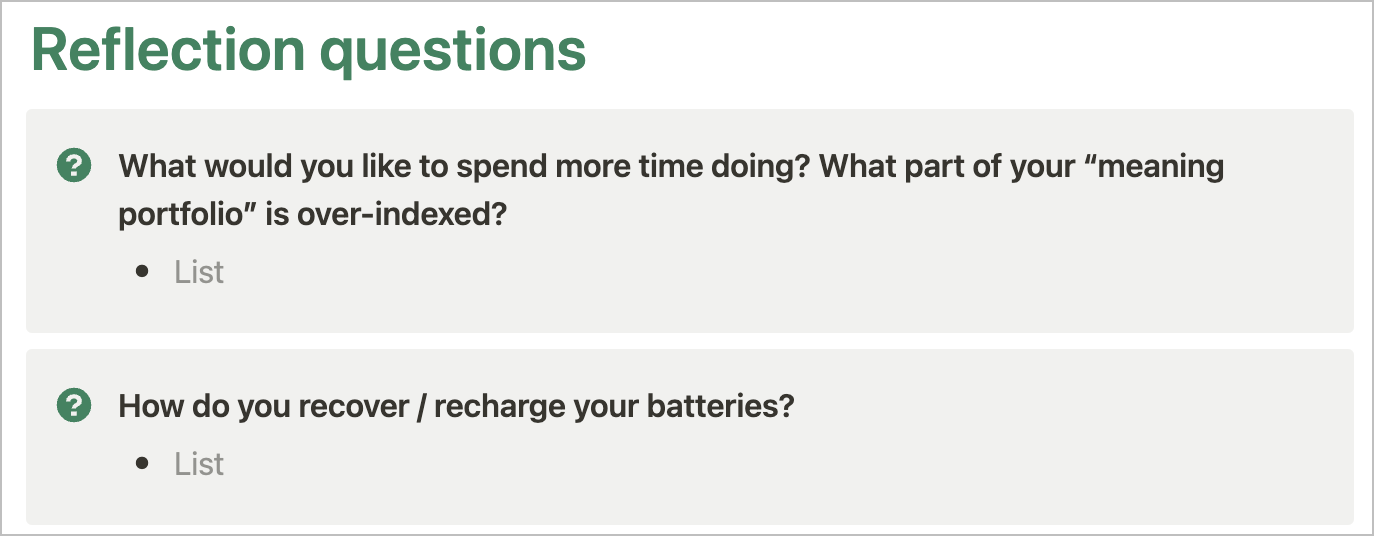
All of our workshops, whether they are training a Notion-specific topic (eg. Knowledge Management in Notion) or not (eg. Capacity Planning) include a Notion template for folks to duplicate. The template often includes questions that you can respond to by typing directly on to the page, and sometimes includes simple databases to help you organize information, apply concepts, and plan your next steps.
Record YouTube video, draft blog post, and promo emails
In an ideal world, all of our workshops have a related YouTube video and blog post. These would be focused on topics related to the workshop-itself, or on material that provides helpful background information to what we are intending to share live.
In terms of emails, we are usually writing each email from our marketing plan a week ahead of when we are planning to publish it. Many folks probably batch write this kind of content and pre-schedule it all. But, we like the flexibility of weaving in real-life, relevant stories and helpful information, that are happening in real-time. We never like to feel “sales-y”.
Go live with landing page and start teasing on social
This is when we take the ThriveCart product live, make sure our ConvertKit sequence is published, and our Zapier automation is ready to go! Then we can start teasing the workshop out on social media and have a landing page to send folks to.
4 weeks before
Keep moving workshop material and promotional content forward
- Continue working on the workshop slides in Canva and the Notion template.
- Continue writing the remaining promotional emails. Once registration is open and we start marketing the workshop via email, we make sure to exclude anyone who has already registered for the workshop from receiving any further promotional emails.
- Publish the YouTube video and blog post and share across social channels and to the newsletter lists
- Update the descriptions of our most popular YouTube videos, and our relevant blog posts, to include a CTA sending folks to the workshop landing page
- Send out an email to our Notion Mastery community announcing the workshop and sharing the Luma registration link
- Post an announcement in the Notion Mastery Circle community announcing the workshop

Set up feedback form and email
We use Tally to host our feedback forms and leverage their direct integration with Notion to send all responses to a Notion database.
We keep our feedback forms short and always give folks the option of responding anonymously.
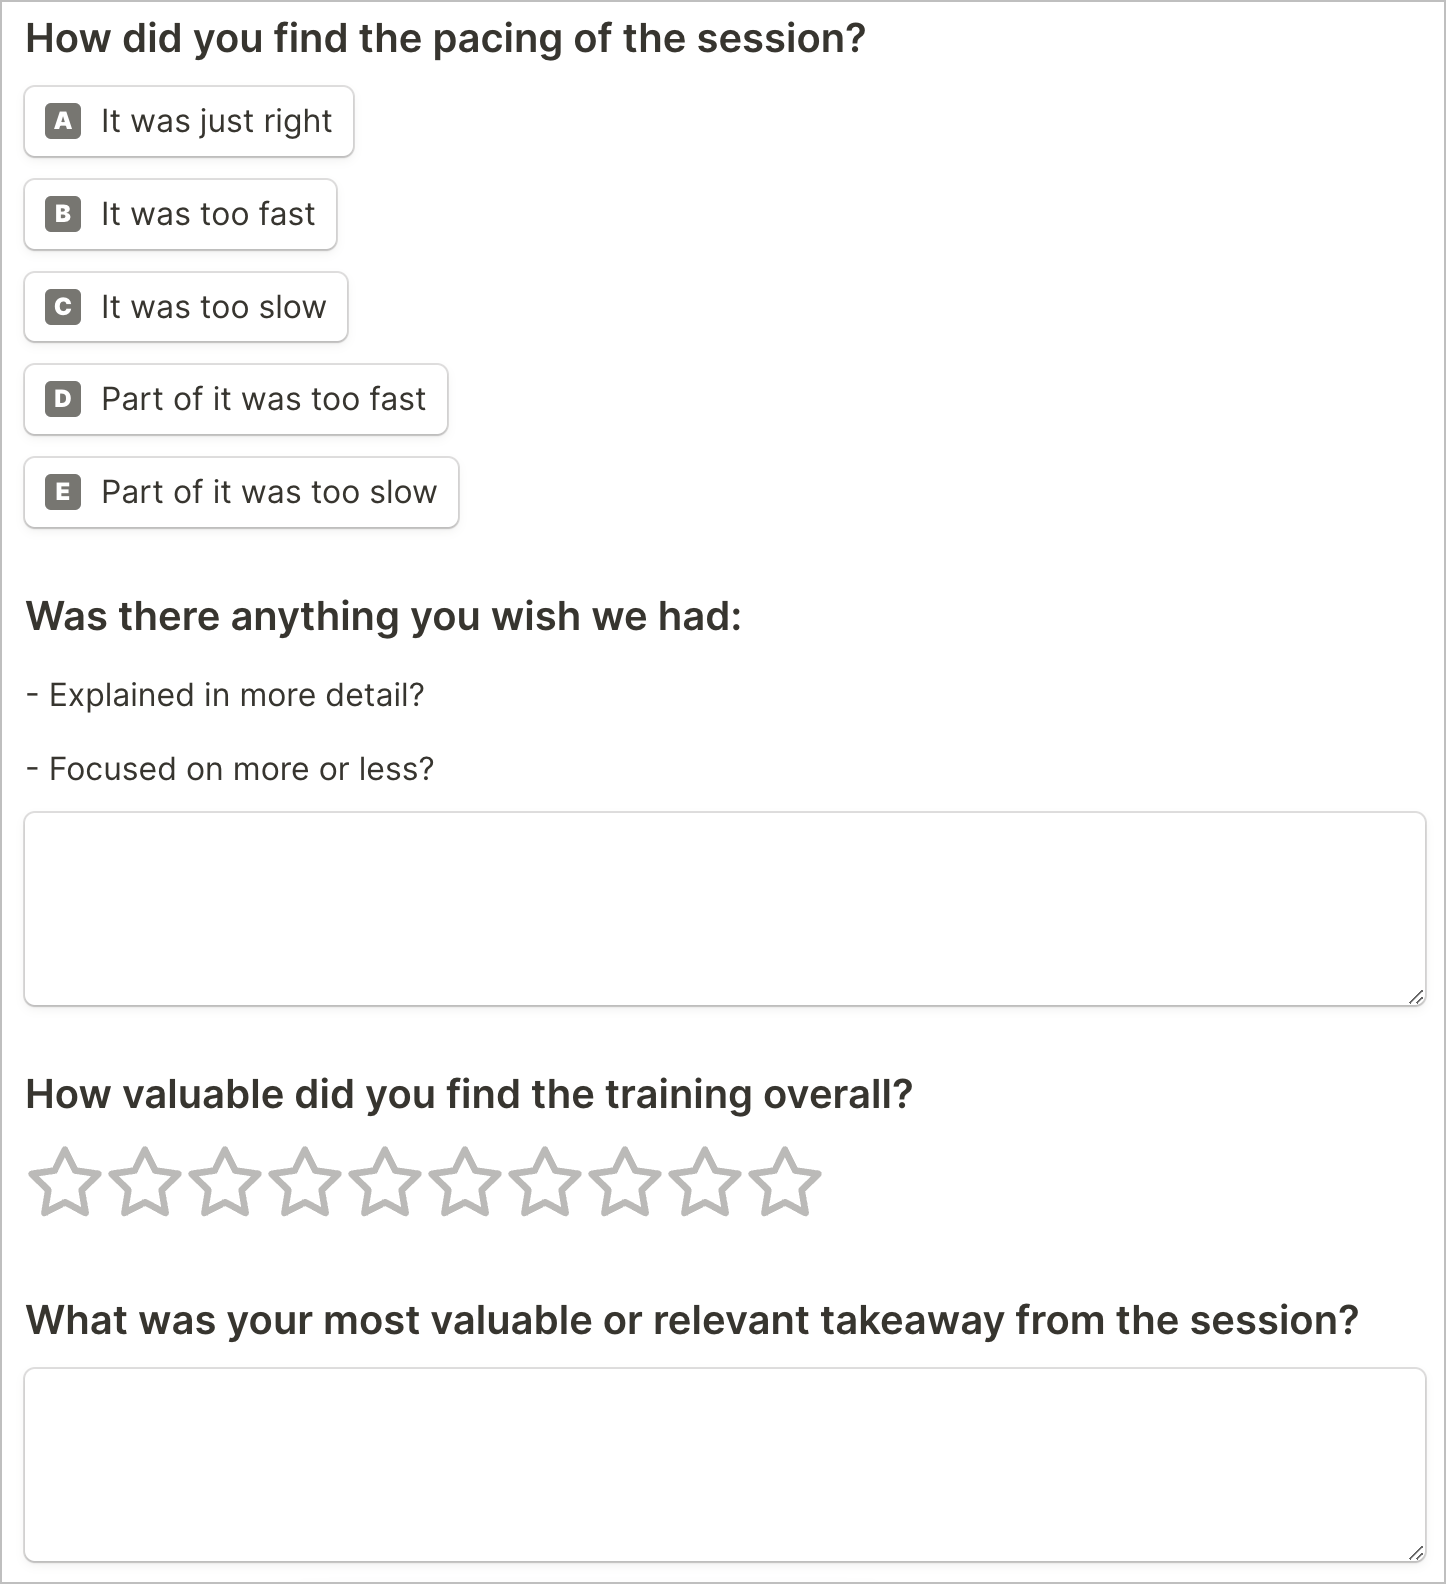
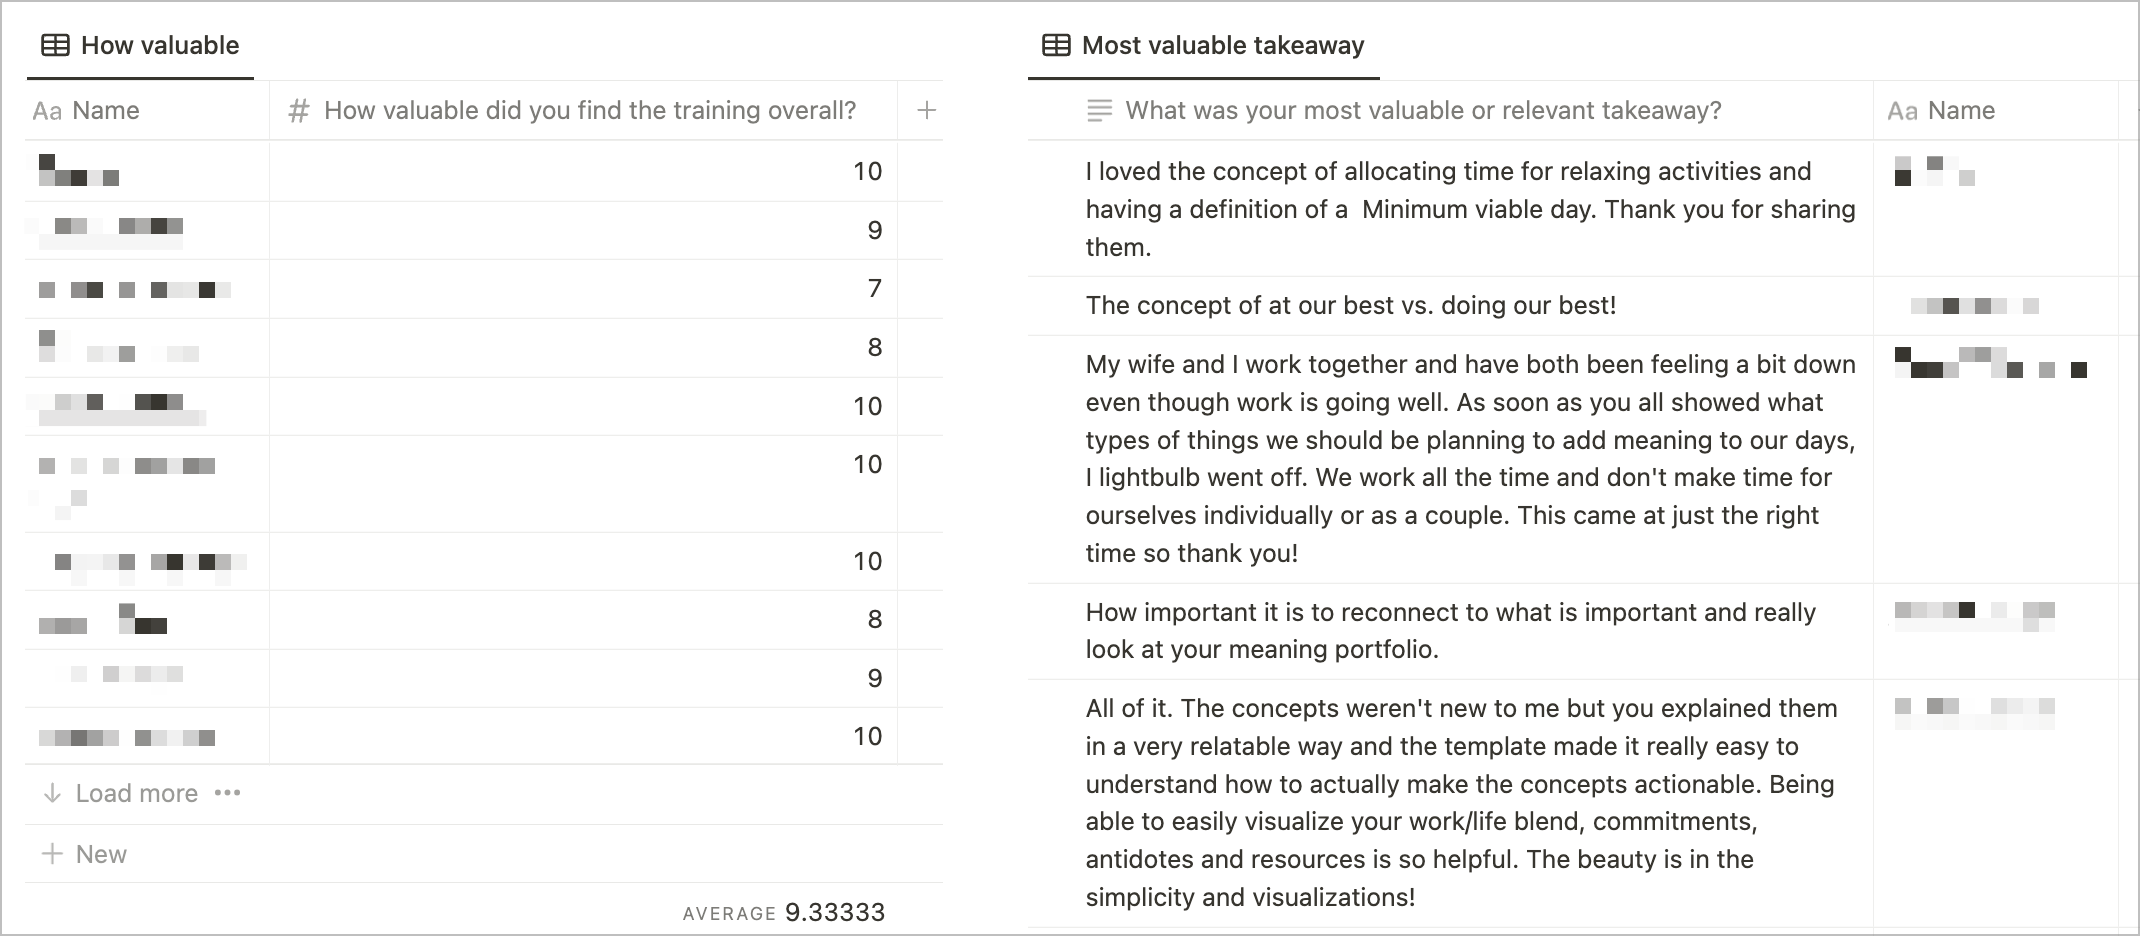
I set up a feedback dashboard in Notion, using linked views of the Notion database that responses are sent to. Bringing the data into Notion enables us to see responses to the same question in an aggregated way, and gives us more flexibility for analyzing the information.
2 weeks before
We continue refining the workshop slides, template and activities, and promoting the workshop via email and social channels.
1 week before
Send prep material to workshop registrants
If there is any reading that workshop attendees should do before hand, any videos they need to watch, or questions to reflect on, they are included in this email.
We also usually provide instructions and a video on how to create a free Notion account (which they need in order to duplicate the workshop template) and instructions for how to duplicate a Notion template (in case they’ve never done it before).
Review the workshop slides and template
At this point the slides and template are usually pretty close to finalized. I like to do a final read through of all the slides and the template to correct any typo’s, missing links, etc.
Do a live run-through of the workshop
Our team gets together to go through the workshop live. We test out the tech we are planning to use, run through the slides, get a sense of the pacing (and our timing), practice anything we are planning to demo, and make any necessary tweaks.
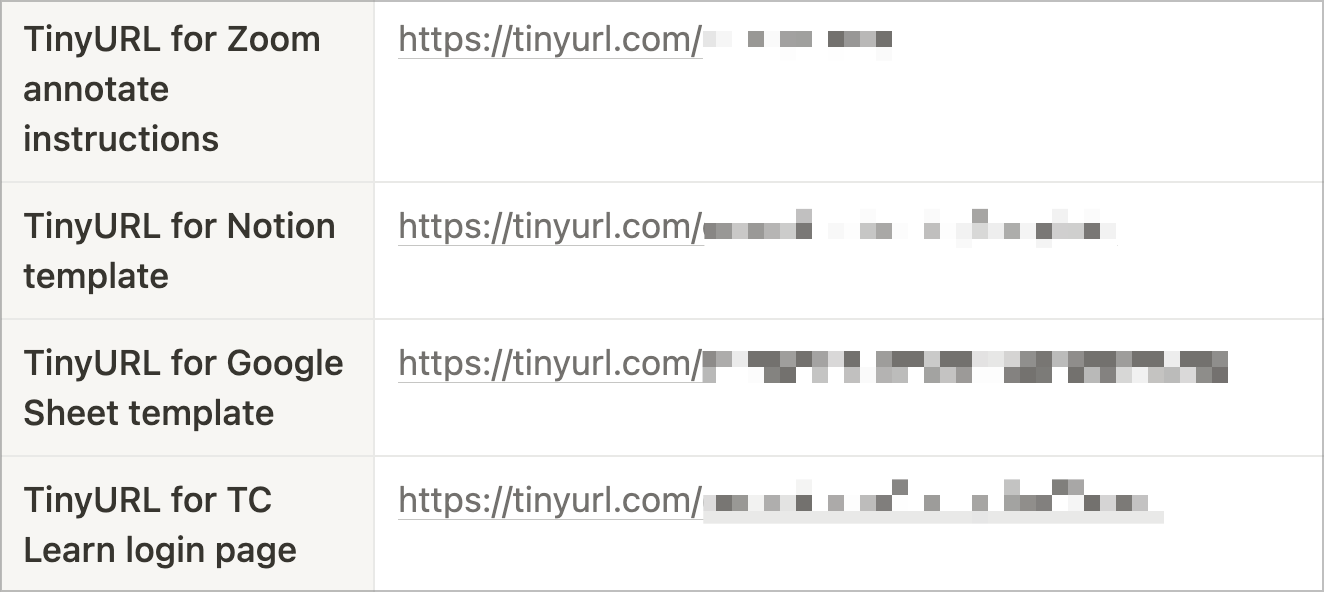
During the run-through, I like to gather any links we will be sharing live and turn them into Tiny URL’s which I then add to a table on our workshop project page for easy access during the live event.
1 day before
Send final promo email
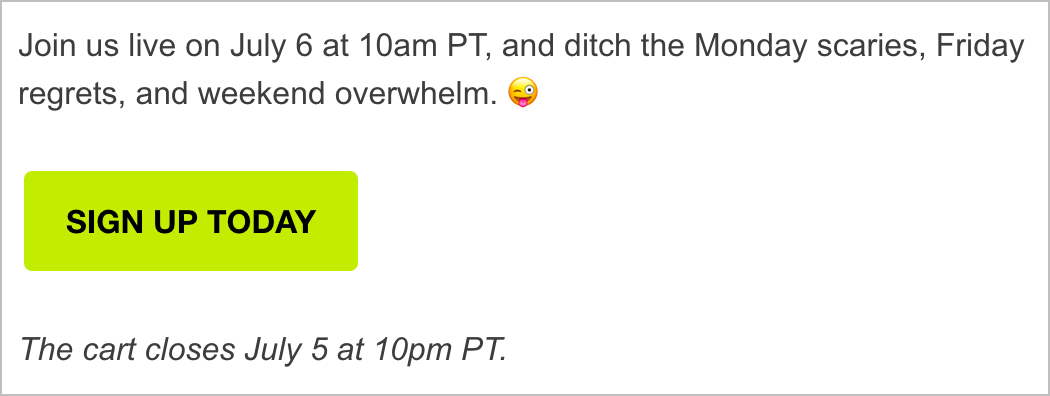
We send out a “last call” email to our newsletter list the morning of the day before the live event. This is usually short and to the point, briefly summarizing what we are offering, why it will be great, and what time the cart is closing. We often include a couple testimonials here, too!
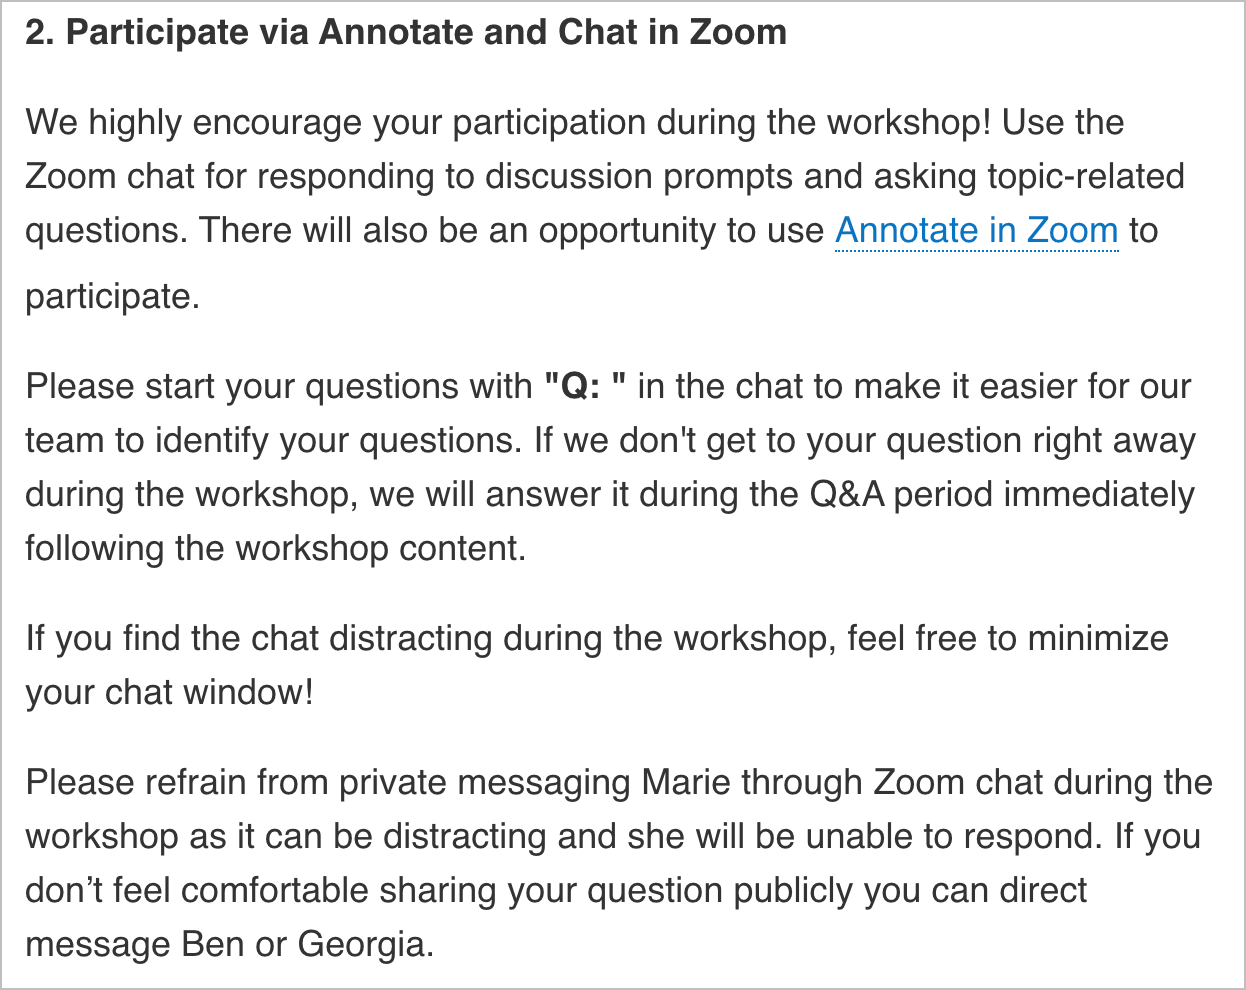
Send email with information about participating in the live call
We do our best to provide lots of opportunities to participate on our live calls. When the group sizes start to get to 100+ we find it super helpful to provide people with some guidance before hand.
The Zoom chat is often a super busy place during our workshops, so we ask that folks preface their questions with Q: to make it easier for our team to spot questions in the chat.
If our workshop incorporates opportunities for folks to participate via Annotation, we provide instructions for how to use Zoom annotation ahead of time to give them an opportunity to check it out in case they have ever used it before.
We also find it helpful to provide reminders about who folks can direct message to receive support, so that they are addressing someone who will be available to help them in real-time to get unstuck.
This email also includes a few important reminders:
- To set up a free Notion account so they can duplicate the template
- Where to find the template
- Where and when the workshop recording will be available (you can never mention this information enough 😉)
Close the cart and update the landing page
The evening before the live workshop, we close the cart. This gives everyone joining us an opportunity to complete the important preparatory steps (eg. creating a Notion account) before they join us live! When the cart closes, we update the landing page so that rather than linking to ThriveCart where the workshop can be purchased, folks are invited to express their interest in hearing from us the next time we plan to run this event.
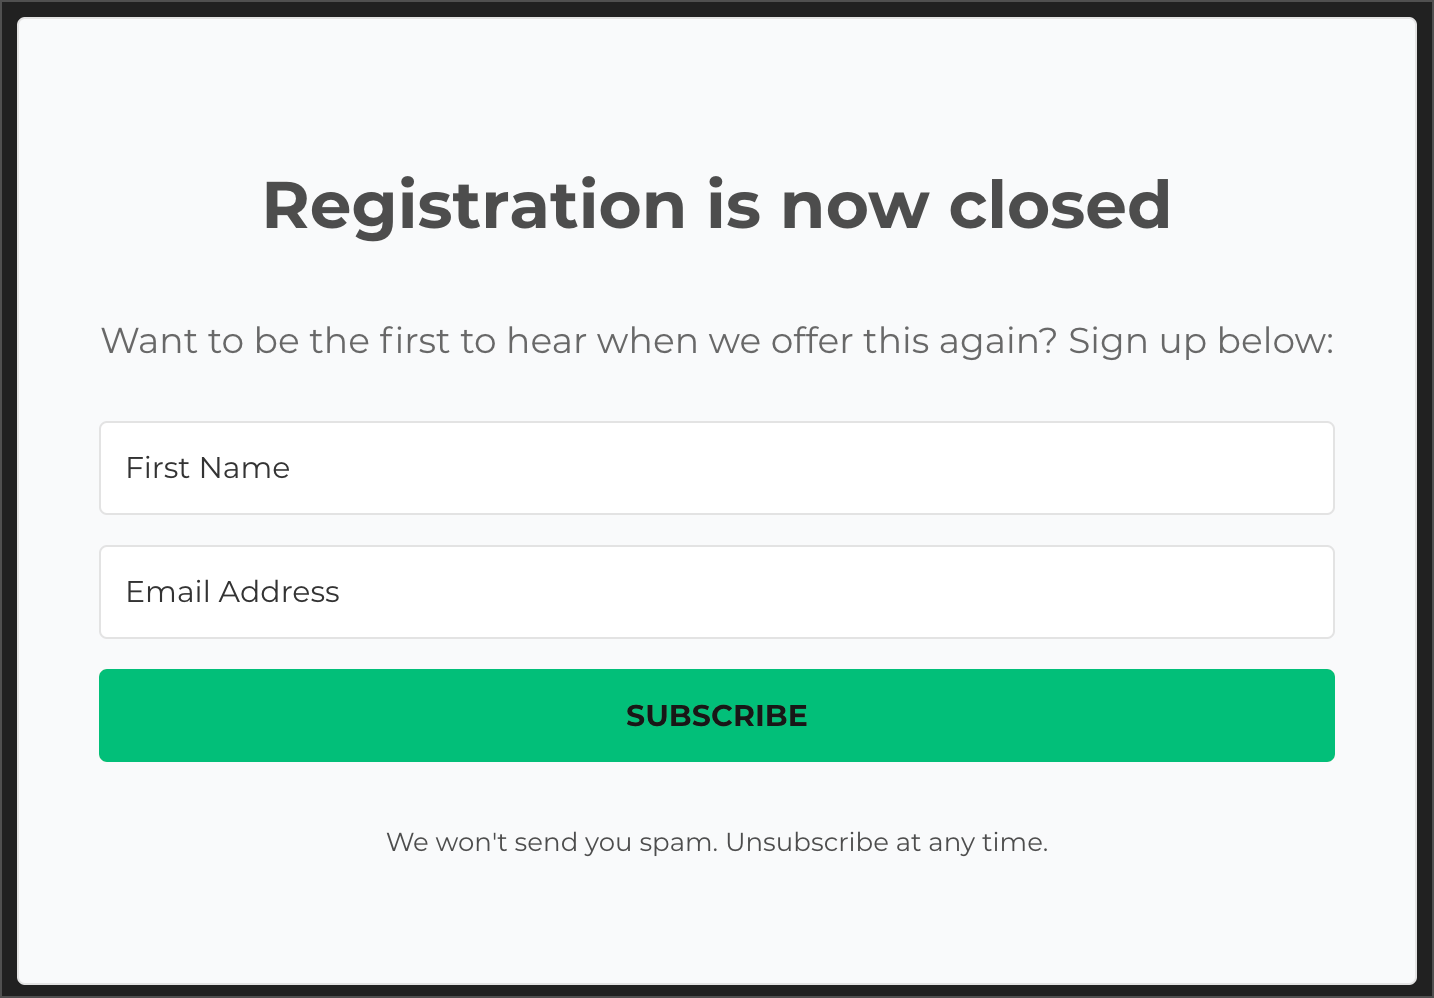
We set up a related tag (eg. Interested - Capacity Planning) that is applied to anyone who completes the form. Then, when we are ready to offer this again in the future, we can easily identify and contact the most interested members of our audience.
Day of workshop
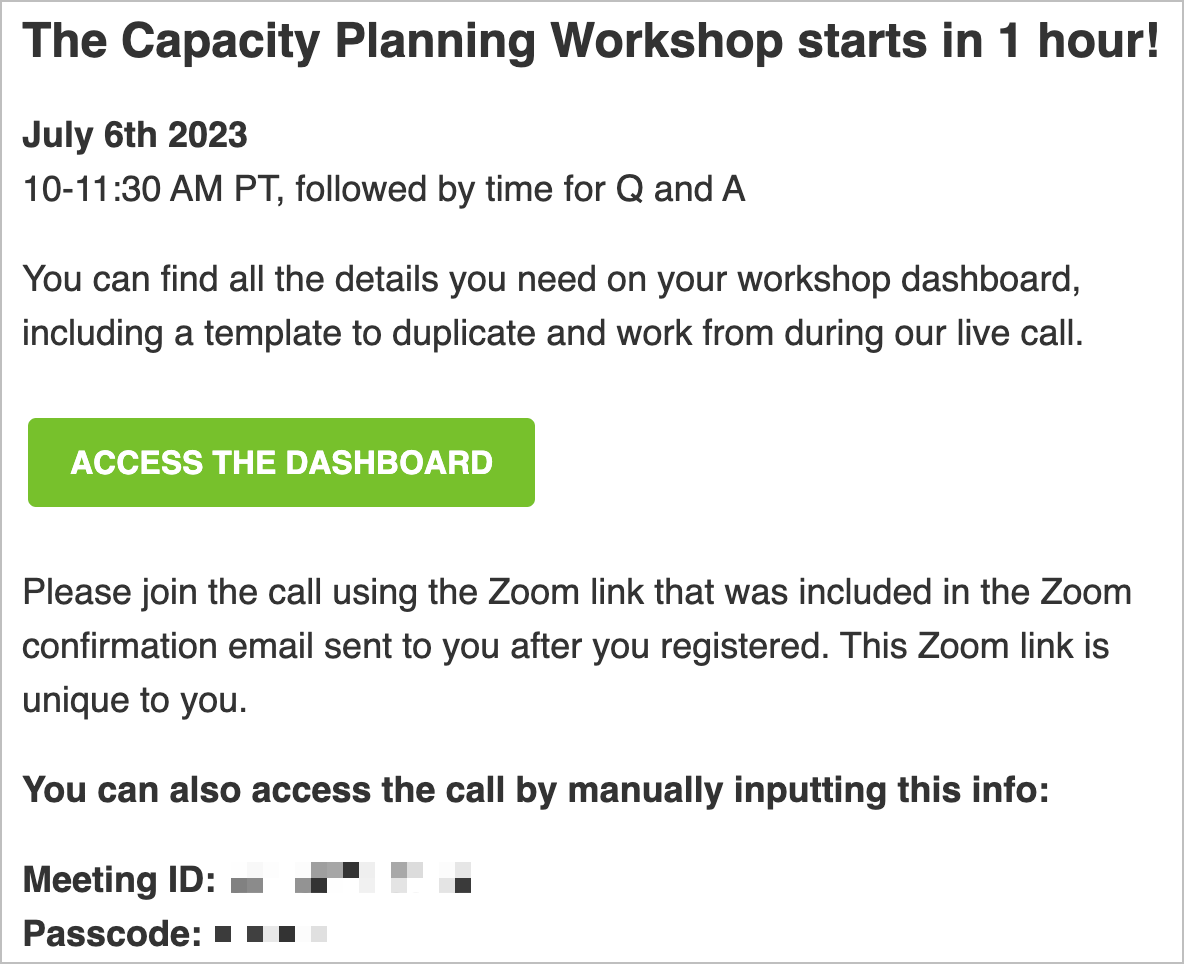
Send 1-hour-to-go email
This email goes out to our paid registrants (via ConvertKit) and Notion Mastery members receive a similar email (via Luma). It acts as a gentle reminder that the event is coming up soon (in case anyone forgot to add it to their calendar!) and provides quick access to the Zoom link and dashboard where they can find all their workshop resources.
Deliver the workshop
This is what all the hard work has been leading up to! The actual delivery of the workshop. 🥳
Our team logs on half an hour early to run our last tech check’s and get ourselves settled and ready to go.
At the top of the hour we disable the Zoom waiting room and kick off the event. Often we will have a prompt showing on screen inviting folks to share where they’re joining from and what they’re looking forward to, while we allow a couple minutes for everyone to join the call. Then we dive into the workshop content and activities, and finish with time for Q and A.
We like to make sure to spotlight our facilitators in Zoom so that attendees can easily see them as they deliver the workshop!
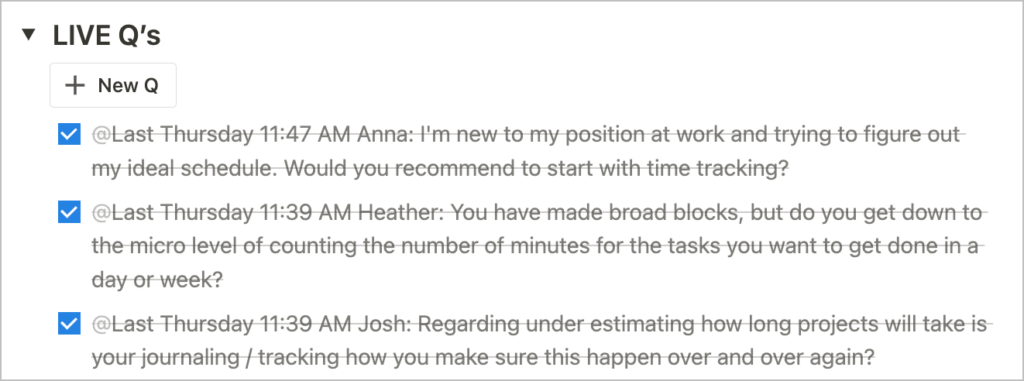
During the live call, we have 1 or 2 people from our team monitoring the chat. Any questions that aren’t answered in real-time are tracked on a Notion page. When we reach the Q and A period, we can then go through those questions and make sure they get addressed, checking them off as we go.
The last thing we share before wrapping up the live call is the feedback form! We often have a better response rate when a link to the form is shared in the Zoom chat.
After the workshop
Share the workshop recording
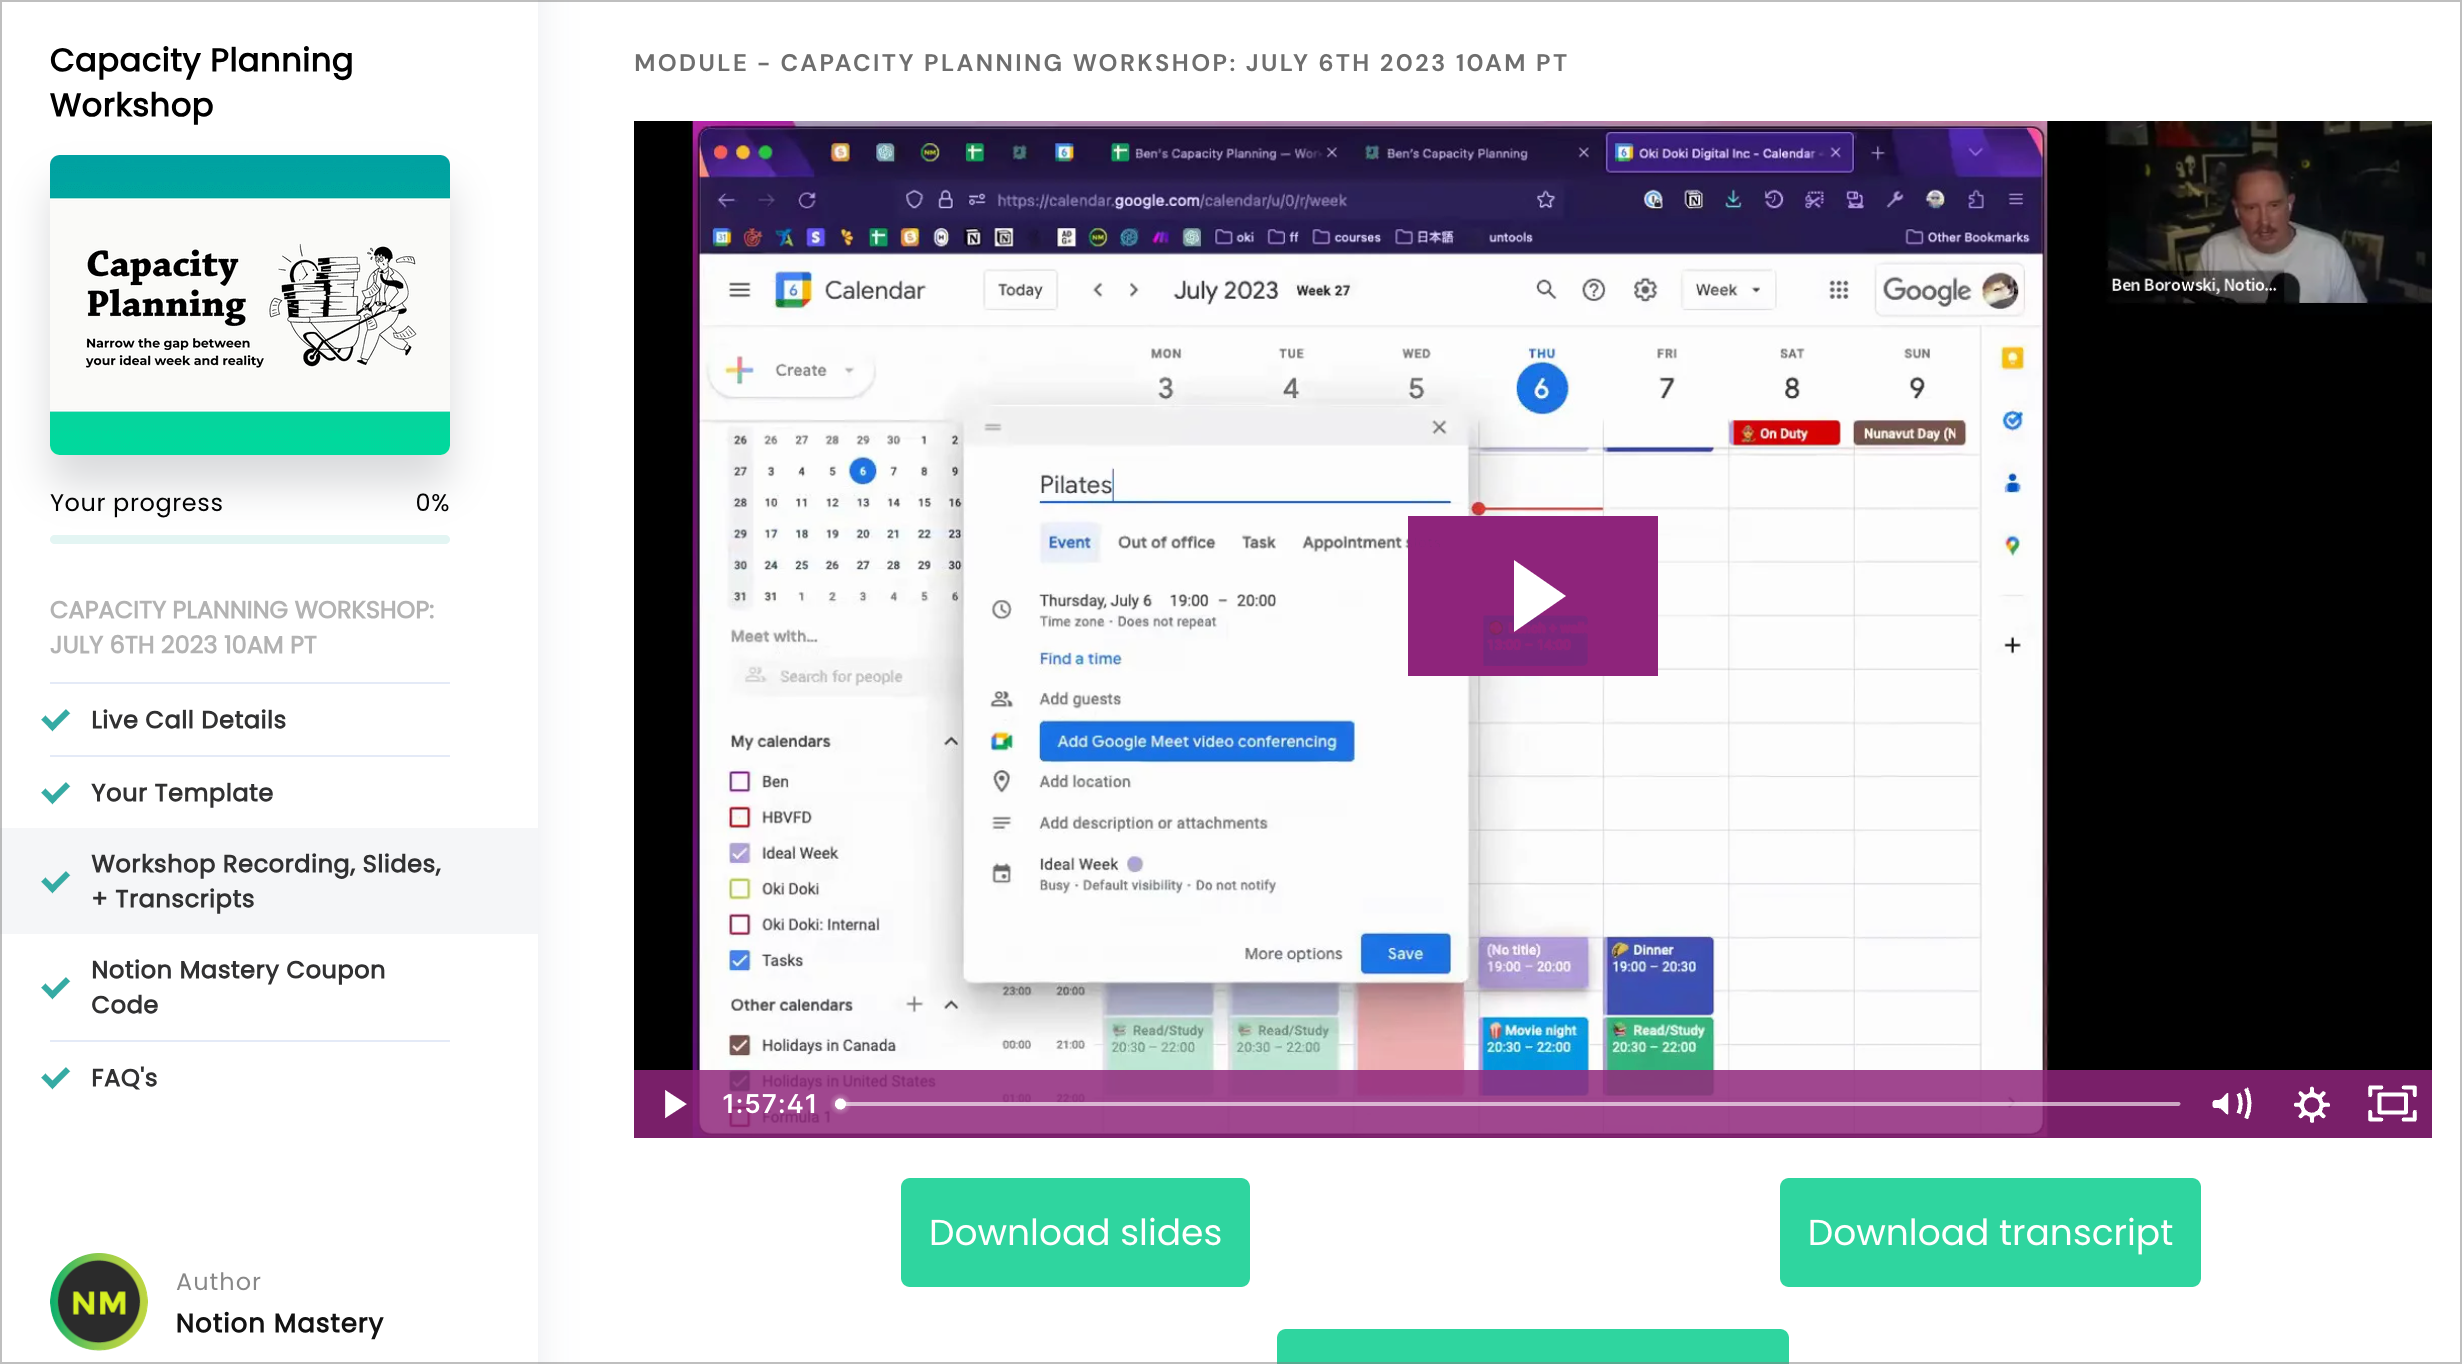
After downloading the recording from Zoom (we use the Shared screen with gallery view file) we add it to Descript and make any edits that we need, before exporting it to Wistia.
The recording hosted on Wistia is then shared in ThriveCart Learn (for our paid registrants) and on the event page in our NM Notion calendar (for NM members). We also always share the recording transcript as well as the Zoom chat transcript. There’s often tons of good stuff happening in the chat while we are live, and sharing the chat transcript afterwards makes sure everyone can benefit from the resources and advice being shared, without getting distracted by it in real-time.
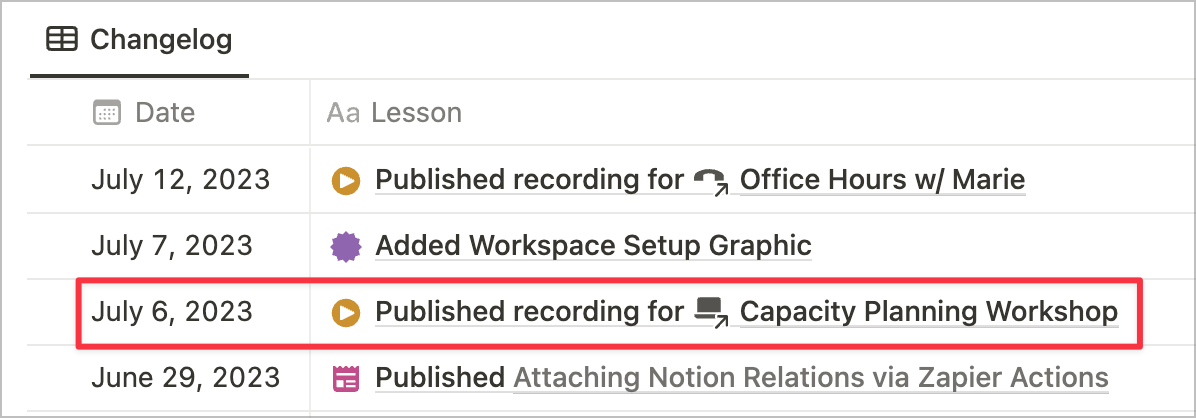
When the recording and transcripts are loaded up and ready to go, we send out one final email to paid registrants to notify them that the workshop recording is available and encourage them to complete the feedback form. The NM members are notified through the changelog in our course.
Review the workshop feedback
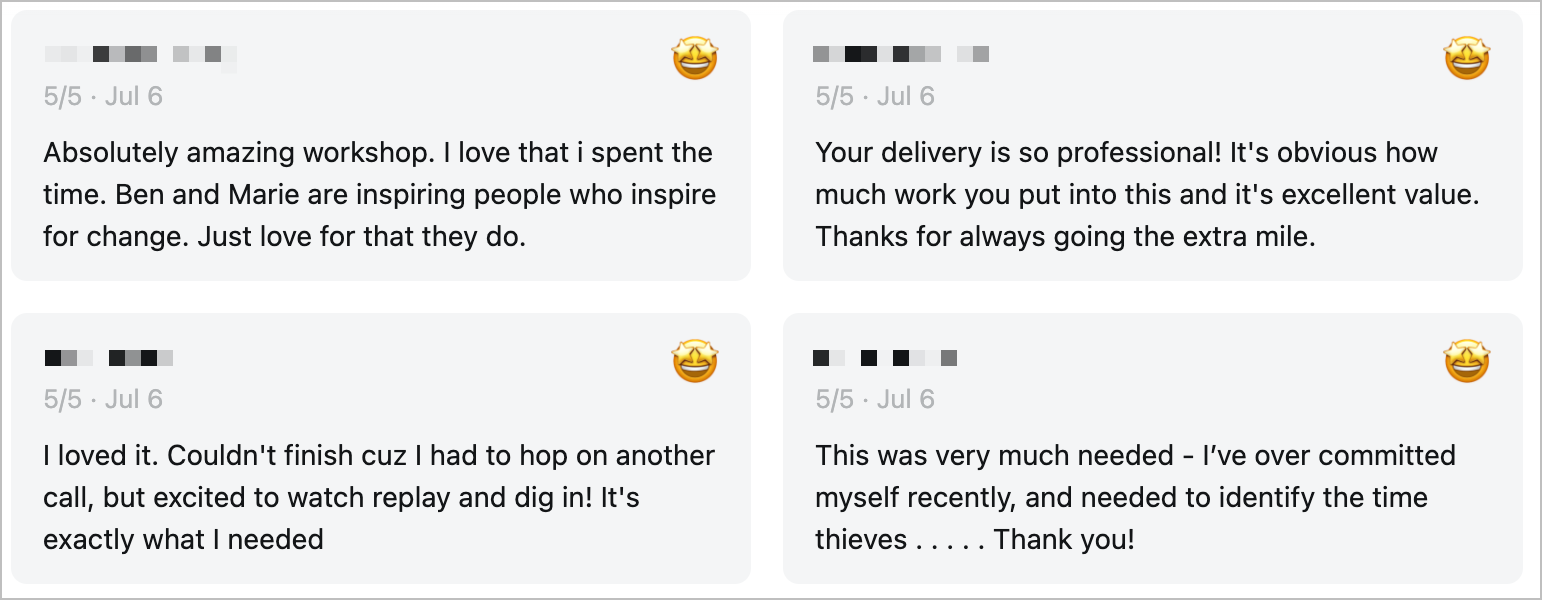
A week or so after the live event we review the feedback that has come in. This includes responses to the Tally feedback form, ratings and comments submitted via Luma, as well as any kind words that were shared in the Zoom chat or via email after the live call.
We take time to reflect on:
- What we learned through the process
- What worked well
- What could be improved
- Any thank you’s or acknowledgements
Doing this reflection and making notes of our own ideas for improvement, as well as those shared via the feedback forms, helps us continuously improve what we are offering! It’s also a nice pause to celebrate the workshop completion, the effort we put in, and the successes along the way.
Make the workshop available as an evergreen product
We don’t always do this final step, but occasionally we will take a workshop recording and make it available as an evergreen product. The transition from a live set up to the evergreen set up is pretty minimal.
- Duplicate the ConvertKit welcome email and tweak it so that it is free of date/time references and Zoom call links (we duplicate rather than edit so that we can use the original live welcome sequence again if we decide to run the workshop live again in future!)
- Add a new tag (eg.
Registered - Capacity Planning - Evergreen) and a new ConvertKit rule so that when the tag is applied the new evergreen welcome email is sent - Update the ThriveCart Learn course to remove the Zoom call info and any references to a specific date or time
- Update the ThriveCart product cart page to remove any references to a specific date or time
- Update the ThriveCart product behaviour rules to apply the new evergreen tag when a purchase is made
- Update our WordPress landing page to remove any references to the Zoom format, date or time, and to once again link to the ThriveCart product rather than the ConvertKit interest form
Once those actions are complete, the workshop is now ready to be sold as an evergreen offering that folks can purchase, watch, and benefit from at any time.
This was a dense post! If you made it anywhere near this far, I hope you found some helpful nuggets in this content. Please feel free to reach out to me on Twitter if you have any questions (or any suggestions for how we can continue to refine our process)! Workshop and course ops are some of my favourite topics to jam on. In the meantime, happy workshopping!
 Notion tips in your inbox