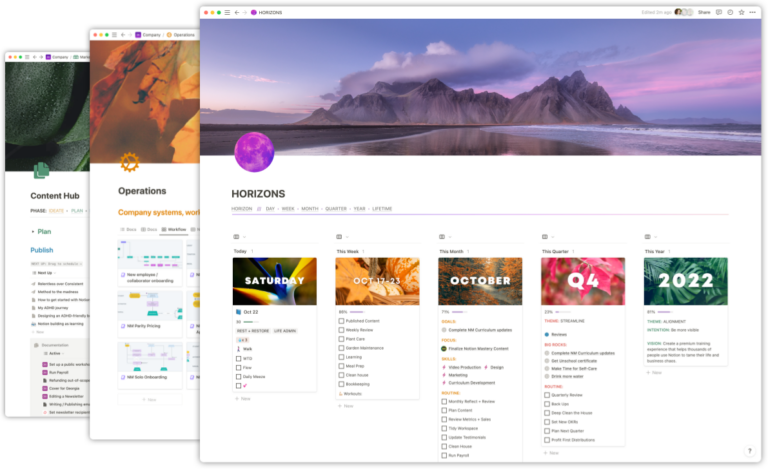
Over the last month I’ve been building out a new onboarding system for Notion Mastery as well as restructuring our Notion Workspace to accommodate additional courses like our new Formula Fundamentals course.
The Challenge
The challenge here was we wanted to start offering smaller standalone access to programs and courses that were previously only available as part of the Notion Mastery program. Given that all of our Teamspaces in the Workspace were “Default” teamspaces, this meant anyone we added to the, for example, “Formula Fundamentals” Teamspace would get access to the entire “Notion Mastery” Workspace and all the Teamspaces under the Workspace.
We needed to make each Teamspace in the Workspace to be separate permissions-wise. In general, this is an excellent practice in Notion: give access to resources (pages, databases) via Groups rather than by individual Members.
Even if you must give solo access to a Member in a unique way, it’s often advantageous to create a Group for that solitary user. It makes managing access to workflows and operational segments much more smooth and allows you to make permissions and access changes at scale more fluidly.
In many scenarios, in fact, it’s good to not use Default Teamspaces at all, unless they are “introductory” Teamspaces (for example, our “Welcome” Teamspace). This is because any Member you add to your space will automatically be added to Default Teamspaces, even if they are a temporary contractor! This is often undesirable.
Teamspace Permissions
There are four access levels in Notion Teamspaces: Default, Open, Closed, and Private.
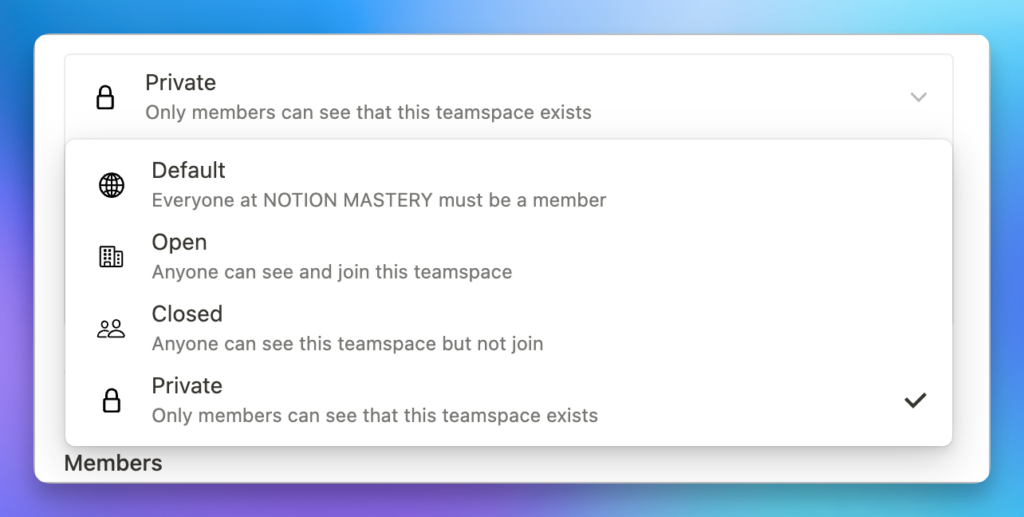
- Default: Every Member in the Workspace must be a Member
- Open: Any Member can join, but they are not a Member by default
- Closed: Members must be invited to join, but they can be aware of its existence and discover the names of top-level Pages in the Teamspace
- Private: These Teamspaces are completely hidden to Members and, like Closed Teamspaces, they must be invited to join
I decided the best way to continue to utilize a single Workspace, yet segment our students into different levels of access I would:
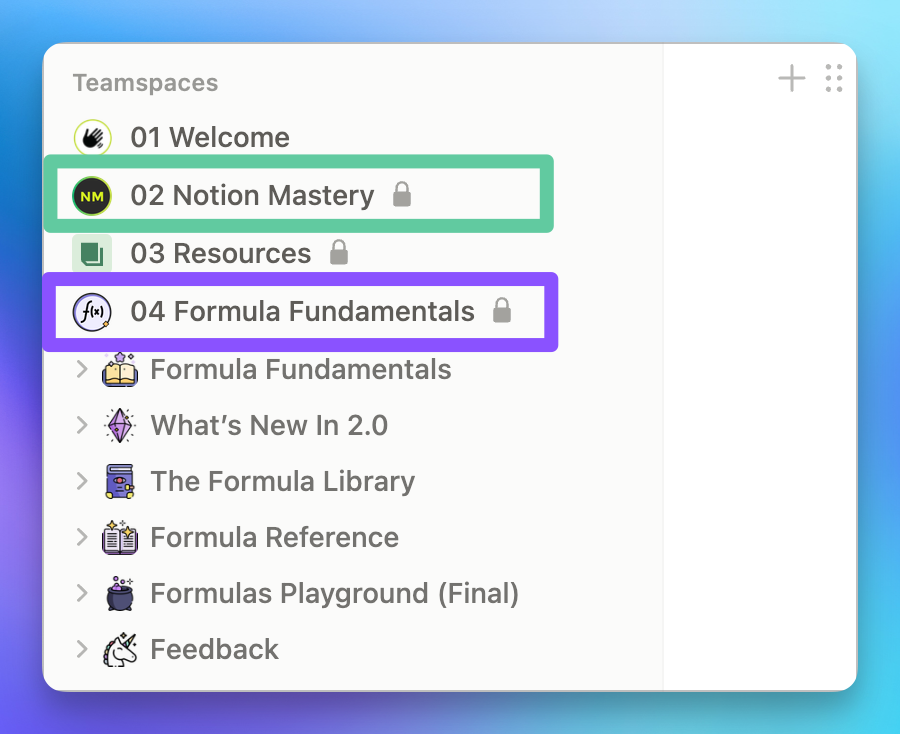
- Update the permissions of all Teamspaces (except for the “Welcome” Teamspace) to Private
- Grant access to Teamspaces via Groups instead of by Member (which Default teamspaces technically do)
This meant disabling the invite links in the space and onboarding new members via Notion’s SCIM API instead.
What follows is documentation of the new systems and how I used Notion’s API and specifically the SCIM API to automate invites. I think this system is pretty unique in the Notion world, and I’m considering building software to allow others to do the same without the headache of APIs, manual coding, and automation. Feel free to hit me up on Twitter if a DFY system such as this would be useful to your business.
Creating the Groups
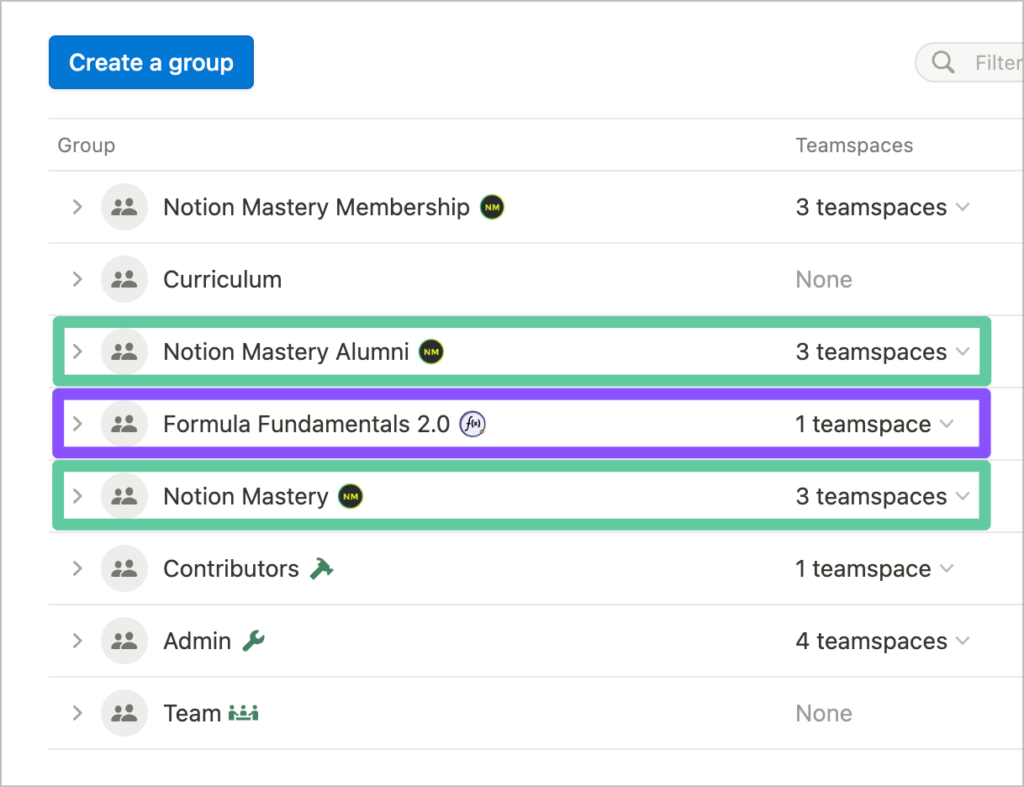
First up, I created three new Groups in the Workspace:
- Notion Mastery: Students in their first year of access to the program (our program is priced to give access to the course as well as live events for a period of 12 months)
- Notion Mastery Alumni: Students who were early-access customers to Notion Mastery and have legacy access
- Formula Fundamentals 2.0: Students who will have access to just our new Formulas course in the Workspace
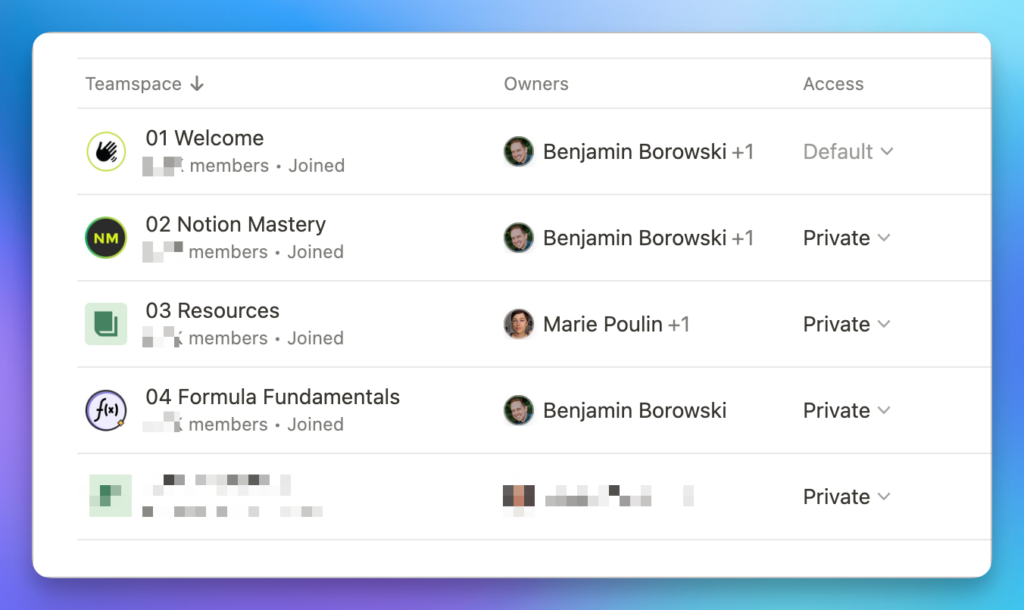
Secondly, I added these Groups as Members of each Teamspace with “Teamspace member” access. Each of the Members of these Teamspaces have “Can view” permissions, so this means they can read the content but not make any changes or share with others.
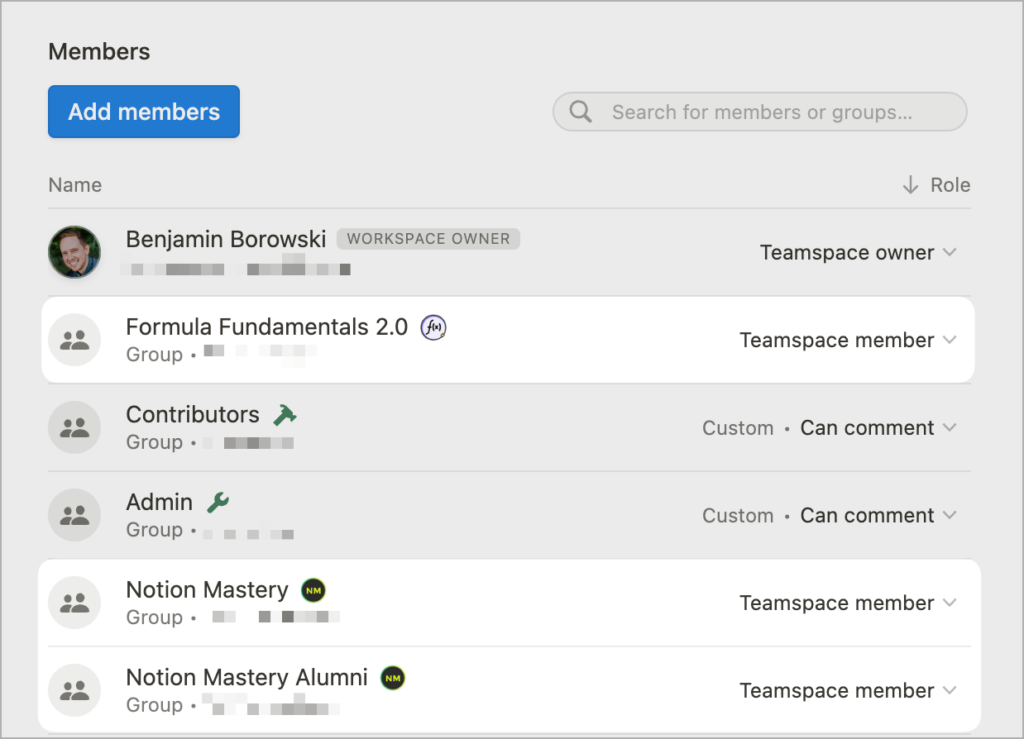
Above you can see the Permissions settings for the “Formula Fundamentals” course which exists in a Teamspace. The permissions rules for this Teamspace mean:
- Anyone added to the “Formula Fundamentals 2.0” Group will be a Teamspace member
- Anyone added to “Notion Mastery” or “Notion Mastery Alumni” will also be Teamspace member
- Absolutely no Members are added individually. We will entirely manage access to this Teamspace and its child pages via these and other Groups
So, for example, if I add a Member to the Workspace, but no Groups, they will see the “Welcome” workspace only. If I add them to the “Formula Fundamentals 2.0” Group, they will see the “Welcome” Teamspace and the “Formula Fundamentals” Teamspace. In contrast, any Members added to the “Notion Mastery” Group will see all those Teamspaces as well as the “Notion Mastery” and “Resources” Teamspaces. If a Member who bought Formula Fundamentals wants to upgrade to Notion Mastery, now all we have to do is add them to the “Notion Mastery” Group and they’ll get immediate access to the “Notion Mastery” Teamspace(s).
But how do we segment Members into these Groups, and how do we integrate this segmentation step into our sales funnel?
Segmenting the Members
To start, I wrote a number of scripts to fetch the existing Members from our Notion Workspace via the SCIM API. Using the Members list, I compared it to our sales data and segmented customers into Groups in Notion. I did this by using Ruby and a Rake task to compare our sales data with our Member data. I then generated JSON files that segmented our customers into the respective groups.
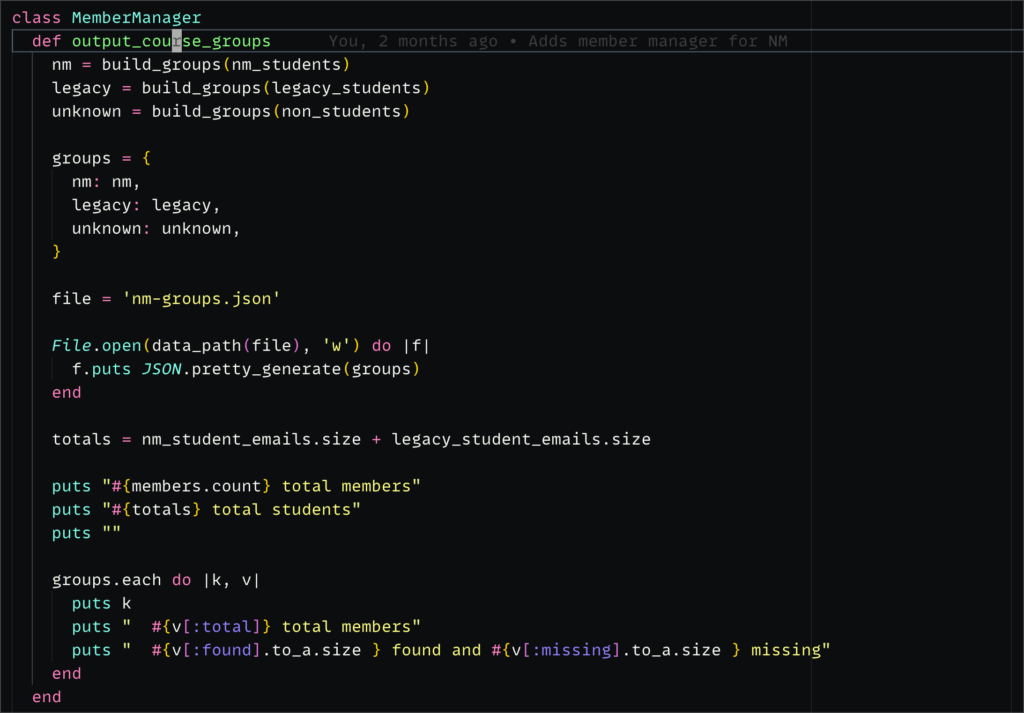
MemberManager class I utilize in the Rake task to generate the JSON files for segmenting our customer groups.Once I had local lists of the Members and which Groups they should be segmented into, I ran some scripts which utilize the SCIM API to add them to the respective Notion Groups. In short, I used the JSON files generated via Ruby and then used the Notion API to loop over those groups and make a request to add them to the Group they belonged to. This script took a few hours to run since we have to throttle requests to Notion’s APIs pretty aggressively.
The end result is that this allows us to deliver different courses since we grant access to Teamspaces via Groups only now.
Replacing Invite Links with SCIM
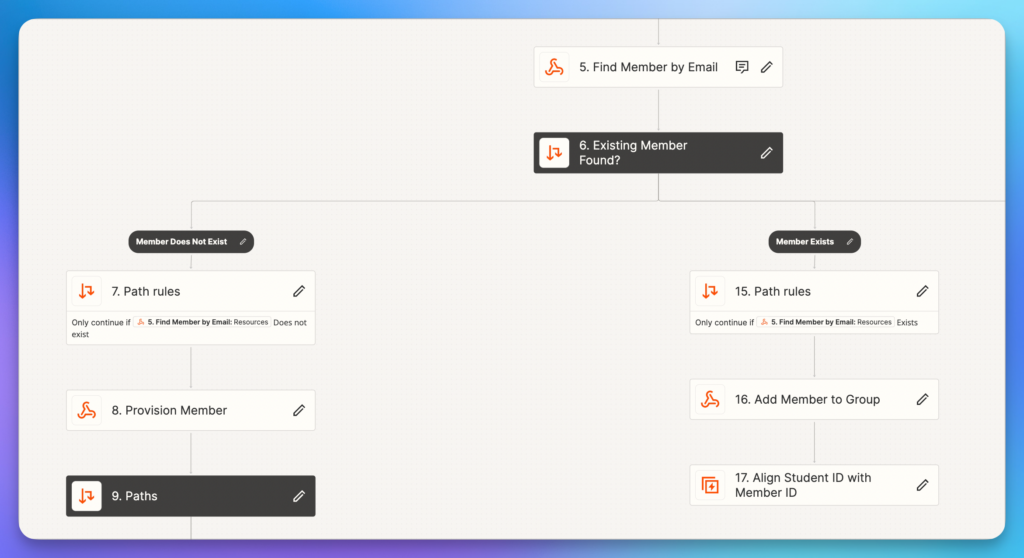
I then modified our onboarding, replacing invite links sent via ConvertKit with a new Zapier Zap which determines first which product the customer bought and:
- Provisions them as a Member in our workspace
- Adds them to Groups based on their purchase
- Captures sales and student data into our company Workspace
- Aligns their Member ID (their canonical Notion Account ID) with their student record (this means taking their Notion Account ID and aligning it with our other company Workspace data where we keep track of who’s purchased our programs)
One of the challenges of not using SAML for SSO in Notion is that you cannot control how users sign in and what their email address on their account is set to. So if a user changes their email address, we lose the record of them making a purchase, so we were losing track over who was a paying customer and who had gotten into the program by virtue of a shared invite link.
This new system allows us to track users by a Notion Account ID so we know who our customers are without needing to know their name or email address.
Moving the Teamspaces to Private
After all our Members were in the correct Groups in Notion, we could move the Teamspaces to Private to activate the Group-based access.
After I changed the first Teamspace from Default to Private, I encountered my first hiccup. One of the Teamspaces retained every single Member of the Workspace as an individual Member of the Teamspace. This meant I had to remove all of the Members from the Teamspace manually. I recruited Marie’s help and this took us literally 5+ hours to accomplish. But accomplish we did!
On one of the other Teamspaces, I moved first from Default to Closed (instead of Private). This move removed all existing Members, so I did the same routine for the other Teamspace.
So thankfully we only had to remove all the Members manually once from a single Teamspace.
Aside: Notion’s engineering team noted that the removal of all the Members is actually not expected behavior. So keeping the Members intact is actually the way it should work. The intended design of this feature is pretty frustrating and put in my feature request to give me the option to remove Members when switching to Private. Would’ve saved us so much time!
The other thing I requested was access to add/remove Members from Teamspaces via the SCIM API (or similar). Now that the manual effort is done, I’ll no longer need this, but add/remove seems to make longical sense here given the SCIM API coverage.
Aligning Notion Account IDs with Sales Data
One of the tricky parts of not using an entirely SAML-based solution here is that Notion users can always change their names and emails on their account. This originally made it challenging to keep up with who was who in our customer/sales databases. In fact, as we enabled the new systems we found a number of suspicious Members in our Workspace that appeared to have abused our invite link to invite others (and sometimes their entire teams).
Disabling the invite link makes this a thing of the past, but we still have this issue where the purchaser used a different email to purchase the product and it might not match the email address on their Notion account.
To remedy this, we ended up adding a final step to the Zapier zap which, after provisioning a Member into the space and adding them to a Group, uses the Notion API to update our Sales/Student databases in Notion with the user’s Member ID in the Notion Mastery Workspace.
This allows us to look up Members by a canonical ID instead of an email, meaning we can know who’s who while allowing folks to change their email and name as much as they desire.
The Final Impact
Segmenting our customers into logical Groups has allowed us to:
- Sell and deliver smaller trainings inside the larger Notion Mastery program
- Automatically align our data after purchases instead of a manual error-prone process in Notion
- Reduce fraudulent access by not exposing a unlimited-use invite link to purchasers
- Keep track of customers after they’ve changed their display names or emails
Need a similar solution for your business? Hit me up at ben@weareokidoki.com. Let’s talk!
 Notion tips in your inbox